Connect to a TiDB Cloud Dedicated Cluster via Azure Private Link
This document describes how to connect to your TiDB Cloud Dedicated cluster via Azure Private Link.
TiDB Cloud supports highly secure and one-way access to the TiDB Cloud service hosted in an Azure virtual network via Azure Private Link, as if the service were in your own virtual network. You can create a private endpoint in your virtual network, and then connect to the TiDB Cloud service via the endpoint with permission.
Powered by Azure Private Link, the endpoint connection is secure and private, and does not expose your data to the public internet. In addition, the endpoint connection supports CIDR overlap and is easier for network management.
The architecture of Azure Private Link is as follows: 1
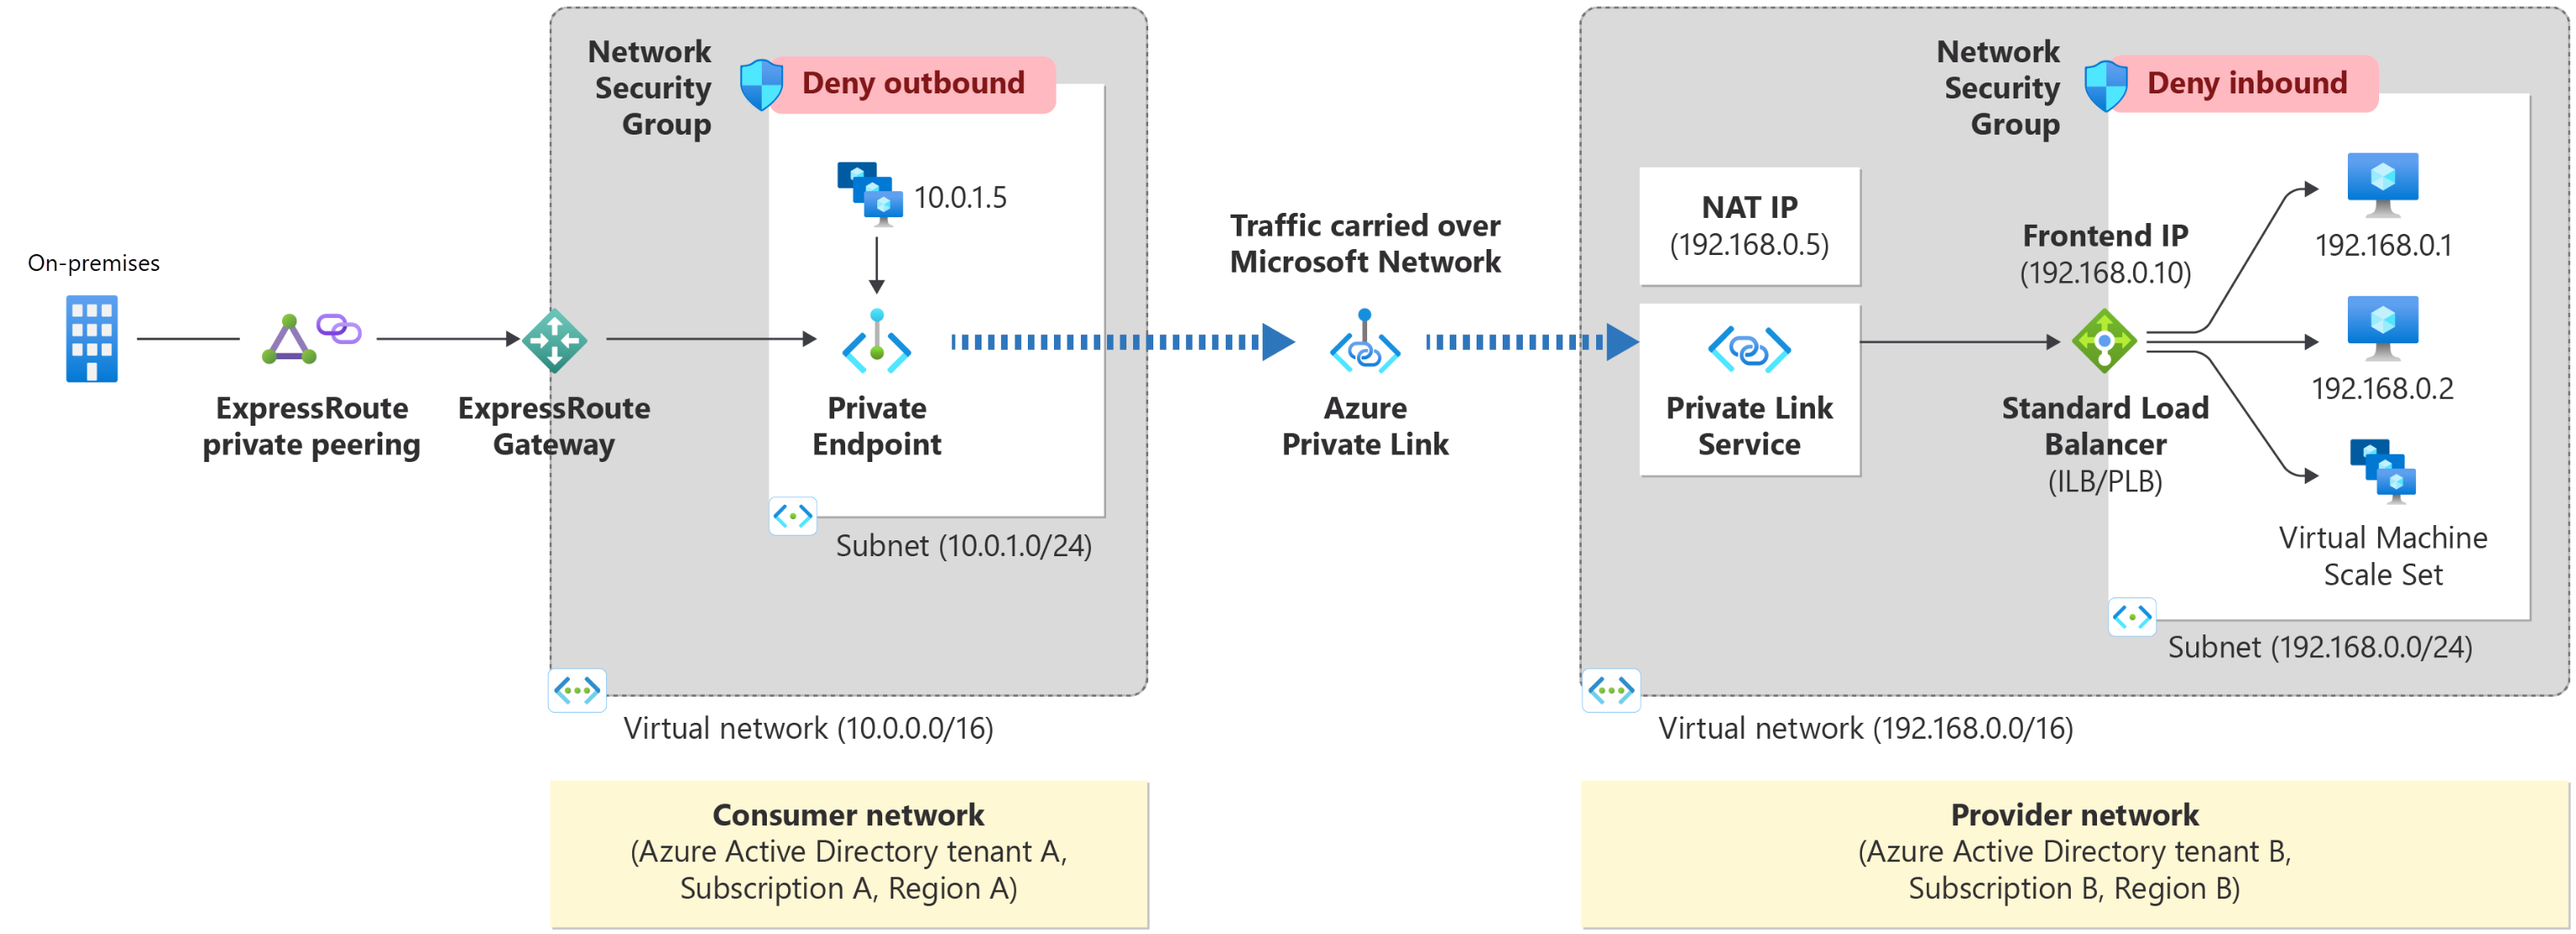
For more detailed definitions of the private endpoint and endpoint service, see the following Azure documents:
Restrictions
- Only the
Organization OwnerandProject Ownerroles can create private endpoints. - The private endpoint and the TiDB cluster to be connected must be located in the same region.
Set up a private endpoint with Azure Private Link
To connect to your TiDB Cloud Dedicated cluster via a private endpoint, complete the following steps:
- Select a TiDB cluster
- Create an Azure private endpoint
- Accept the endpoint
- Connect to your TiDB cluster
If you have multiple clusters, you need to repeat these steps for each cluster that you want to connect to using Azure Private Link.
Step 1. Select a TiDB cluster
- On the My TiDB page, click the name of your target TiDB Cloud Dedicated cluster to go to its overview page.
- Click Connect in the upper-right corner. A connection dialog is displayed.
- In the Connection Type drop-down list, select Private Endpoint, and then click Create Private Endpoint Connection to open the Create Azure Private Endpoint Connection dialog.
Step 2. Create an Azure private endpoint
In the Create Azure Private Endpoint Connection dialog, copy the TiDB Cloud resource ID of the private link service and leave the dialog open for later use.
Create the private endpoint by using either the Azure portal or Azure CLI.
Log in to the Azure portal.
Search for Private endpoints, and then select Private endpoints in the result.
On the Private endpoint page, click + Create.
In the Basics tab, fill in the project and instance information, and then click Next: Resource.
In the Resource tab, choose Connect to an Azure resource by resource ID or alias as the connection method, and paste the copied TiDB Cloud resource ID to the Resource ID or alias field.
Continue clicking Next to go through the remaining configuration tabs and complete the required settings. Then, click Create to create and deploy the private endpoint. It might take a few seconds for Azure to complete the deployment. For more information, see Create a private endpoint in Azure documentation.
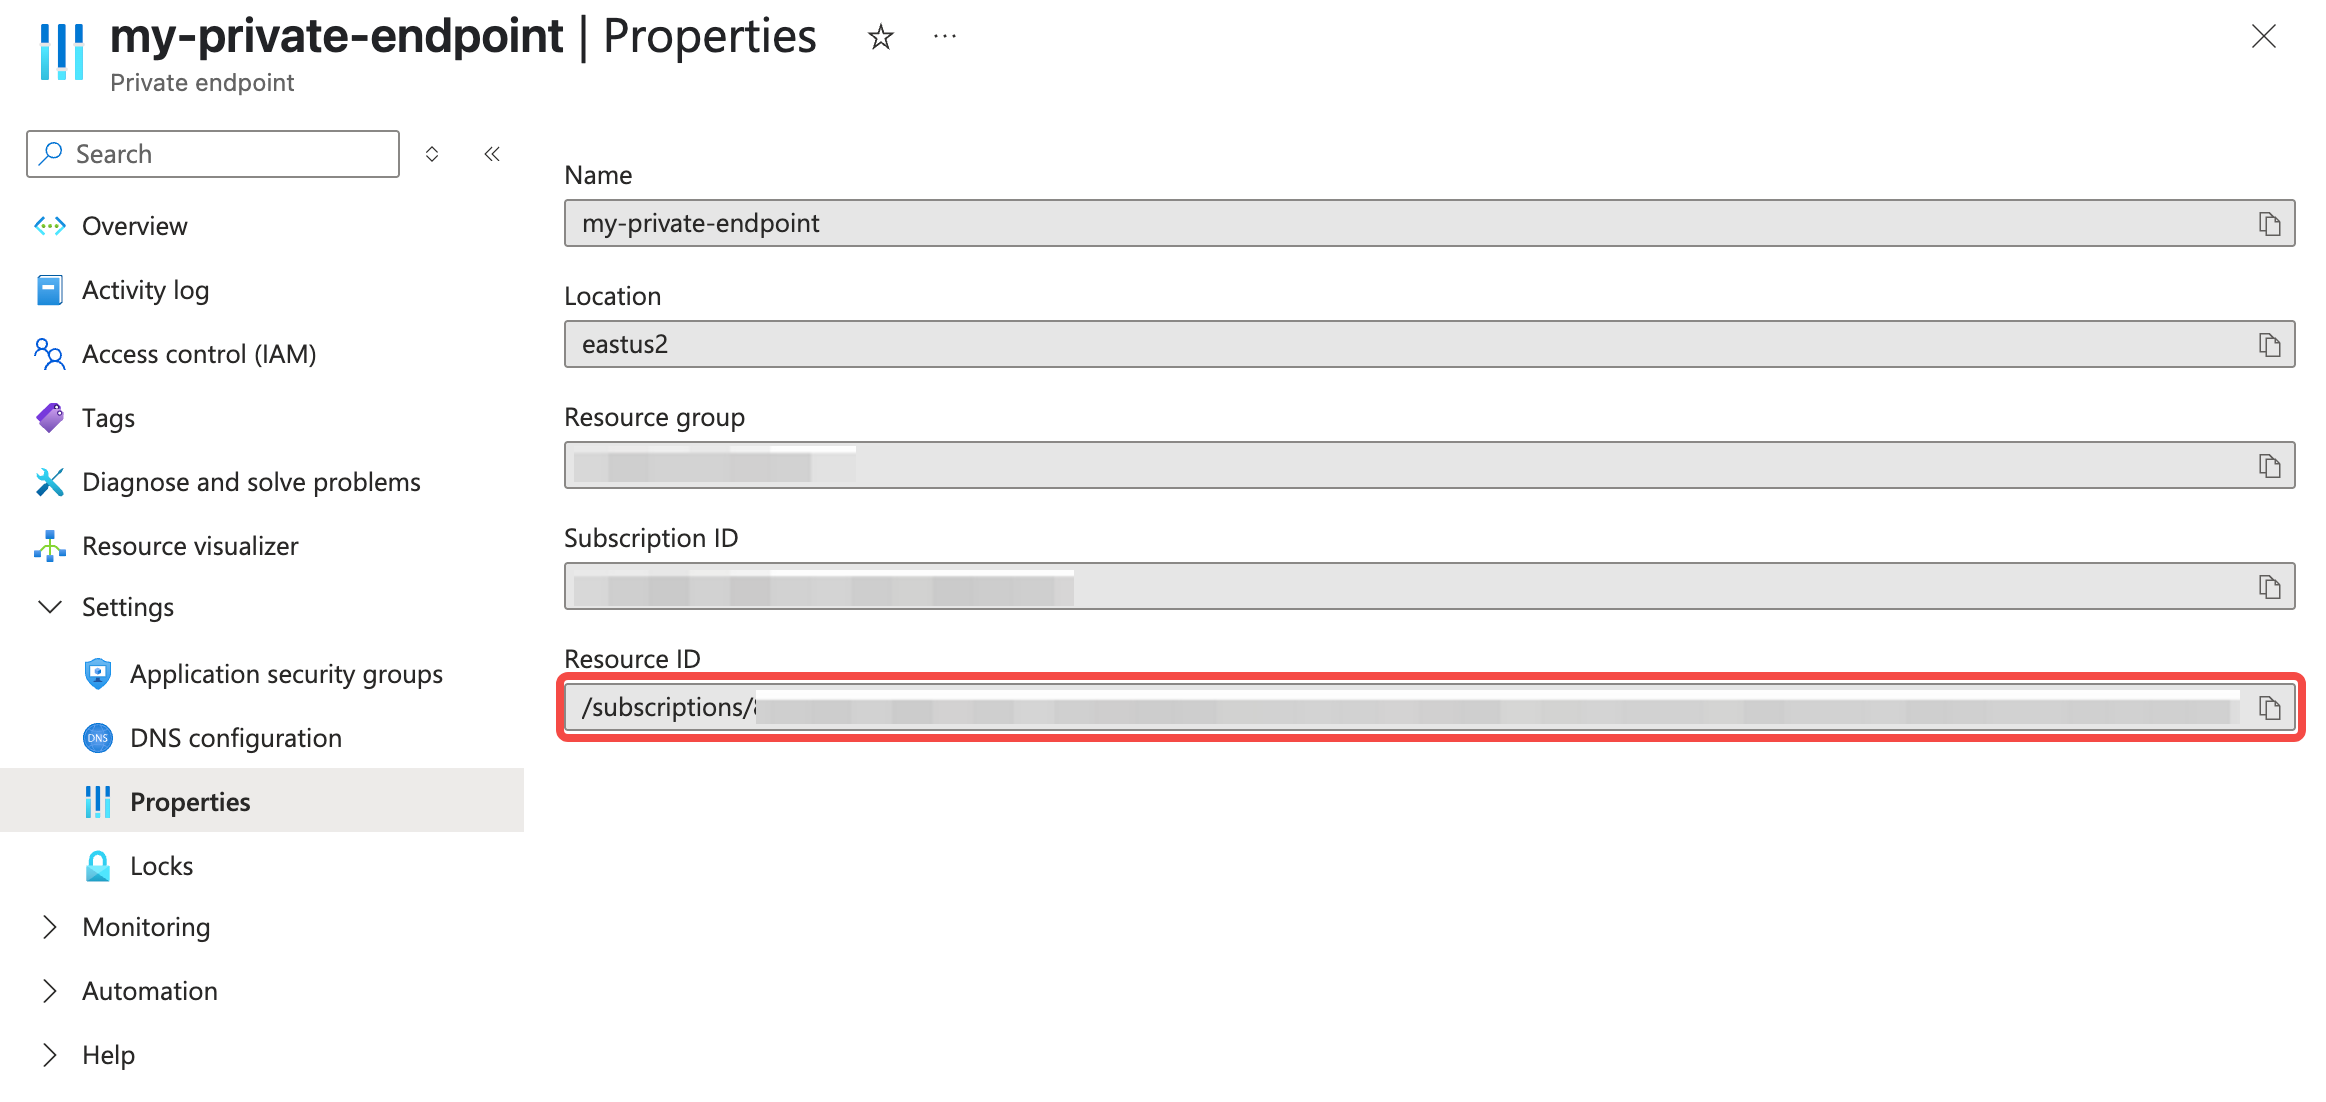
After the private endpoint is created and deployed, click Go to resource, and then do the following:
Click Settings > Properties in the left navigation pane, and copy its Resource ID for later use.
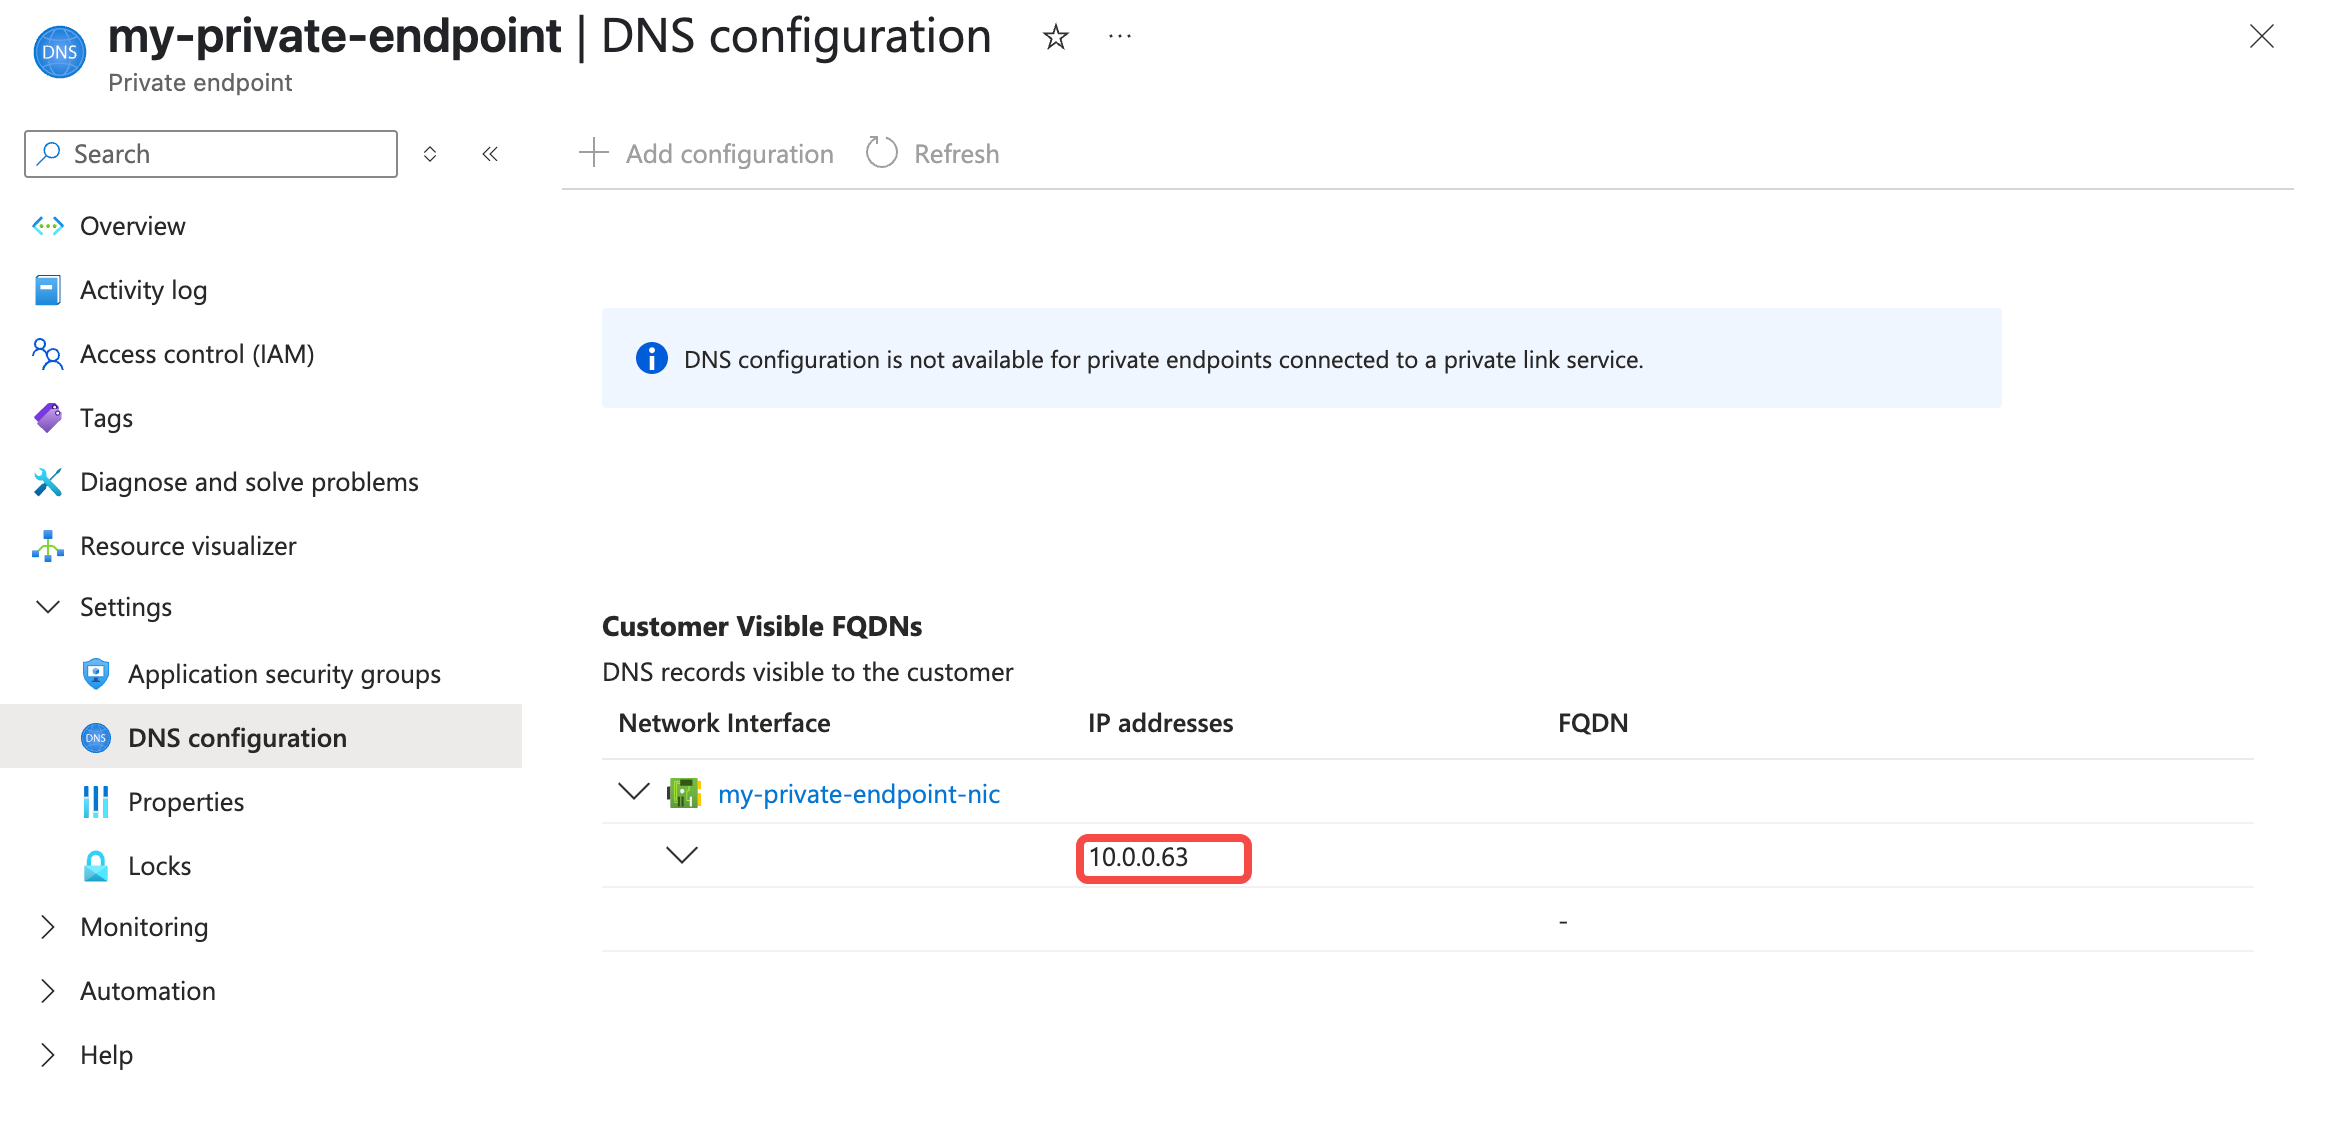
Click Settings > DNS configuration in the left navigation pane, and then copy its IP address for later use.
Sign in to Azure CLI and select your subscription:
az login
az account set --subscription ${your_subscription_id}
Create the private endpoint by using the TiDB Cloud resource ID that you copied from the Create Azure Private Endpoint Connection dialog:
az network private-endpoint create \
  --name ${your_private_endpoint_name} \
  --resource-group ${your_resource_group_name} \
  --vnet-name ${your_vnet_name} \
  --subnet ${your_subnet_name} \
  --private-connection-resource-id "${your_tidb_cloud_resource_id}" \
  --connection-name ${your_private_endpoint_connection_name} \
  --location ${your_region}
Get the private endpoint Resource ID:
az network private-endpoint show \
  --name ${your_private_endpoint_name} \
  --resource-group ${your_resource_group_name} \
  --query "id" \
  --output tsv
Get the private endpoint IP address from DNS configuration:
az network private-endpoint show \
  --name ${your_private_endpoint_name} \
  --resource-group ${your_resource_group_name} \
  --query "customDnsConfigs[0].ipAddresses[0]" \
  --output tsv
Step 3. Accept the endpoint
- Return to the Create Azure Private Endpoint Connection dialog in the TiDB Cloud console, and then paste the copied Resource ID and IP address into the corresponding fields.
- Click Verify Endpoint to validate the private endpoint access. If you encounter any error, follow the error message for troubleshooting, and then try again.
- Once verification is successful, click Accept Endpoint to approve the connection from your private endpoint.
Step 4. Connect to your TiDB cluster
After you have accepted the endpoint connection, you are redirected back to the connection dialog.
- Wait for the private endpoint connection status to become Active (approximately 5 minutes). To check the status, navigate to the Networking page by clicking Settings > Networking in the left navigation pane.
- In the Connect With drop-down list, select your preferred connection method. The corresponding connection string is displayed at the bottom of the dialog.
- Connect to your cluster with the connection string.
Private endpoint status reference
To view the statuses of private endpoints or private endpoint services, navigate to the Networking page by clicking Settings > Networking in the left navigation pane.
The possible statuses of a private endpoint are explained as follows:
- Discovered: TiDB Cloud can automatically detect your private endpoint associated with the endpoint service before accepting the request to prevent the need for creating another one.
- Pending: waiting for processing.
- Active: your private endpoint is ready to use. You cannot edit the private endpoint of this status.
- Deleting: the private endpoint is being deleted.
- Failed: the private endpoint creation fails. You can click Edit of that row to retry the creation.
The possible statuses of a private endpoint service are explained as follows:
- Creating: the endpoint service is being created, which takes 3 to 5 minutes.
- Active: the endpoint service is created, no matter whether the private endpoint is created or not.
Troubleshooting
TiDB Cloud fails to create an endpoint service. What should I do?
The endpoint service is created automatically after you open the Create Azure Private Endpoint page and choose the TiDB cluster. If it shows as failed or remains in the Creating state for a long time, submit a support ticket for assistance.
If I cancel the action during setup, what should I do before accepting the private endpoint?
The Azure private endpoint connection feature can automatically detect your private endpoints. This means that after creating an Azure private endpoint in the Azure portal, if you click Cancel in the Create Azure Private Endpoint Connection dialog in the TiDB Cloud console, you can still view the created endpoint on the Networking page. If the cancellation is unintentional, you can continue to configure the endpoint to complete the setup. If the cancellation is intentional, you can delete the endpoint directly in the TiDB Cloud console.
- The diagram of the Azure Private Link architecture is from the What is Azure Private Link service document (source file on GitHub) in Azure documentation, licensed under the Creative Commons Attribution 4.0 International.↩