Connect AWS DMS to TiDB Cloud clusters
AWS Database Migration Service (AWS DMS) is a cloud service that makes it possible to migrate relational databases, data warehouses, NoSQL databases, and other types of data stores. You can use AWS DMS to migrate your data from or into TiDB Cloud clusters. This document describes how to connect AWS DMS to a TiDB Cloud cluster.
Prerequisites
An AWS account with enough access
You are expected to have an AWS account with enough access to manage DMS-related resources. If not, refer to the following AWS documents:
A TiDB Cloud account and a TiDB cluster
You are expected to have a TiDB Cloud account and a TiDB Cloud Starter, TiDB Cloud Essential, or TiDB Cloud Dedicated cluster. If not, refer to the following documents to create one:
Configure network
Before creating DMS resources, you need to configure network properly to ensure DMS can communicate with TiDB Cloud clusters. If you are unfamiliar with AWS, contact AWS Support. The following provides several possible configurations for your reference.
For TiDB Cloud Starter or TiDB Cloud Essential, your clients can connect to clusters via public endpoint or private endpoint.
To connect to a TiDB Cloud Starter or Essential cluster via public endpoint, do one of the following to make sure that the DMS replication instance can access the internet.
Deploy the replication instance in public subnets and enable Public accessible. For more information, see Configuration for internet access.
Deploy the replication instance in private subnets and route traffic in the private subnets to public subnets. In this case, you need at least three subnets, two private subnets, and one public subnet. The two private subnets form a subnet group where the replication instance lives. Then you need to create a NAT gateway in the public subnet and route traffic of the two private subnets to the NAT gateway. For more information, see Access the internet from a private subnet.
To connect to a TiDB Cloud Starter or TiDB Cloud Essential cluster via private endpoint, refer to the following documents to set up a private endpoint first and deploy the replication instance in private subnets.
For TiDB Cloud Dedicated, your clients can connect to clusters via public endpoint, private endpoint, or VPC peering.
To connect to a TiDB Cloud Dedicated cluster via public endpoint, do one of the following to make sure that the DMS replication instance can access the internet. In addition, you need to add the public IP address of the replication instance or NAT gateway to the cluster's IP access list.
Deploy the replication instance in public subnets and enable Public accessible. For more information, see Configuration for internet access.
Deploy the replication instance in private subnets and route traffic in the private subnets to public subnets. In this case, you need at least three subnets, two private subnets, and one public subnet. The two private subnets form a subnet group where the replication instance lives. Then you need to create a NAT gateway in the public subnet and route traffic of the two private subnets to the NAT gateway. For more information, see Access the internet from a private subnet.
To connect to a TiDB Cloud Dedicated cluster via private endpoint, set up a private endpoint first and deploy the replication instance in private subnets.
To connect to a TiDB Cloud Dedicated cluster via VPC peering, set up a VPC peering connection first and deploy the replication instance in private subnets.
Create an AWS DMS replication instance
In the AWS DMS console, go to the Replication instances page and switch to the corresponding region. It is recommended to use the same region for AWS DMS as TiDB Cloud.
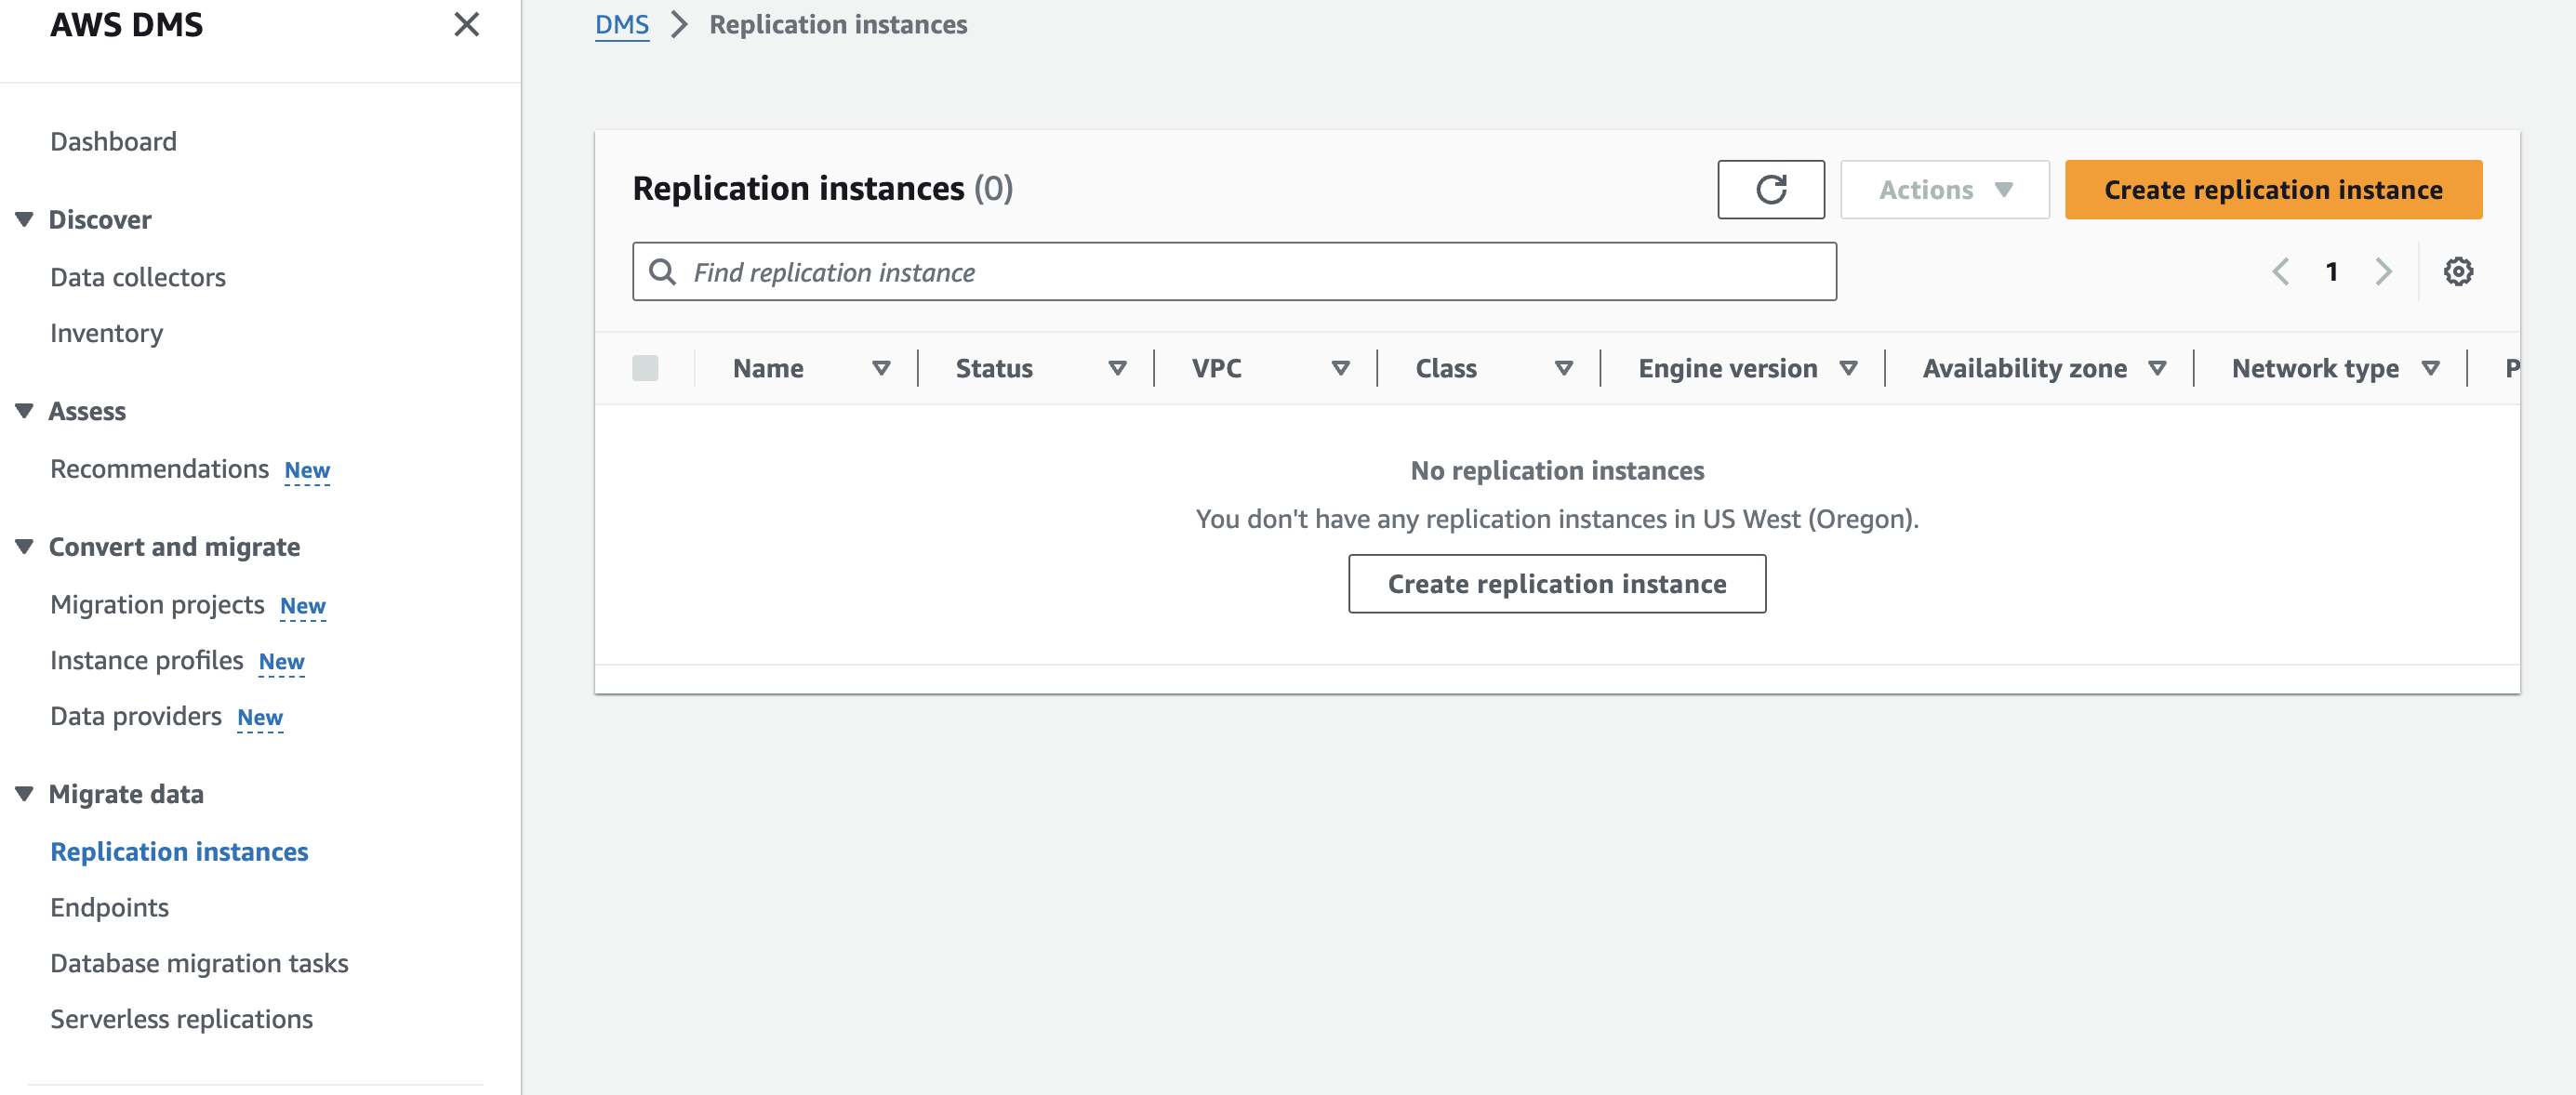
Click Create replication instance.
Fill in an instance name, ARN, and description.
In the Instance configuration section, configure the instance:
- Instance class: select an appropriate instance class. For more information, see Choosing replication instance types.
- Engine version: keep the default configuration.
- High Availability: select Multi-AZ or Single-AZ based on your business needs.
Configure the storage in the Allocated storage (GiB) field.
Configure connectivity and security. You can refer to the previous section for network configuration.
- Network type - new: select IPv4.
- Virtual private cloud (VPC) for IPv4: select the VPC that you need.
- Replication subnet group: select a subnet group for your replication instance.
- Public accessible: set it based on your network configuration.
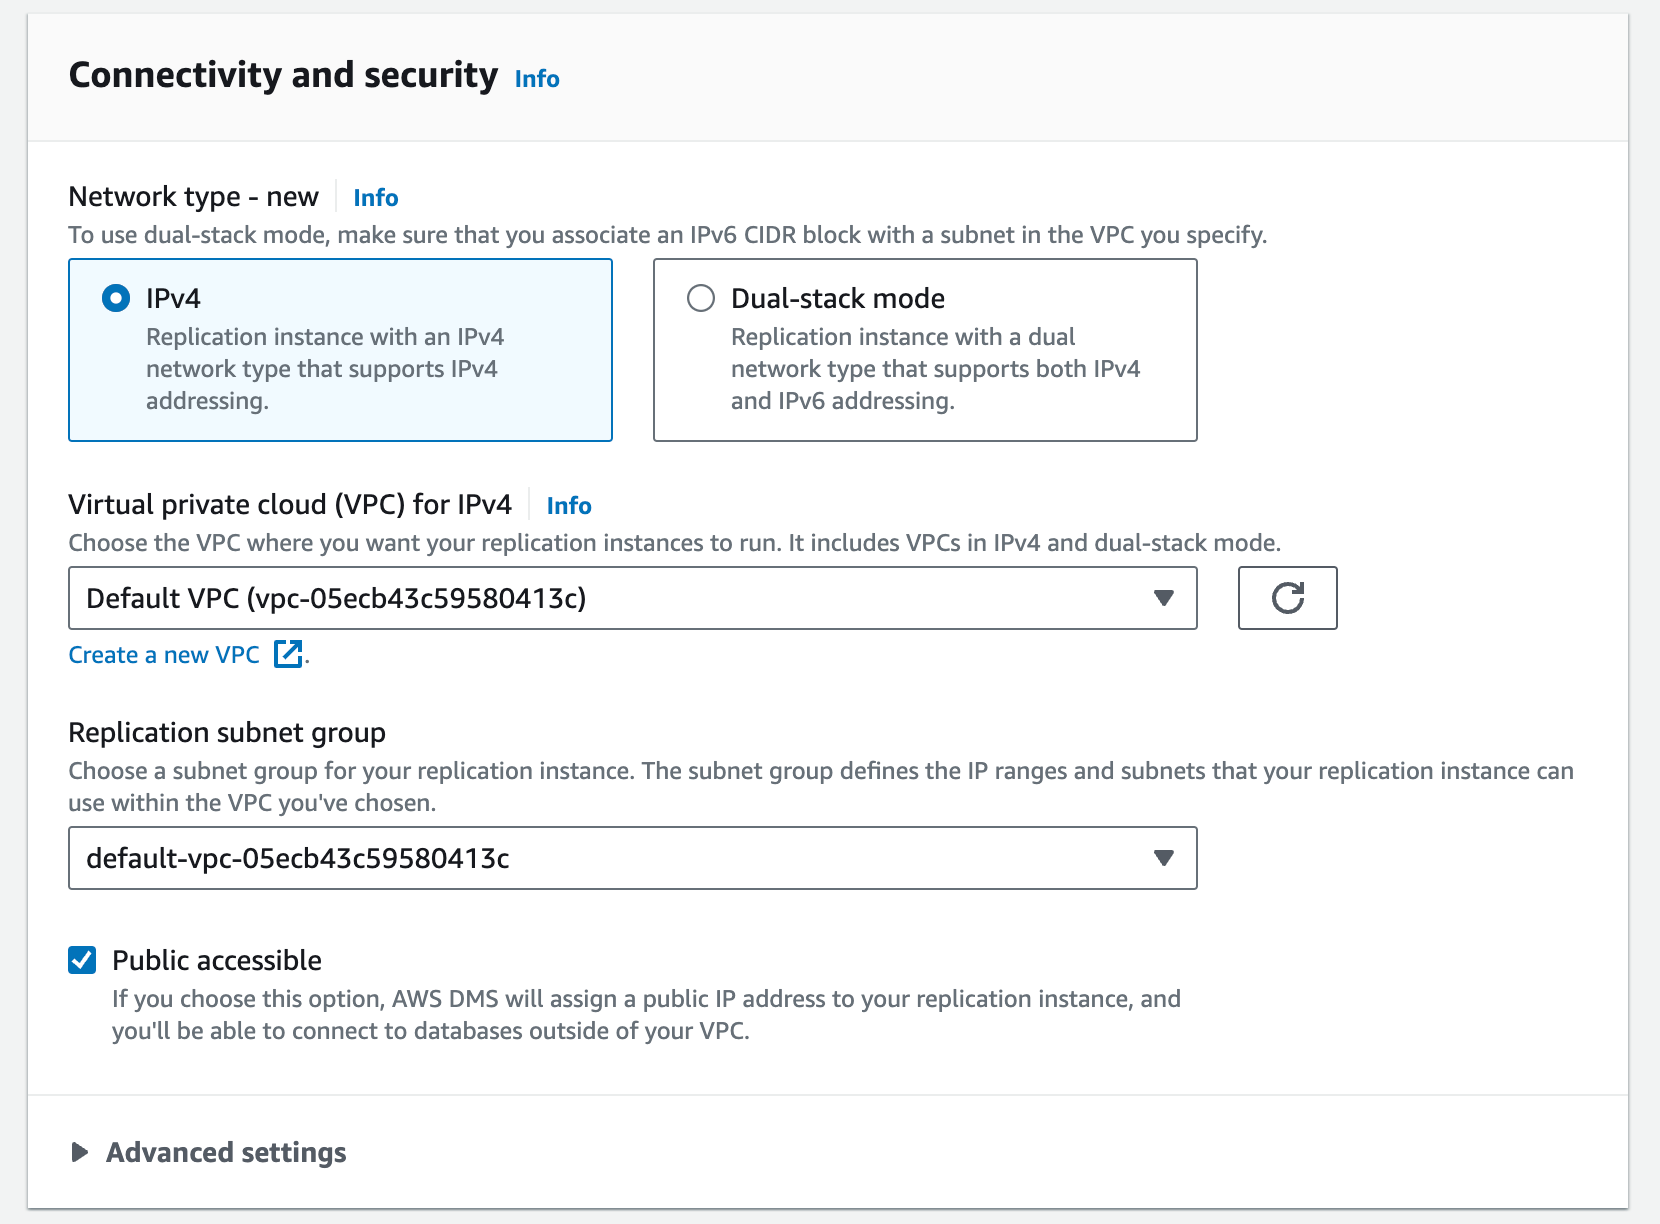
Configure the Advanced settings, Maintenance, and Tags sections if needed, and then click Create replication instance to finish the instance creation.
Create TiDB Cloud DMS endpoints
For connectivity, the steps for using TiDB Cloud clusters as a source or as a target are similar, but DMS does have some different database setting requirements for source and target. For more information, see Using MySQL as a source or Using MySQL as a target. When using a TiDB Cloud cluster as a source, you can only Migrate existing data because TiDB does not support MySQL binlog.
In the AWS DMS console, go to the Endpoints page and switch to the corresponding region.
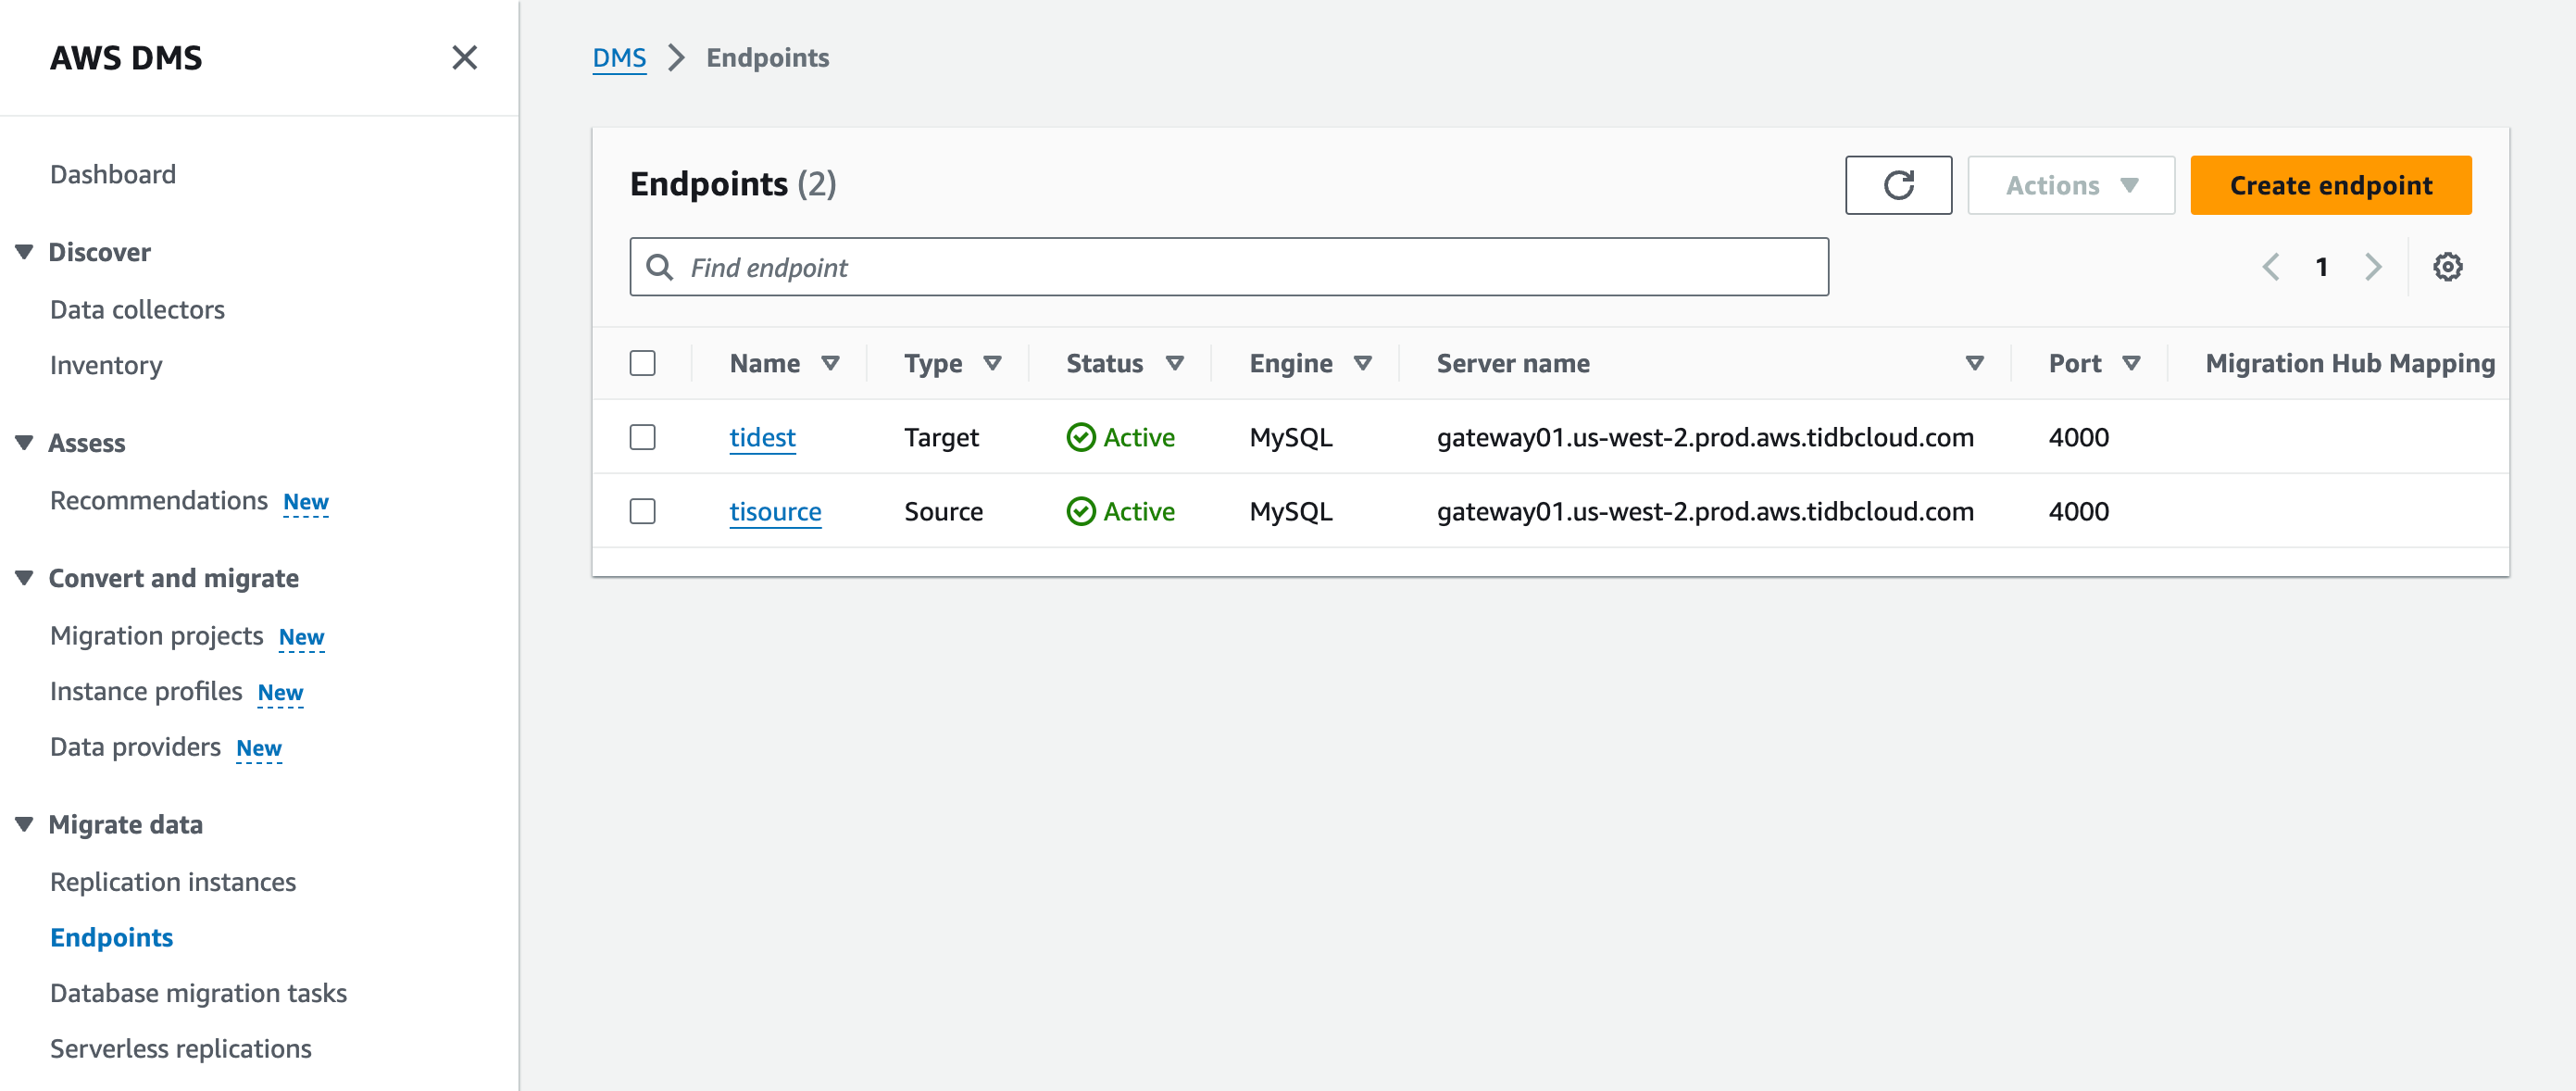
Click Create endpoint to create the target database endpoint.
In the Endpoint type section, select Source endpoint or Target endpoint.
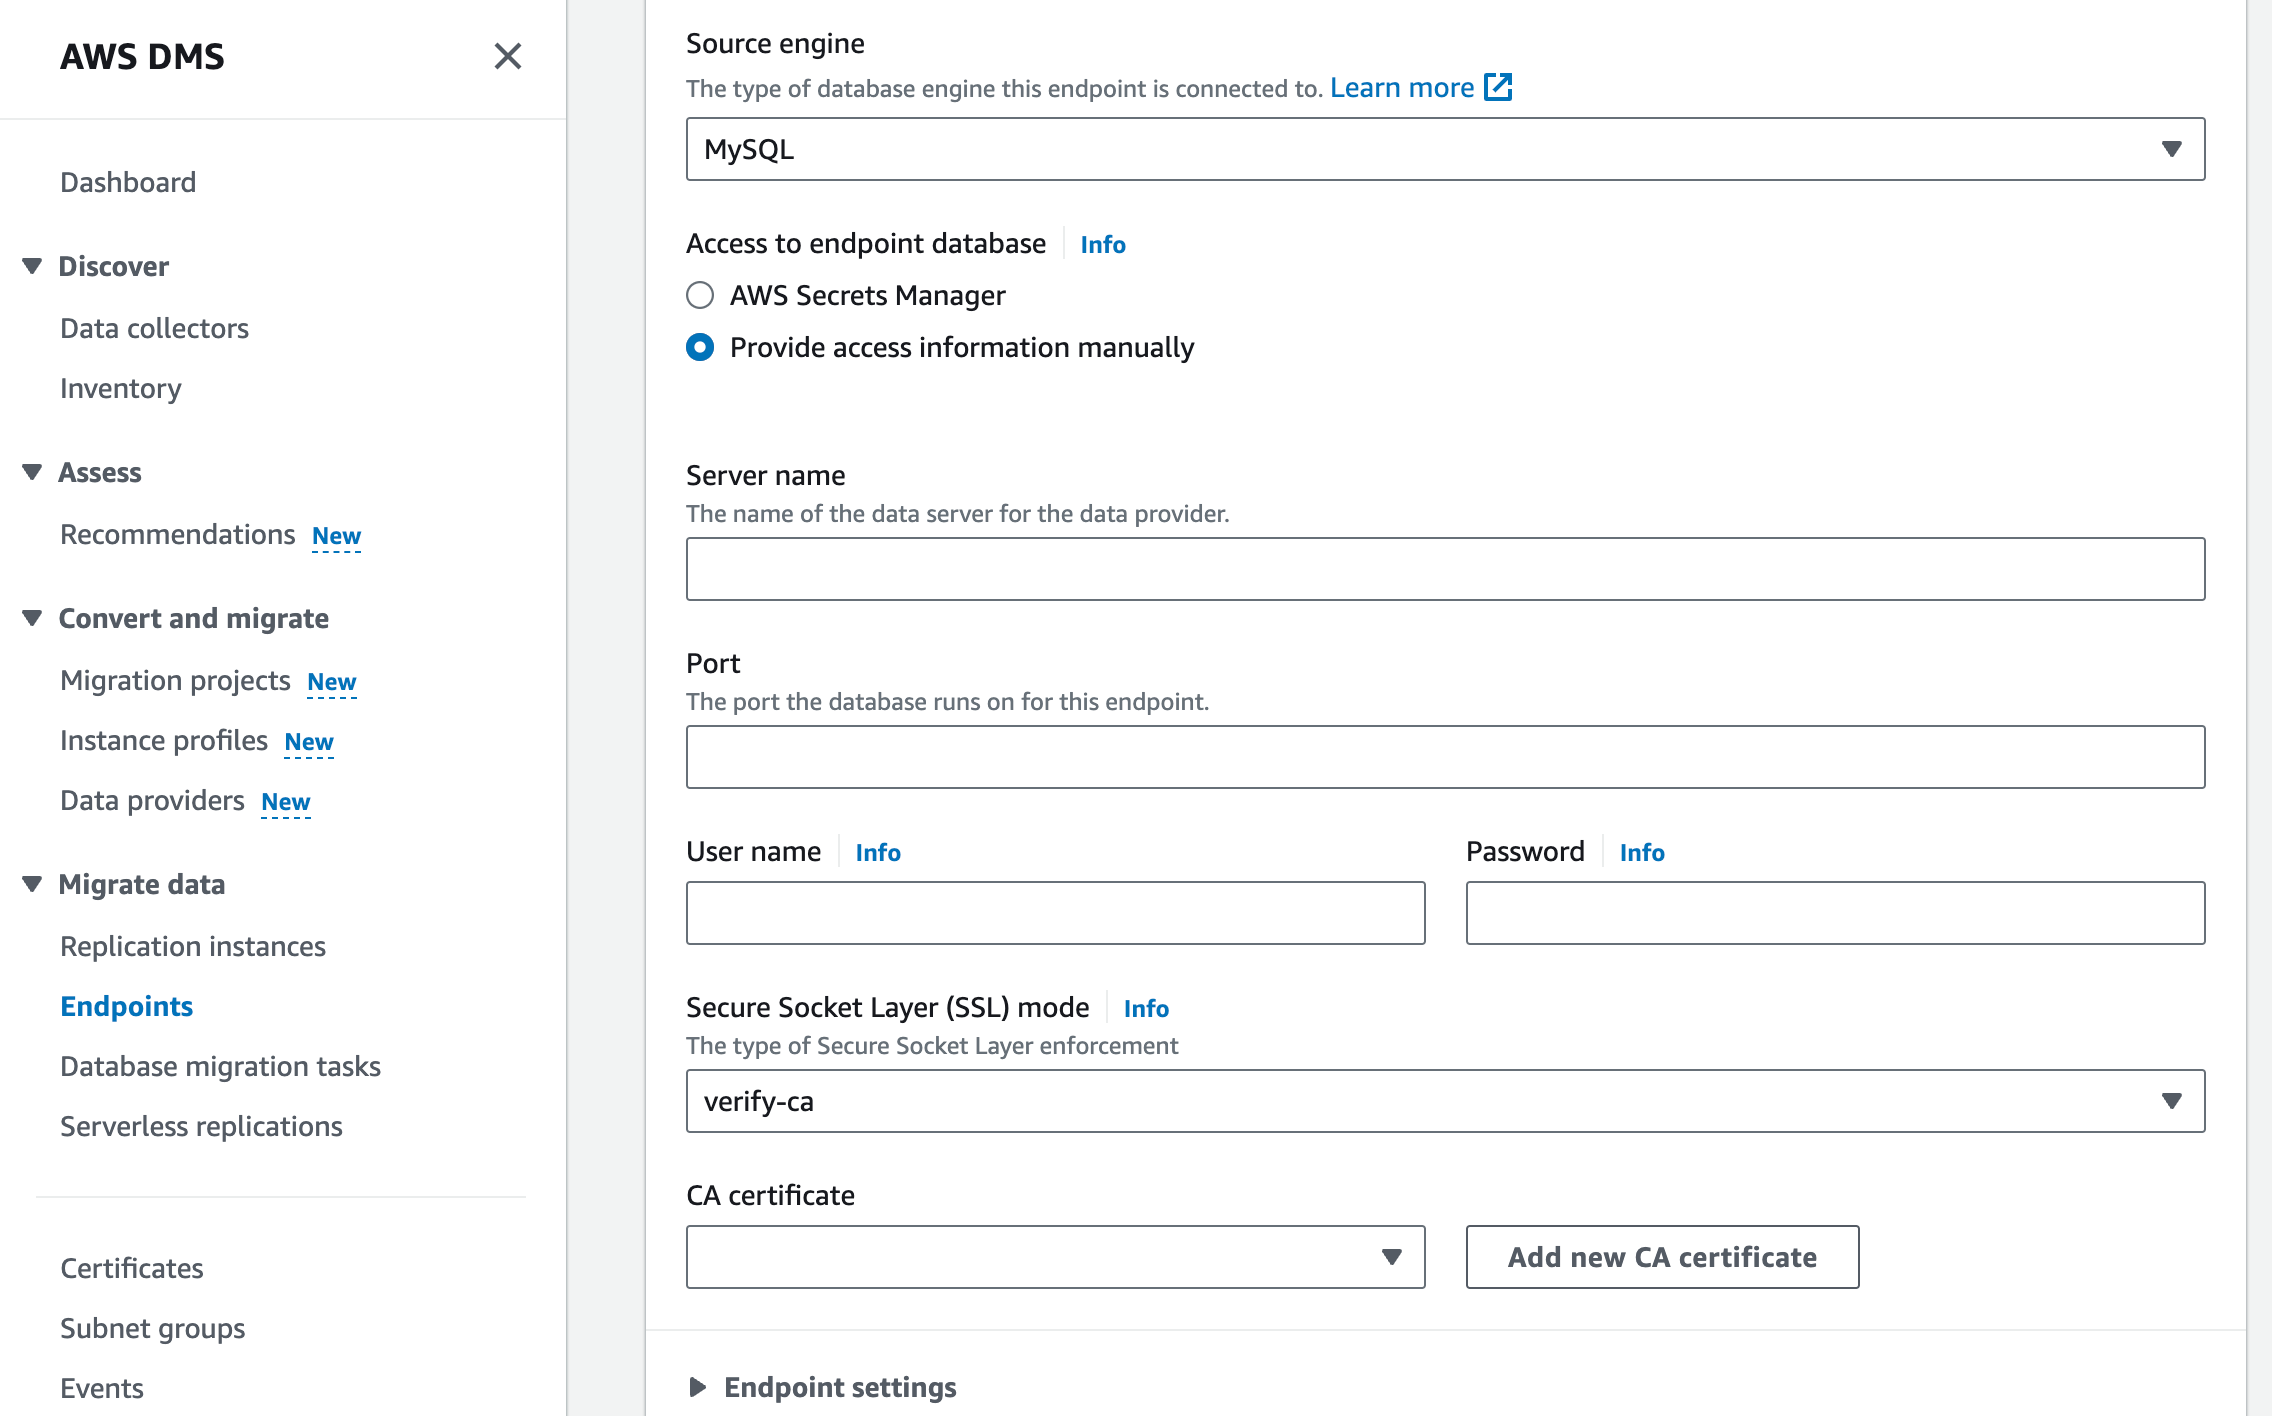
In the Endpoint configuration section, fill in the Endpoint identifier and ARN fields. Then, select MySQL as Source engine or Target engine.
For the Access to endpoint database field, select the Provide access information manually checkbox and fill in cluster information as follows:
- Server name:
HOSTof the cluster. - Port:
PORTof the cluster. - User name: User of the cluster for migration. Make sure it meets DMS requirements.
- Password: Password of the cluster user.
- Secure Socket Layer (SSL) mode: If you are connecting via public endpoint, it is highly recommended to set the mode to verify-full to ensure transport security. If you are connecting via private endpoint, you can set the mode to none.
- (Optional) CA certificate: Use the ISRG Root X1 certificate. For more information, see TLS Connections to TiDB Cloud Starter or Essential.
- Server name:
HOSTof TiDB Cloud Dedicated cluster. - Port:
PORTof TiDB Cloud Dedicated cluster. - User name: User of TiDB Cloud Dedicated cluster for migration. Make sure it meets DMS requirements.
- Password: Password of TiDB Cloud Dedicated cluster user.
- Secure Socket Layer (SSL) mode: If you are connecting via public endpoint, it is highly recommended to set the mode to verify-full to ensure transport security. If you are connecting via private endpoint, you can set it to none.
- (Optional) CA certificate: Get the CA certificate according to TLS connections to TiDB Cloud Dedicated.
- Server name:
If you want to create the endpoint as a Target endpoint, expand the Endpoint settings section, select the Use endpoint connection attributes checkbox, and then set Extra connection attributes to
Initstmt=SET FOREIGN_KEY_CHECKS=0;.Configure the KMS Key and Tags sections if needed. Click Create endpoint to finish the instance creation.