Integrate TiDB Cloud Starter with Amazon Lambda Using AWS CloudFormation
This document provides a step-by-step guide on how to use AWS CloudFormation to integrate TiDB Cloud Starter, a cloud-native distributed SQL database, with AWS Lambda, a serverless and event-driven compute service. By integrating TiDB Cloud Starter with Amazon Lambda, you can leverage the scalability and cost-efficiency of microservices through TiDB Cloud Starter and AWS Lambda. AWS CloudFormation automates the creation and management of AWS resources, including Lambda functions, API Gateway, and Secrets Manager.
Solution overview
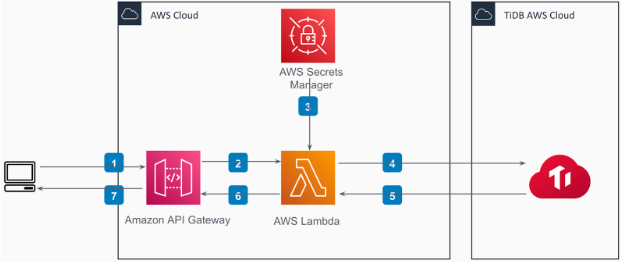
In this guide, you will create a fully functional online bookshop with the following components:
- AWS Lambda Function: handles requests and queries data from a TiDB Cloud Starter cluster using Sequelize ORM and Fastify API framework.
- AWS Secrets Manager SDK: retrieves and manages connection configurations for the TiDB Cloud Starter cluster.
- AWS API Gateway: handles HTTP request routes.
- TiDB Cloud Starter: a cloud-native distributed SQL database.
AWS CloudFormation is used to create the necessary resources for the project, including the Secrets Manager, API Gateway, and Lambda Functions.
The structure of the bookshop project is as follows:
Prerequisites
Before getting started, ensure that you have the following:
An AWS account with access to the following AWS services:
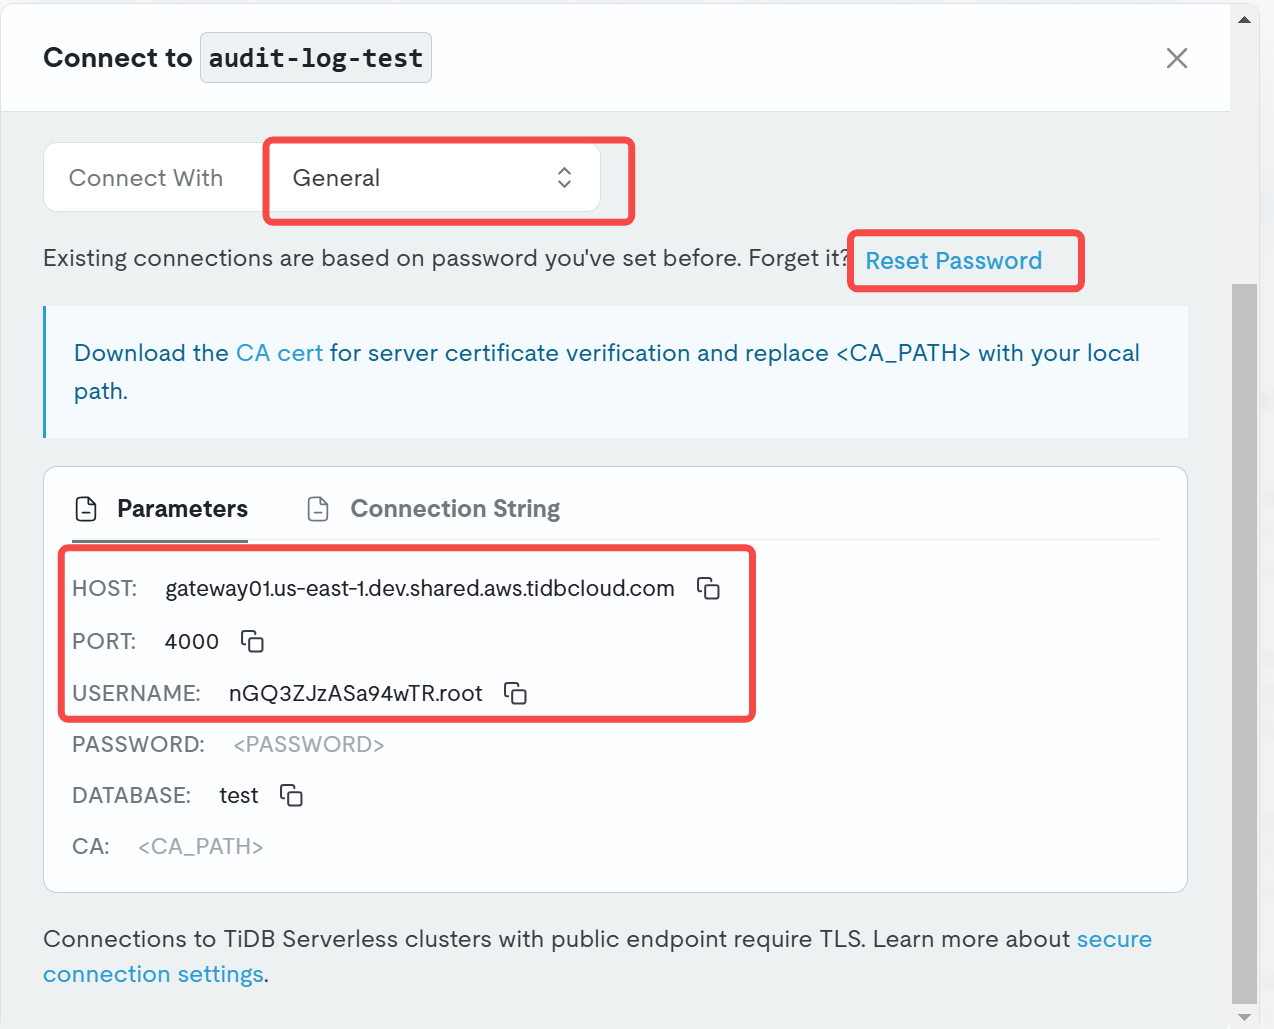
A TiDB Cloud account and a TiDB Cloud Starter cluster. Get the connection information for your TiDB Cloud Starter cluster:
API test tools such as Postman and cURL. Most examples in this document use cURL. For Windows users, Postman is recommended.
Download the latest release assets of the project to your local machine, which includes
cloudformation_template.ymlandcloudformation_template.jsonfiles.
Modify and rebuild the Lambda function code if you use a region other than us-east-1
If you use us-east-1 as your cluster region, skip this section and go to Step 1: Set up the project using AWS CloudFormation.
If you use a different AWS region other than us-east-1 to create the AWS resources, you need to modify the Lambda function code, rebuild it, and upload the code bundle to your own S3 bucket.
To avoid local development environment issues, it is recommended that you use a cloud-native development environment, such as Gitpod.
To rebuild and upload the code bundle to your own S3 bucket, do the following:
Initialize the development environment.
- Open the Gitpod workspace and log in with your GitHub account.
Modify the Lambda function code.
- Open the
aws-lambda-cloudformation/src/secretManager.tsfile in the left sidebar. - Locate the line 22 and then modify the
regionvariable to match your own region.
- Open the
Rebuild the code bundle.
Install the dependencies.
Open a terminal in Gitpod.
Enter the working directory:
cd aws-lambda-cloudformationInstall the dependencies:
yarn
Rebuild the code bundle.
Build the code bundle.
yarn buildCheck the
aws-lambda-cloudformation/dist/index.zipfile.Right-click the
index.zipfile and select Download.
Upload the rebuilt code bundle to your own S3 bucket.
- Visit the S3 service in the AWS Management Console.
- Create a new bucket in your selected region.
- Upload the
index.zipfile to the bucket. - Note down the S3 bucket name and region for later use.
Step 1. Set up the bookshop project using AWS CloudFormation
To set up the bookshop project using AWS CloudFormation, do the following:
Navigate to the AWS Management Console and access the AWS CloudFormation service.
Click Create Stack > With new resources (standard).
On the Create Stack page, complete the stack creation process.
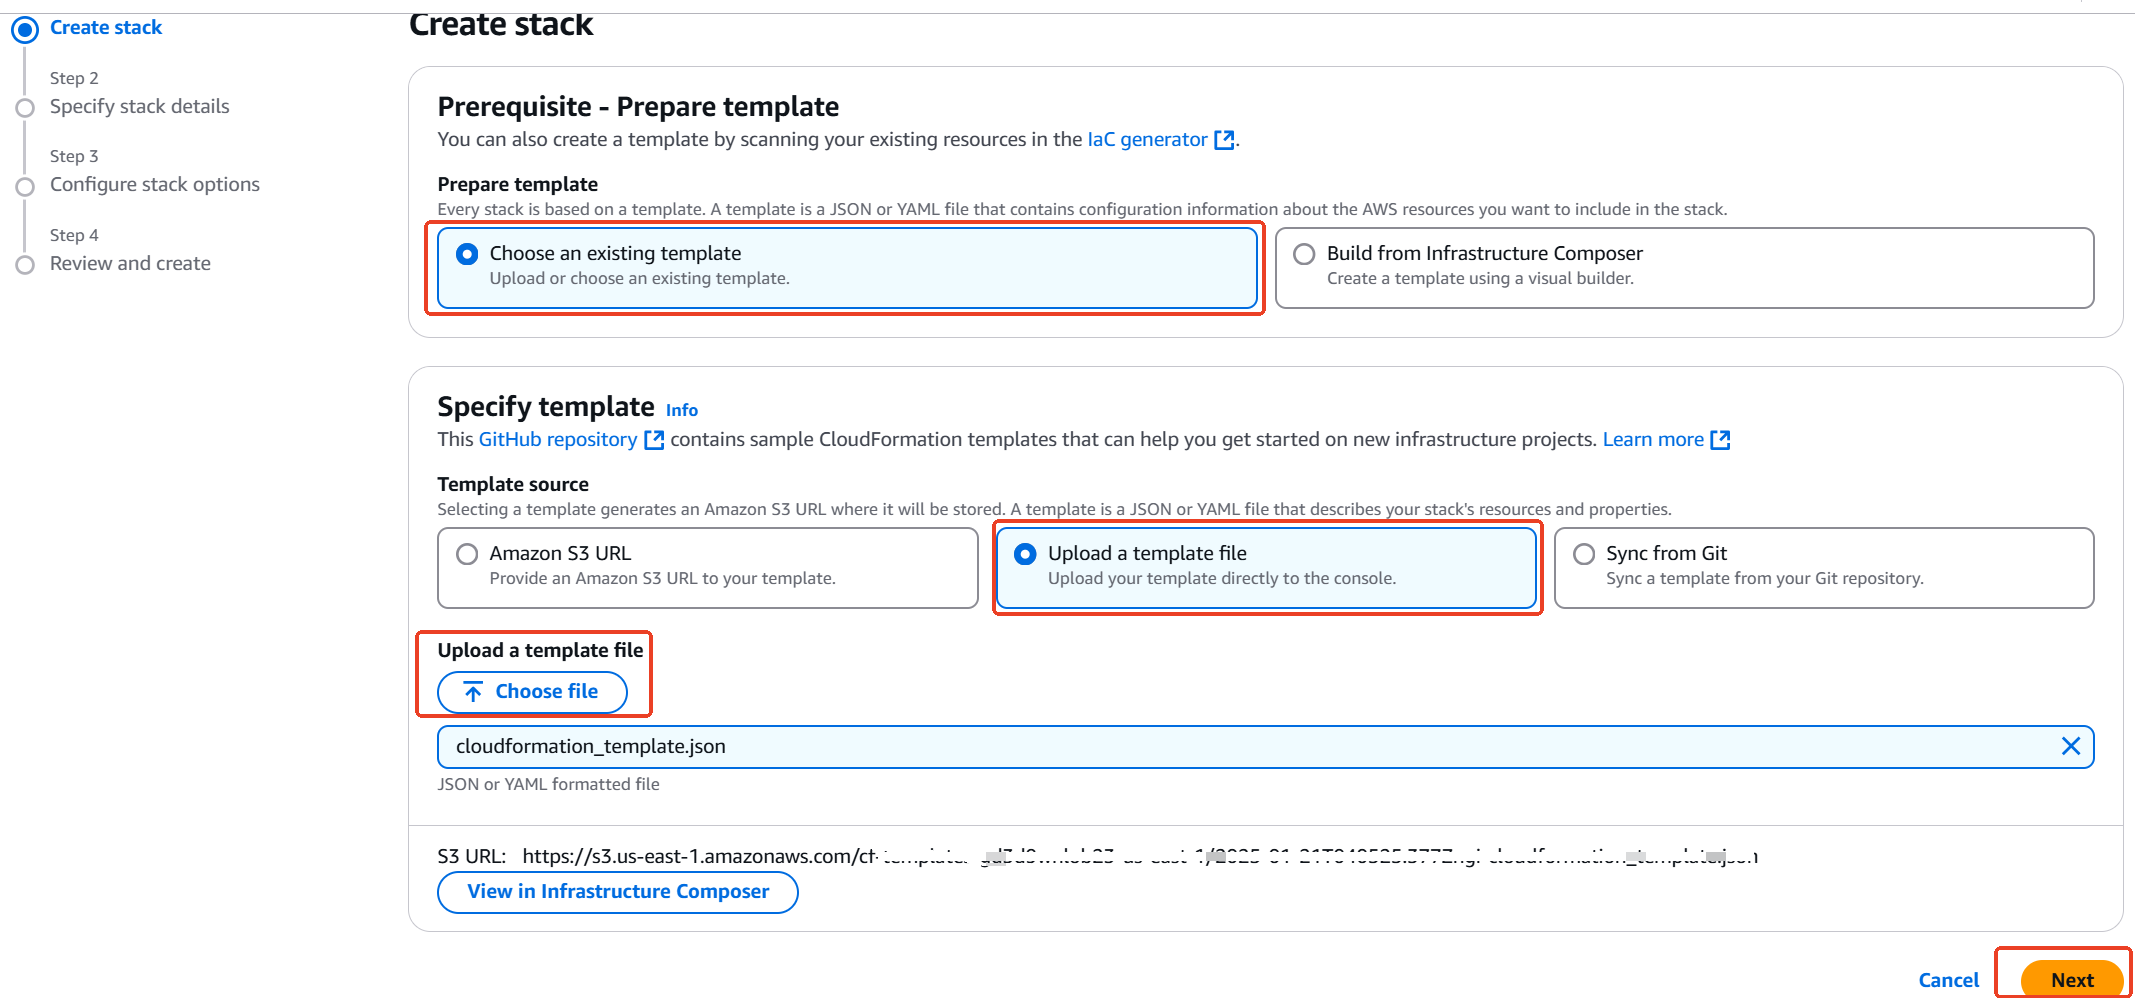
In the Prerequisite area, select Choose an existing template.
In the Specify template area, select Upload a template file, click Choose file to upload the template file (either YAML or JSON), and click Next.
If you do not have the file yet, download it from GitHub. The file contains the AWS CloudFormation template that creates the necessary resources for the project.
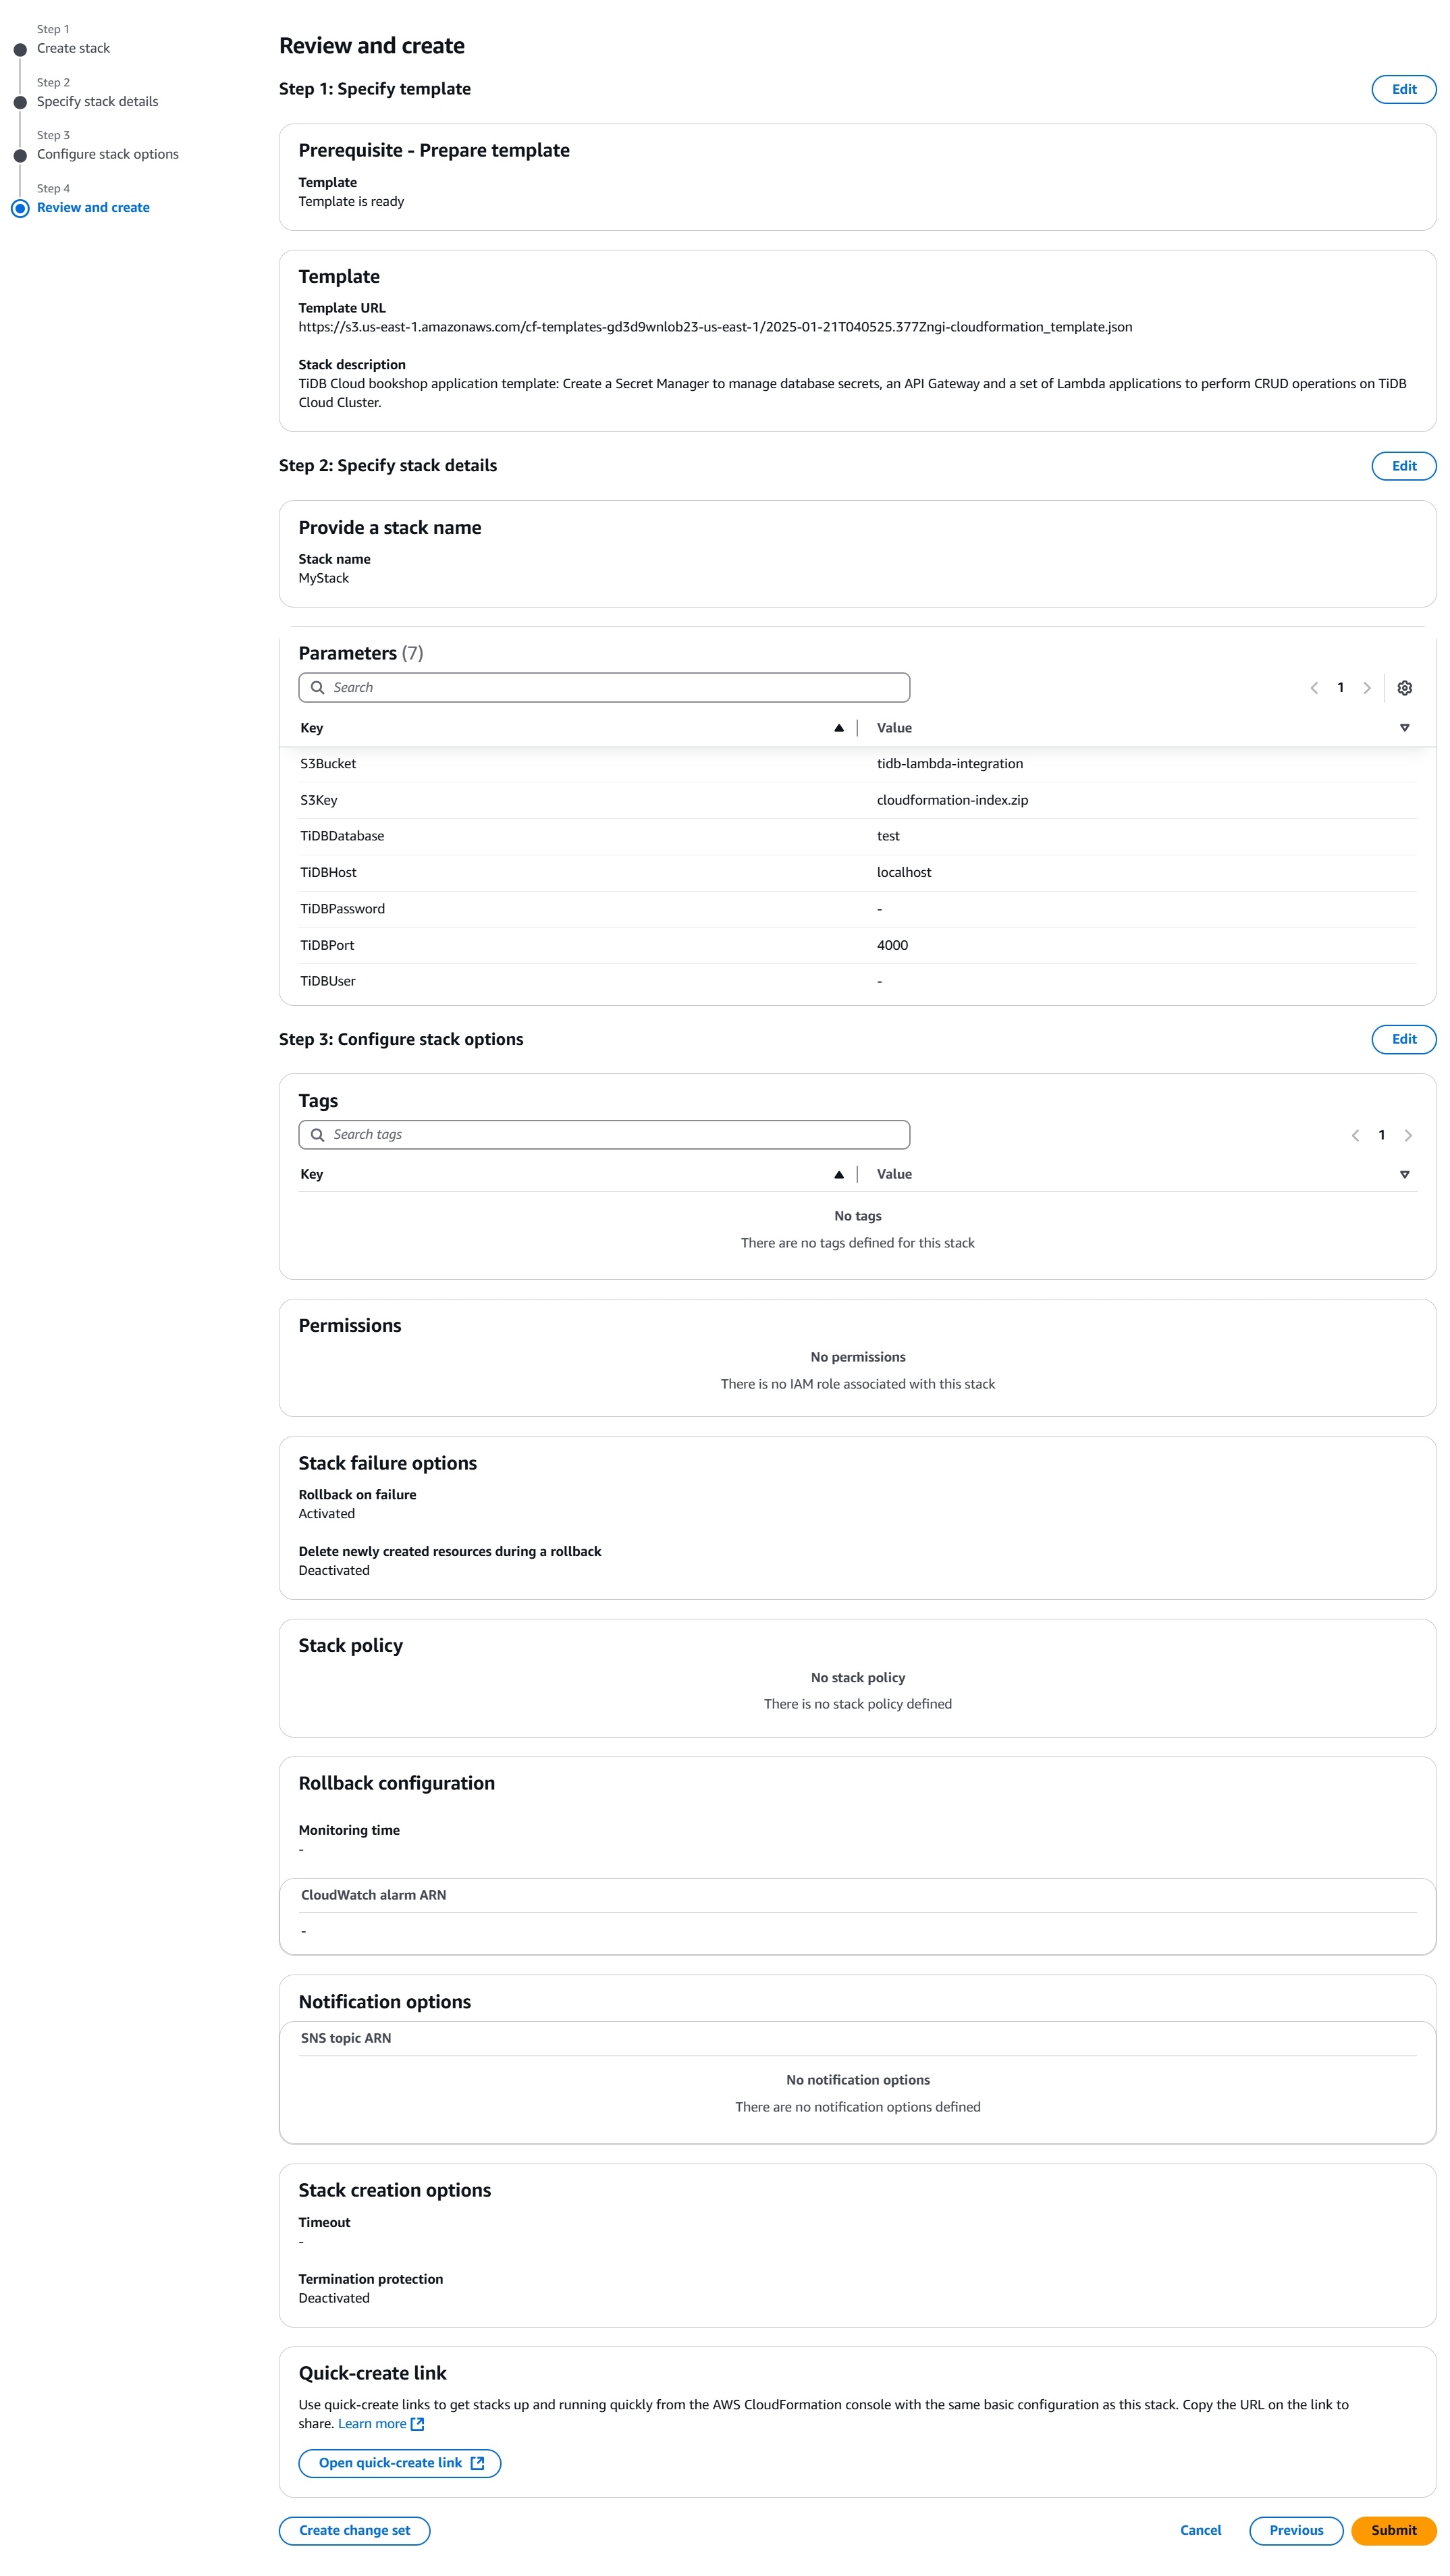
Specify stack details.
If you use
us-east-1as your cluster region, fill in the fields as in the following screenshot: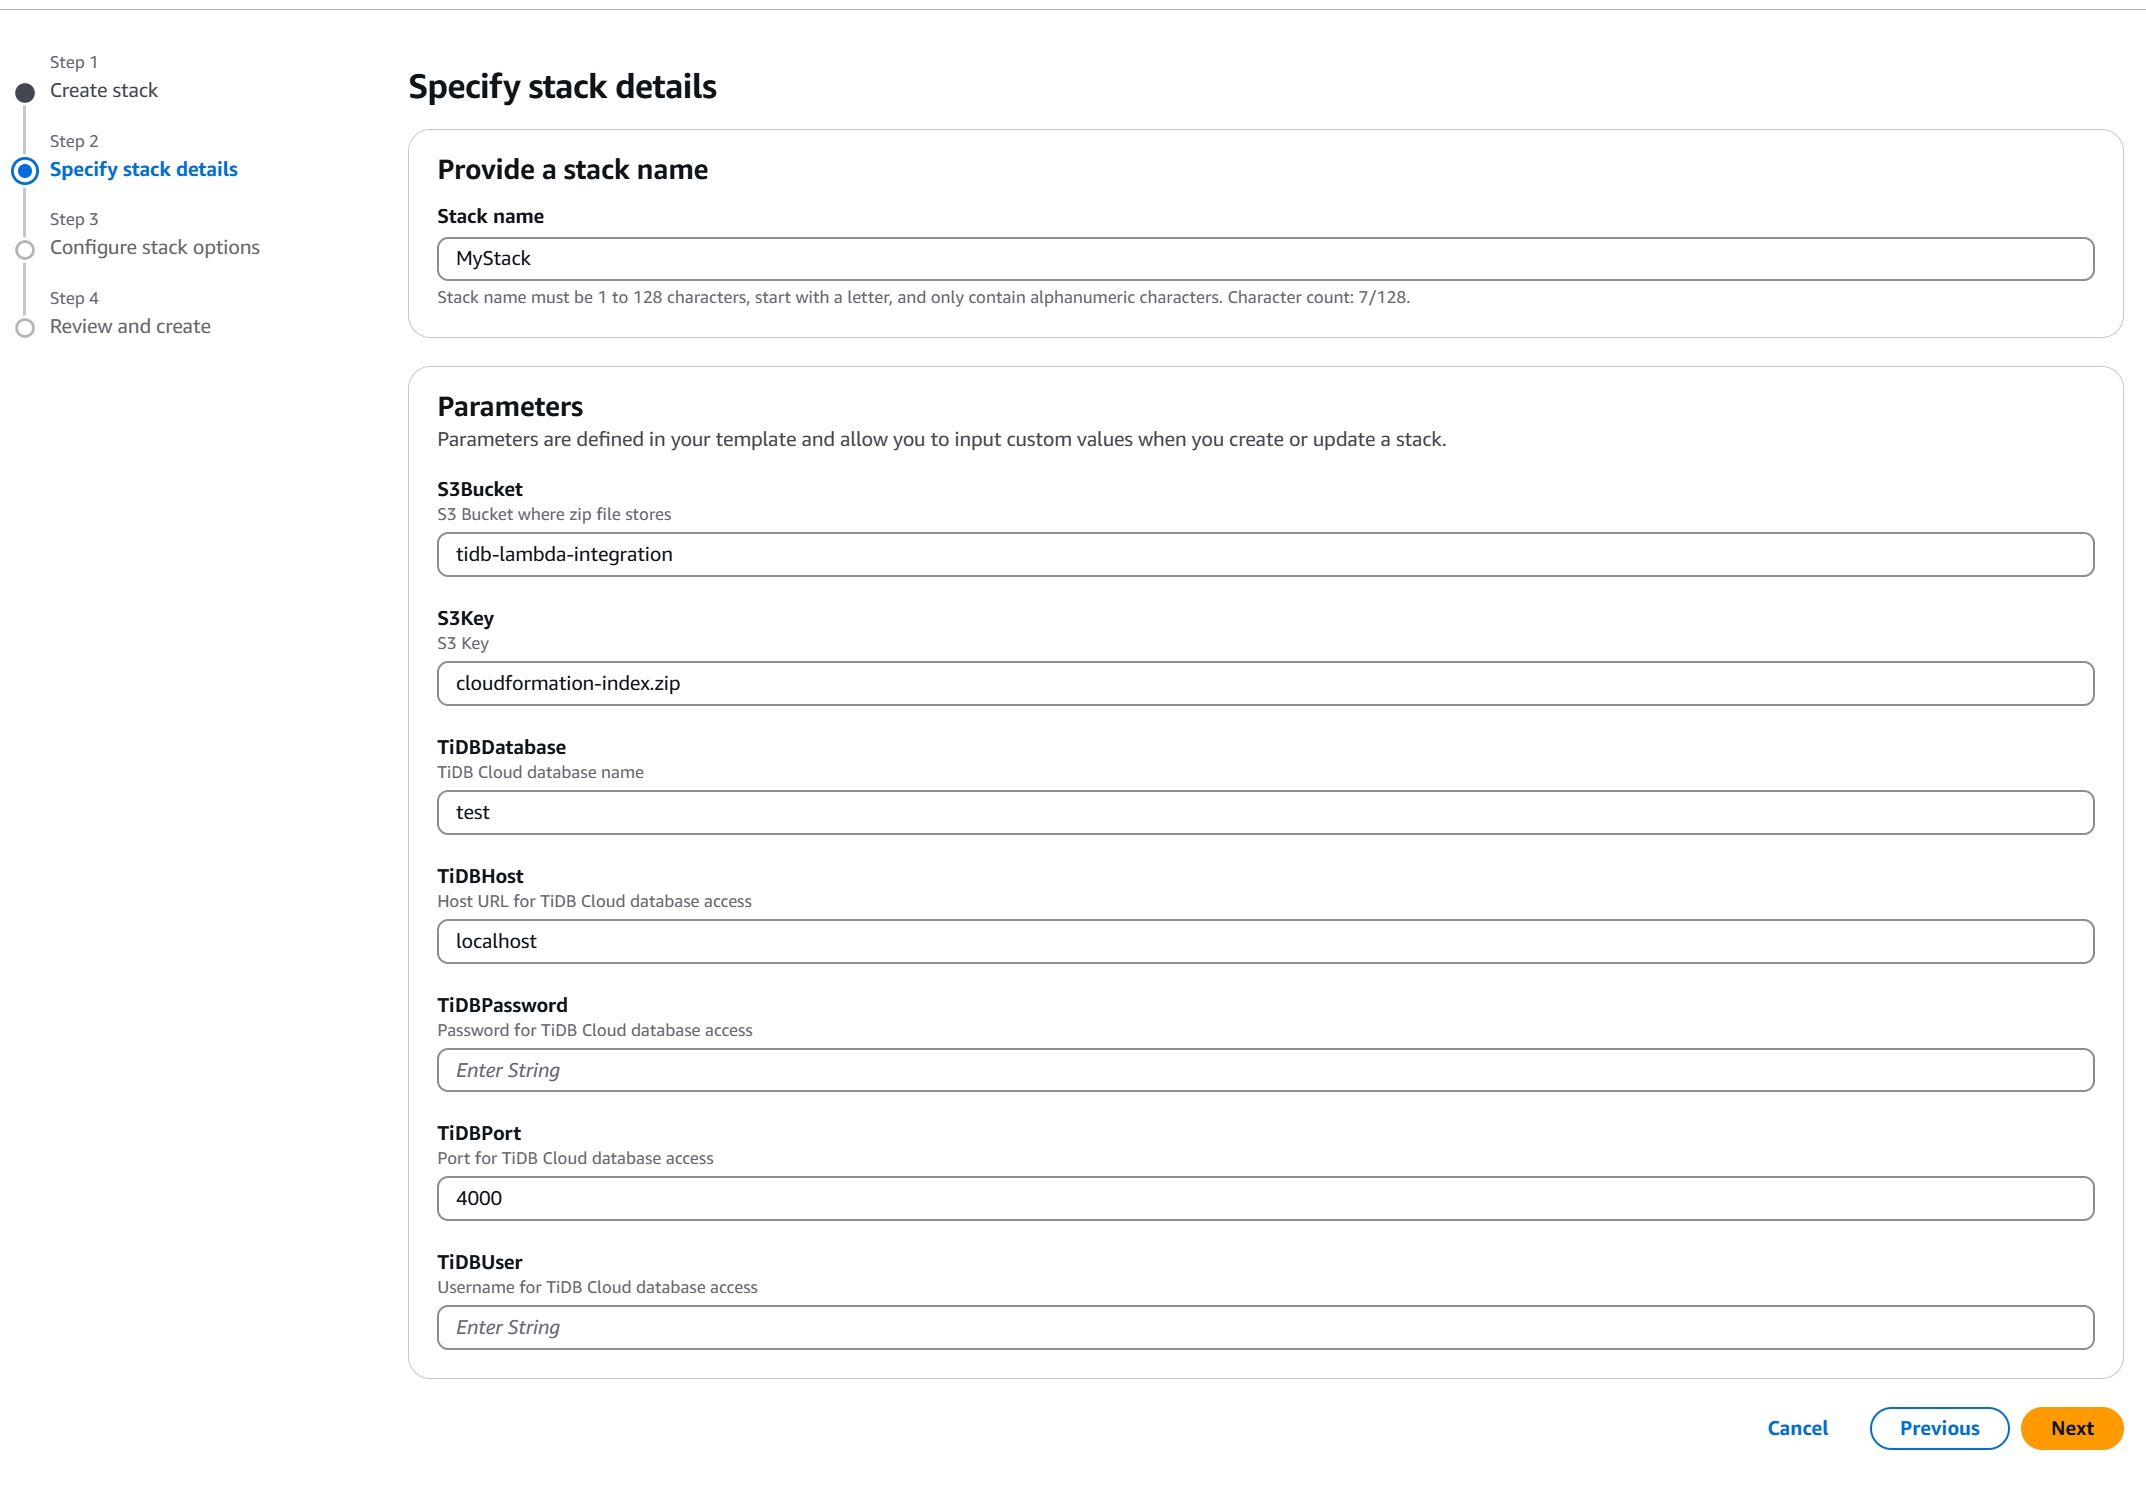
- Stack name: enter the stack name.
- S3Bucket: enter the S3 bucket where you store the zip file.
- S3Key: enter the S3 key.
- TiDBDatabase: enter the TiDB Cloud cluster name.
- TiDBHost: enter the host URL for TiDB Cloud database access. Enter
localhost. - TiDBPassword: enter the password for TiDB Cloud database access.
- TiDBPort: enter the port for TiDB Cloud database access.
- TiDBUser: enter the user name for TiDB Cloud database access.
If you use a different AWS region other than
us-east-1, follow these steps:- Refer to Modify and rebuild the Lambda function code if you use a region other than
us-east-1to modify the Lambda function code, rebuild it, and upload the code bundle to your own S3 bucket. - In the stack details fields, specify the S3 bucket name and region in the
S3BucketandS3Keyparameters according to your own configuration. - Fill in other fields as in the preceding screenshot.
- Refer to Modify and rebuild the Lambda function code if you use a region other than
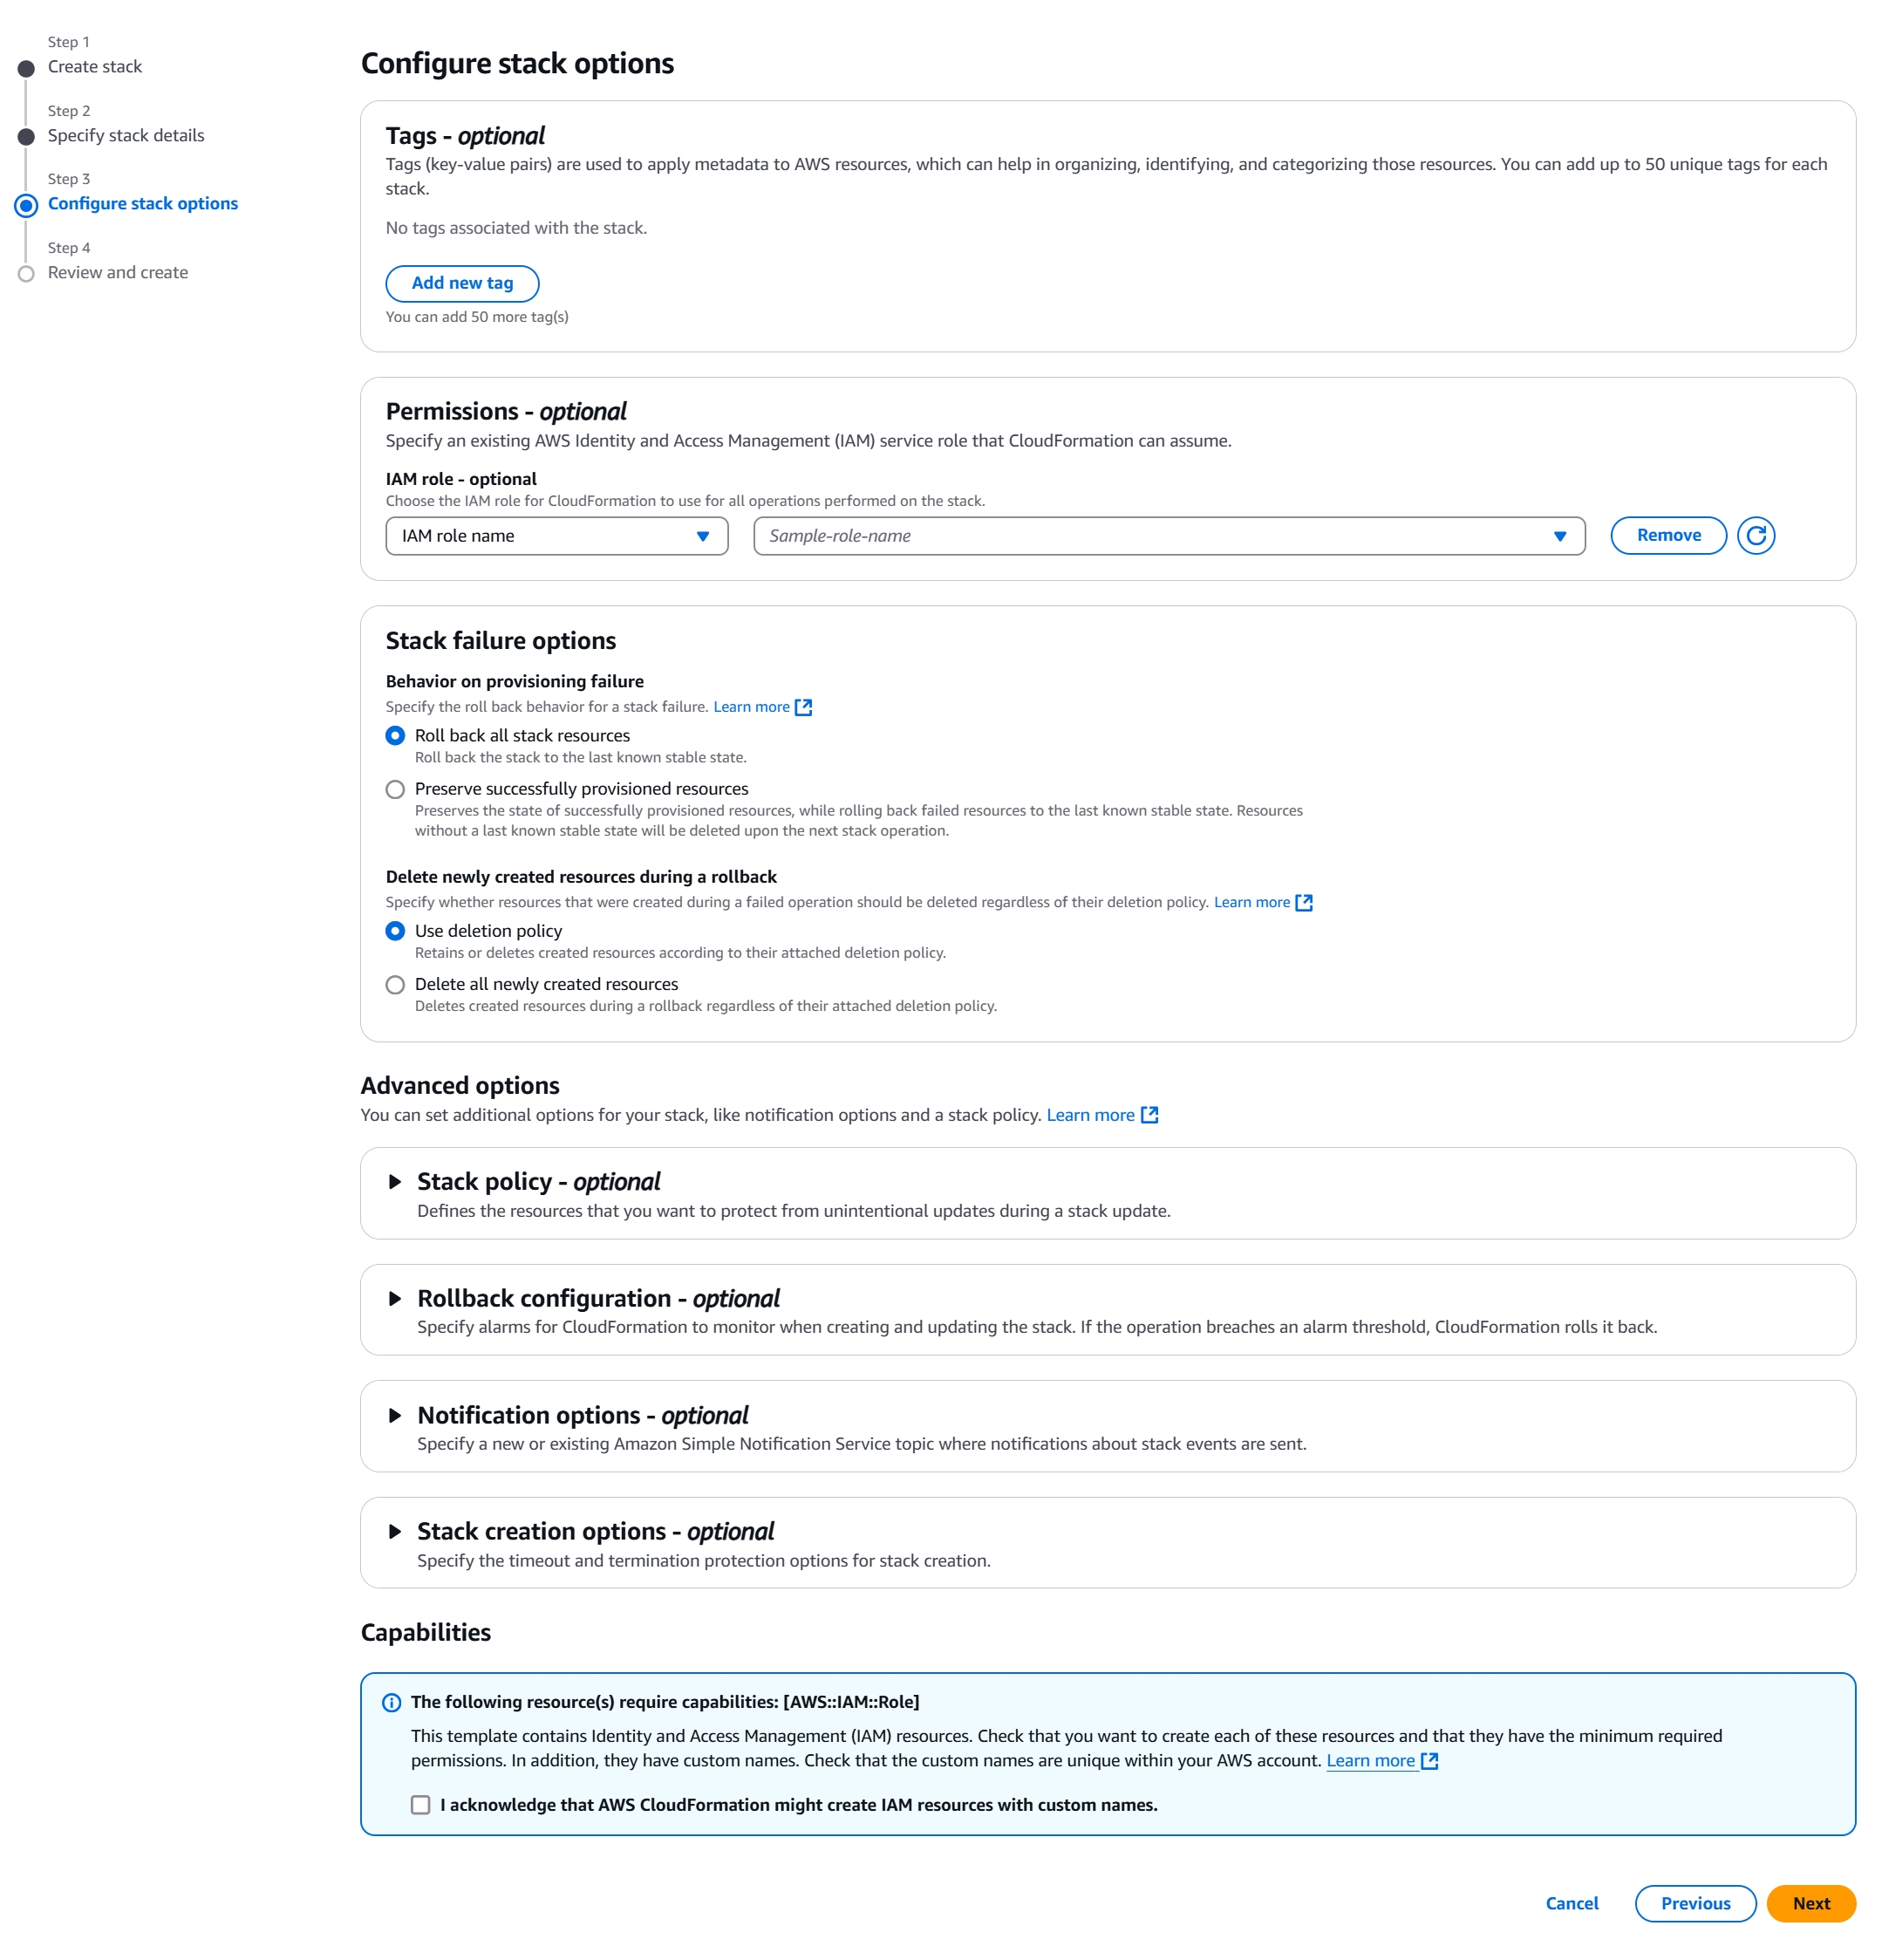
Configure stack options. You can use the default configurations.
Review and create the stack.
Step 2. Use the bookshop project
After the stack has been created, you can use the project as follows:
Visit the API Gateway service in the AWS Management Console, click the
TiDBCloudApiGatewayV2API, and then click API: TiDBCloudApiGatewayV2 in the left pane.Copy the
Invoke URLfrom the Overview page. This URL serves as the API endpoint.
Use API test tools such as Postman and cURL to test the API:
Init mock books:
curl -X POST -H "Content-Type: application/json" -d '{"count":100}' https://<your-api-endpoint>/book/initGet all books:
curl https://<your-api-endpoint>/bookGet a book by the book ID:
curl https://<your-api-endpoint>/book/<book-id>Create a book:
curl -X POST -H "Content-Type: application/json" -d '{ "title": "Book Title", "type": "Test", "publishAt": "2022-12-15T21:01:49.000Z", "stock": 123, "price": 12.34, "authors": "Test Test" }' https:// <your-api-endpoint>/bookUpdate a book:
curl -X PUT -H "Content-Type: application/json" -d '{ "title": "Book Title(updated)" }' https://<your-api-endpoint>/book/<book-id>Delete a book:
curl -X DELETE https://<your-api-endpoint>/book/<book-id>
Step 3. Clean up resources
To avoid unnecessary charges, clean up all resources that have been created.
- Access the AWS Management Console.
- Delete the AWS CloudFormation stack that you created.