Manage TiProxy
This document describes how to enable, disable, view, and modify TiProxy.
Enable TiProxy
You can enable TiProxy for either a new cluster or an existing cluster in any TiDB node group.
Decide the size and number of TiProxy nodes
The size and number of TiProxy nodes depend on both the QPS and network bandwidth of your cluster. Network bandwidth is the sum of the client request and TiDB response bandwidth.
The following table shows the maximum QPS and network bandwidth of each TiProxy size.
The available TiProxy sizes are Small and Large. The available TiProxy node numbers are 2, 3, 6, 9, 12, 15, 18, 21, and 24. The default two small-sized TiProxy nodes can provide 60K QPS and 186 MiB/s network bandwidth. It is recommended that you reserve 20% of the QPS capacity to prevent high latency.
For example, if your cluster's maximum QPS is 100K and the maximum network bandwidth is 100 MiB/s, the size and number of TiProxy nodes mainly depend on the QPS. In this case, you can select 6 small-sized TiProxy nodes.
Enable TiProxy for a new cluster
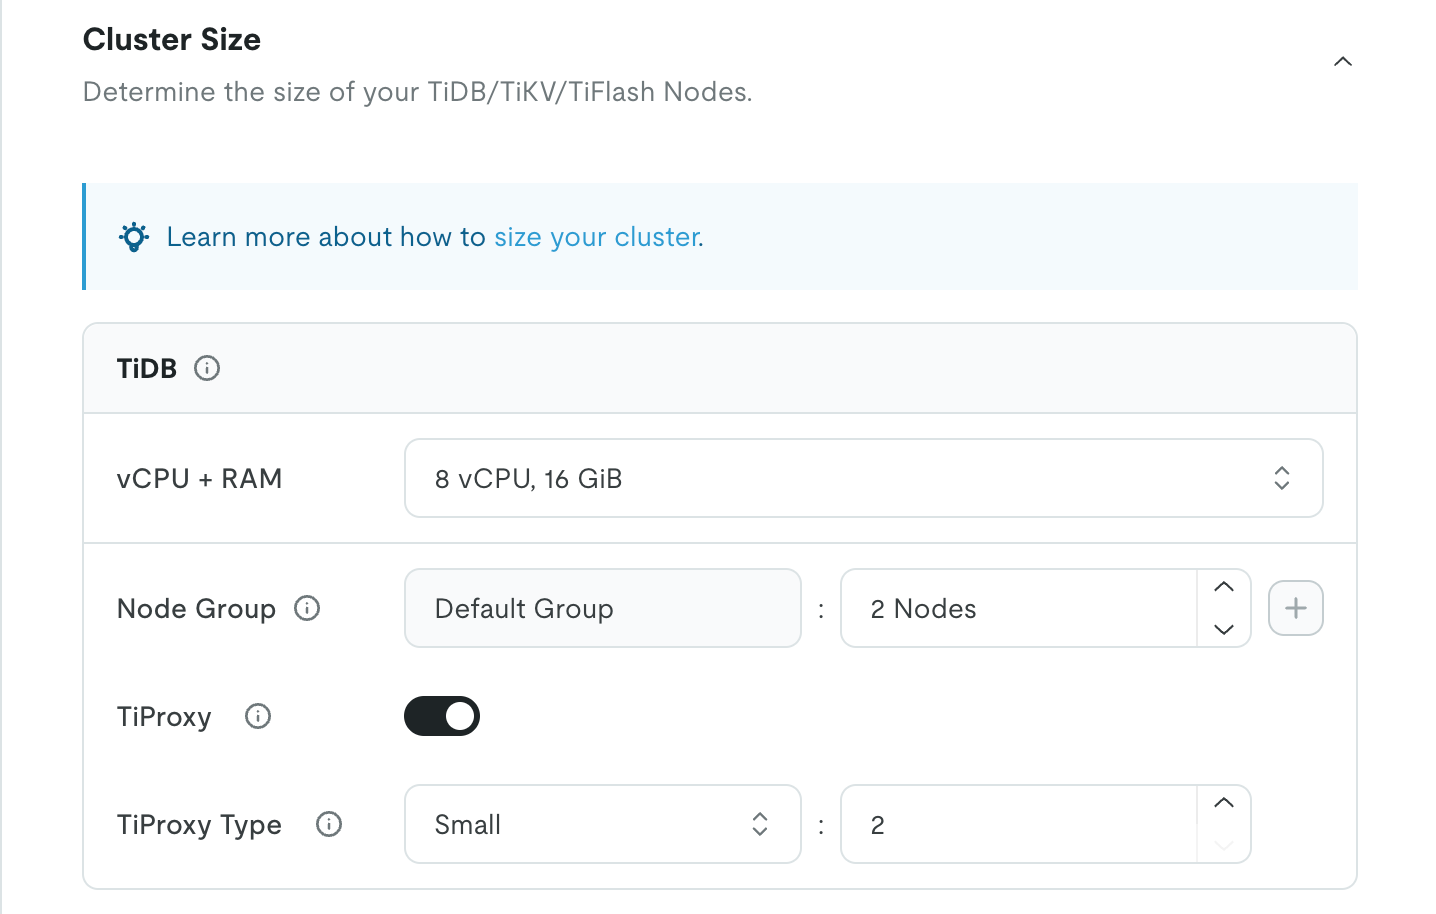
To enable TiProxy when creating a new cluster, click the TiProxy toggle and choose the TiProxy size and number.
Enable TiProxy for an existing cluster
To enable TiProxy for an existing cluster, perform the following steps:
- In the TiDB Cloud console, navigate to the Clusters page of your project, and then click the name of your target cluster to go to its overview page.
- Click ... in the upper-right corner, and click Modify in the drop-down menu. The Modify Cluster page is displayed.
- On the Modify Cluster page, click the TiProxy toggle and choose the TiProxy size and number.
Limitations and quotas
- There must be at least two TiDB nodes in a TiDB node group.
- The TiDB node size must be at least 4 vCPUs.
- The default maximum number of TiProxy nodes in an organization is
10. For more information, see Limitations and Quotas. - The version of the TiDB cluster must be v6.5.0 or later.
Disable TiProxy
To disable TiProxy, perform the following steps:
- In the TiDB Cloud console, navigate to the Clusters page of your project, and then click the name of your target cluster to go to its overview page.
- Click ... in the upper-right corner, and click Modify in the drop-down menu. The Modify Cluster page is displayed.
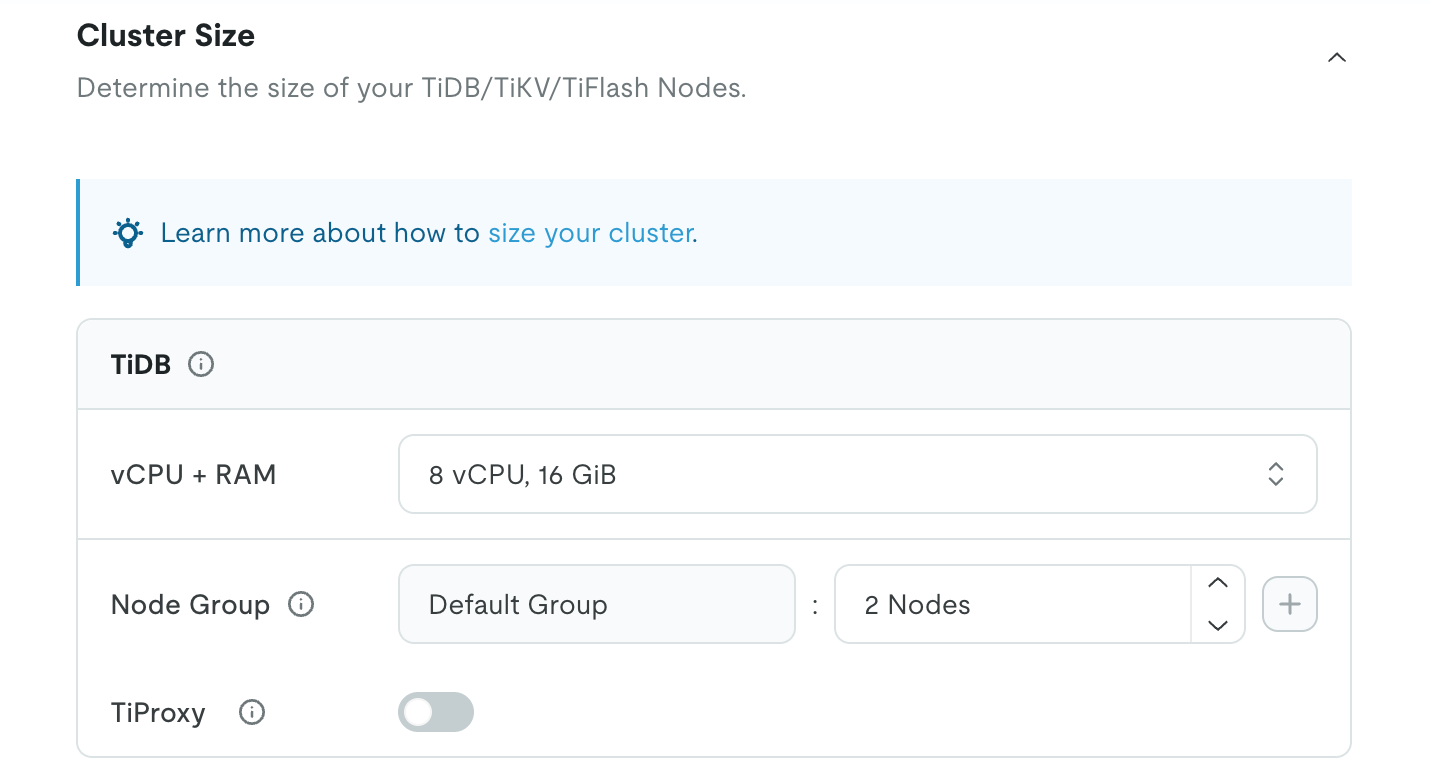
- On the Modify Cluster page, click the TiProxy toggle to disable TiProxy.
View TiProxy
View TiProxy topology
To view the TiProxy topology, perform the following steps:
- In the TiDB Cloud console, navigate to the Clusters page of your project, and then click the name of your target cluster to go to its overview page.
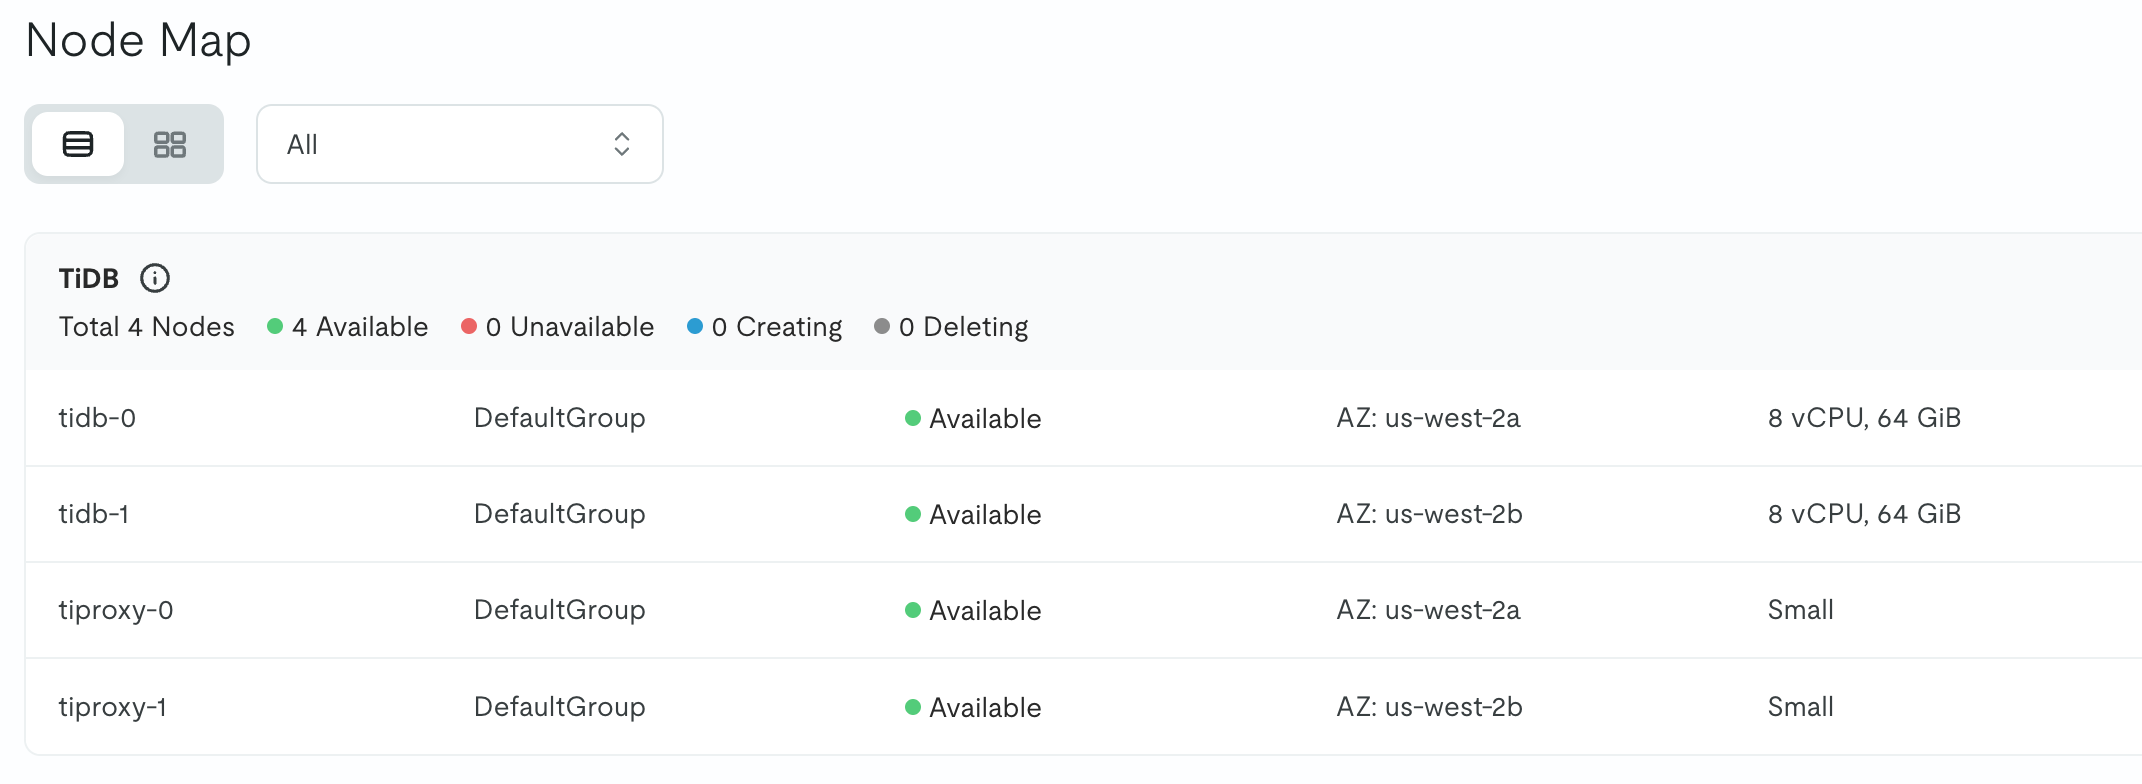
- In the left navigation pane, click Monitoring > Nodes. The Node Map page is displayed.
- On the Node Map page, the TiProxy topology is displayed in the TiDB pane.
View TiProxy metrics
To view TiProxy metrics, perform the following steps:
- In the TiDB Cloud console, navigate to the Clusters page of your project, and then click the name of your target cluster to go to its overview page.
- In the left navigation pane, click Monitoring > Metrics. The Metrics page is displayed.
- On the Metrics page, click Server and scroll down to the TiProxy-related metrics. To view TiProxy metrics for a specific TiDB node group, click TiDB Node Group View, select your TiDB node group, and then scroll down to the TiProxy-related metrics.
The metrics include:
- TiProxy CPU Usage: the CPU usage statistics of each TiProxy node. The upper limit is 100%. If the maximum CPU usage exceeds 80%, it is recommended that you scale out TiProxy.
- TiProxy Connections: the number of connections on each TiProxy node.
- TiProxy Throughput: the bytes transferred per second on each TiProxy node. If the maximum throughput reaches the maximum network bandwidth, it is recommended that you scale out TiProxy. For more information about the maximum network bandwidth, see Decide the size and number of TiProxy nodes.
- TiProxy Sessions Migration Reasons: the number of session migrations that happen every minute and the reason for them. For example, when TiDB scales in and TiProxy migrates sessions to other TiDB nodes, the reason is
status. For more migration reasons, see TiProxy Monitoring Metrics.
View TiProxy bills
To view TiProxy bills, perform the following steps:
- In the TiDB Cloud console, switch to your target organization using the combo box in the upper-left corner.
- In the left navigation pane, click Billing. On the Billing page, the Bills tab is displayed by default.
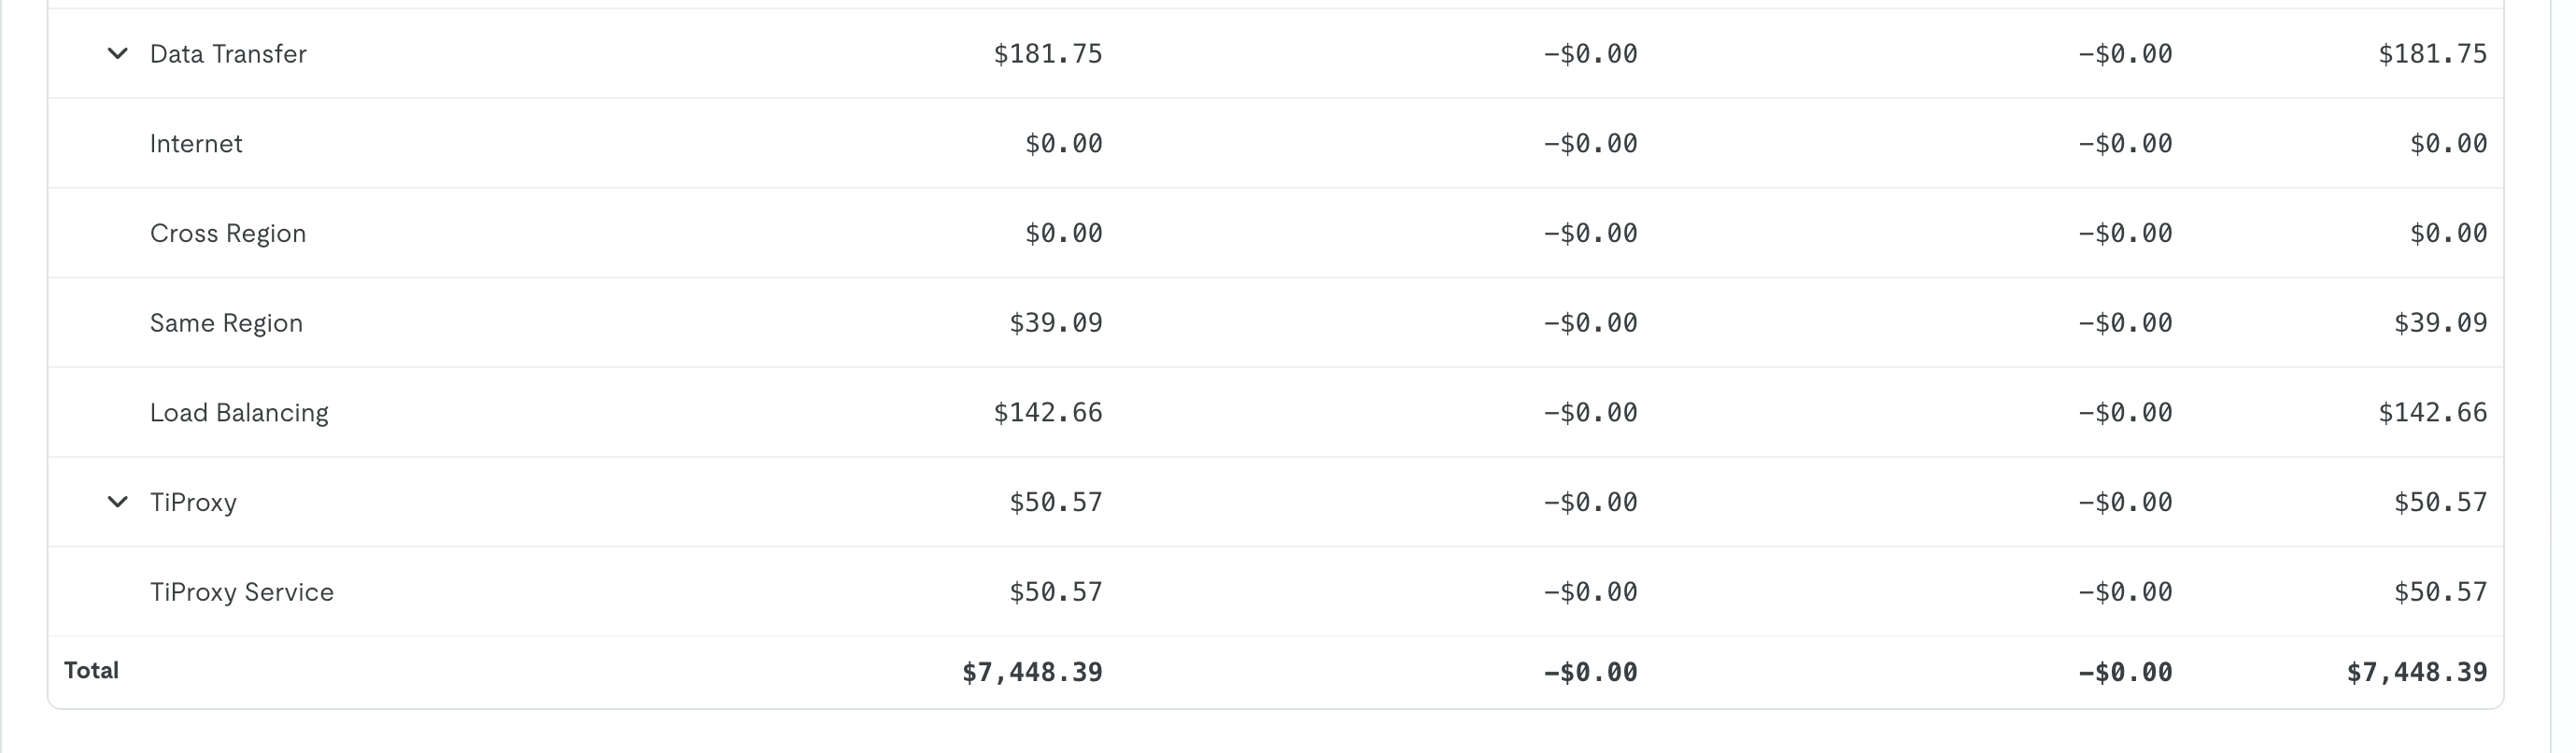
- In the Summary by Service section, TiProxy node cost is displayed under TiDB Dedicated, while TiProxy data transfer cost is included in Data Transfer > Same Region.
Modify TiProxy
To scale in or scale out TiProxy, perform the following steps:
- In the TiDB Cloud console, navigate to the Clusters page of your project, and then click the name of your target cluster to go to its overview page.
- Click ... in the upper-right corner, and click Modify in the drop-down menu. The Modify Cluster page is displayed.
- On the Modify Cluster page, modify the number of the TiProxy nodes.
Manage TiProxy in multiple TiDB node groups
When you have multiple TiDB node groups, each TiDB node group has its dedicated TiProxy group. TiProxy routes traffic to the TiDB nodes in the same TiDB node group to isolate computing resources. You can enable, disable, or modify TiProxy in each TiDB node group. However, the TiProxy size in all the TiDB node groups must be the same.