ギットポッド
ギットポッドを使用すると、ボタンまたはリンクをクリックするだけで、ブラウザで完全な開発環境を取得でき、コードをすぐに記述できます。
Gitpod は、コードを直接作成する開発環境向けのオープンソース Kubernetes アプリケーション (GitHub リポジトリ アドレス: https://github.com/gitpod-io/gitpod ) であり、タスクごとに新しい自動化された開発環境をクラウドで数秒で起動します。開発環境をコードとして記述し、ブラウザまたはデスクトップ IDE から直接、リモートおよびクラウドベースのインスタント開発環境を開始できます。
クイックスタート
TiDB アプリケーション開発用のサンプル コード リポジトリpingcap-inc/tidb-example-javaをフォークします。
ブラウザーのアドレス バーで、サンプル コード リポジトリの URL の前に
https://gitpod.io/#を付けて、Gitpod ワークスペースを開始します。たとえば、
https://gitpod.io/#https://github.com/pingcap-inc/tidb-example-javaです。URL で環境変数を構成できます。たとえば、
https://gitpod.io/#targetFile=spring-jpa-hibernate_Makefile,targetMode=spring-jpa-hibernate/https://github.com/pingcap-inc/tidb-example-javaです。
リストされているプロバイダーのいずれかを使用してログインし、ワークスペースを開始します。たとえば、
Githubです。
デフォルトの Gitpod 構成と環境を使用する
クイックスタートステップを完了した後、Gitpod がワークスペースをセットアップするのにしばらく時間がかかります。
例としてスプリング ブート Webアプリケーションを取り上げます。 https://gitpod.io/#targetFile=spring-jpa-hibernate_Makefile,targetMode=spring-jpa-hibernate/https://github.com/pingcap-inc/tidb-example-java URL で新しいワークスペースを作成できます。
その後、次のようなページが表示されます。
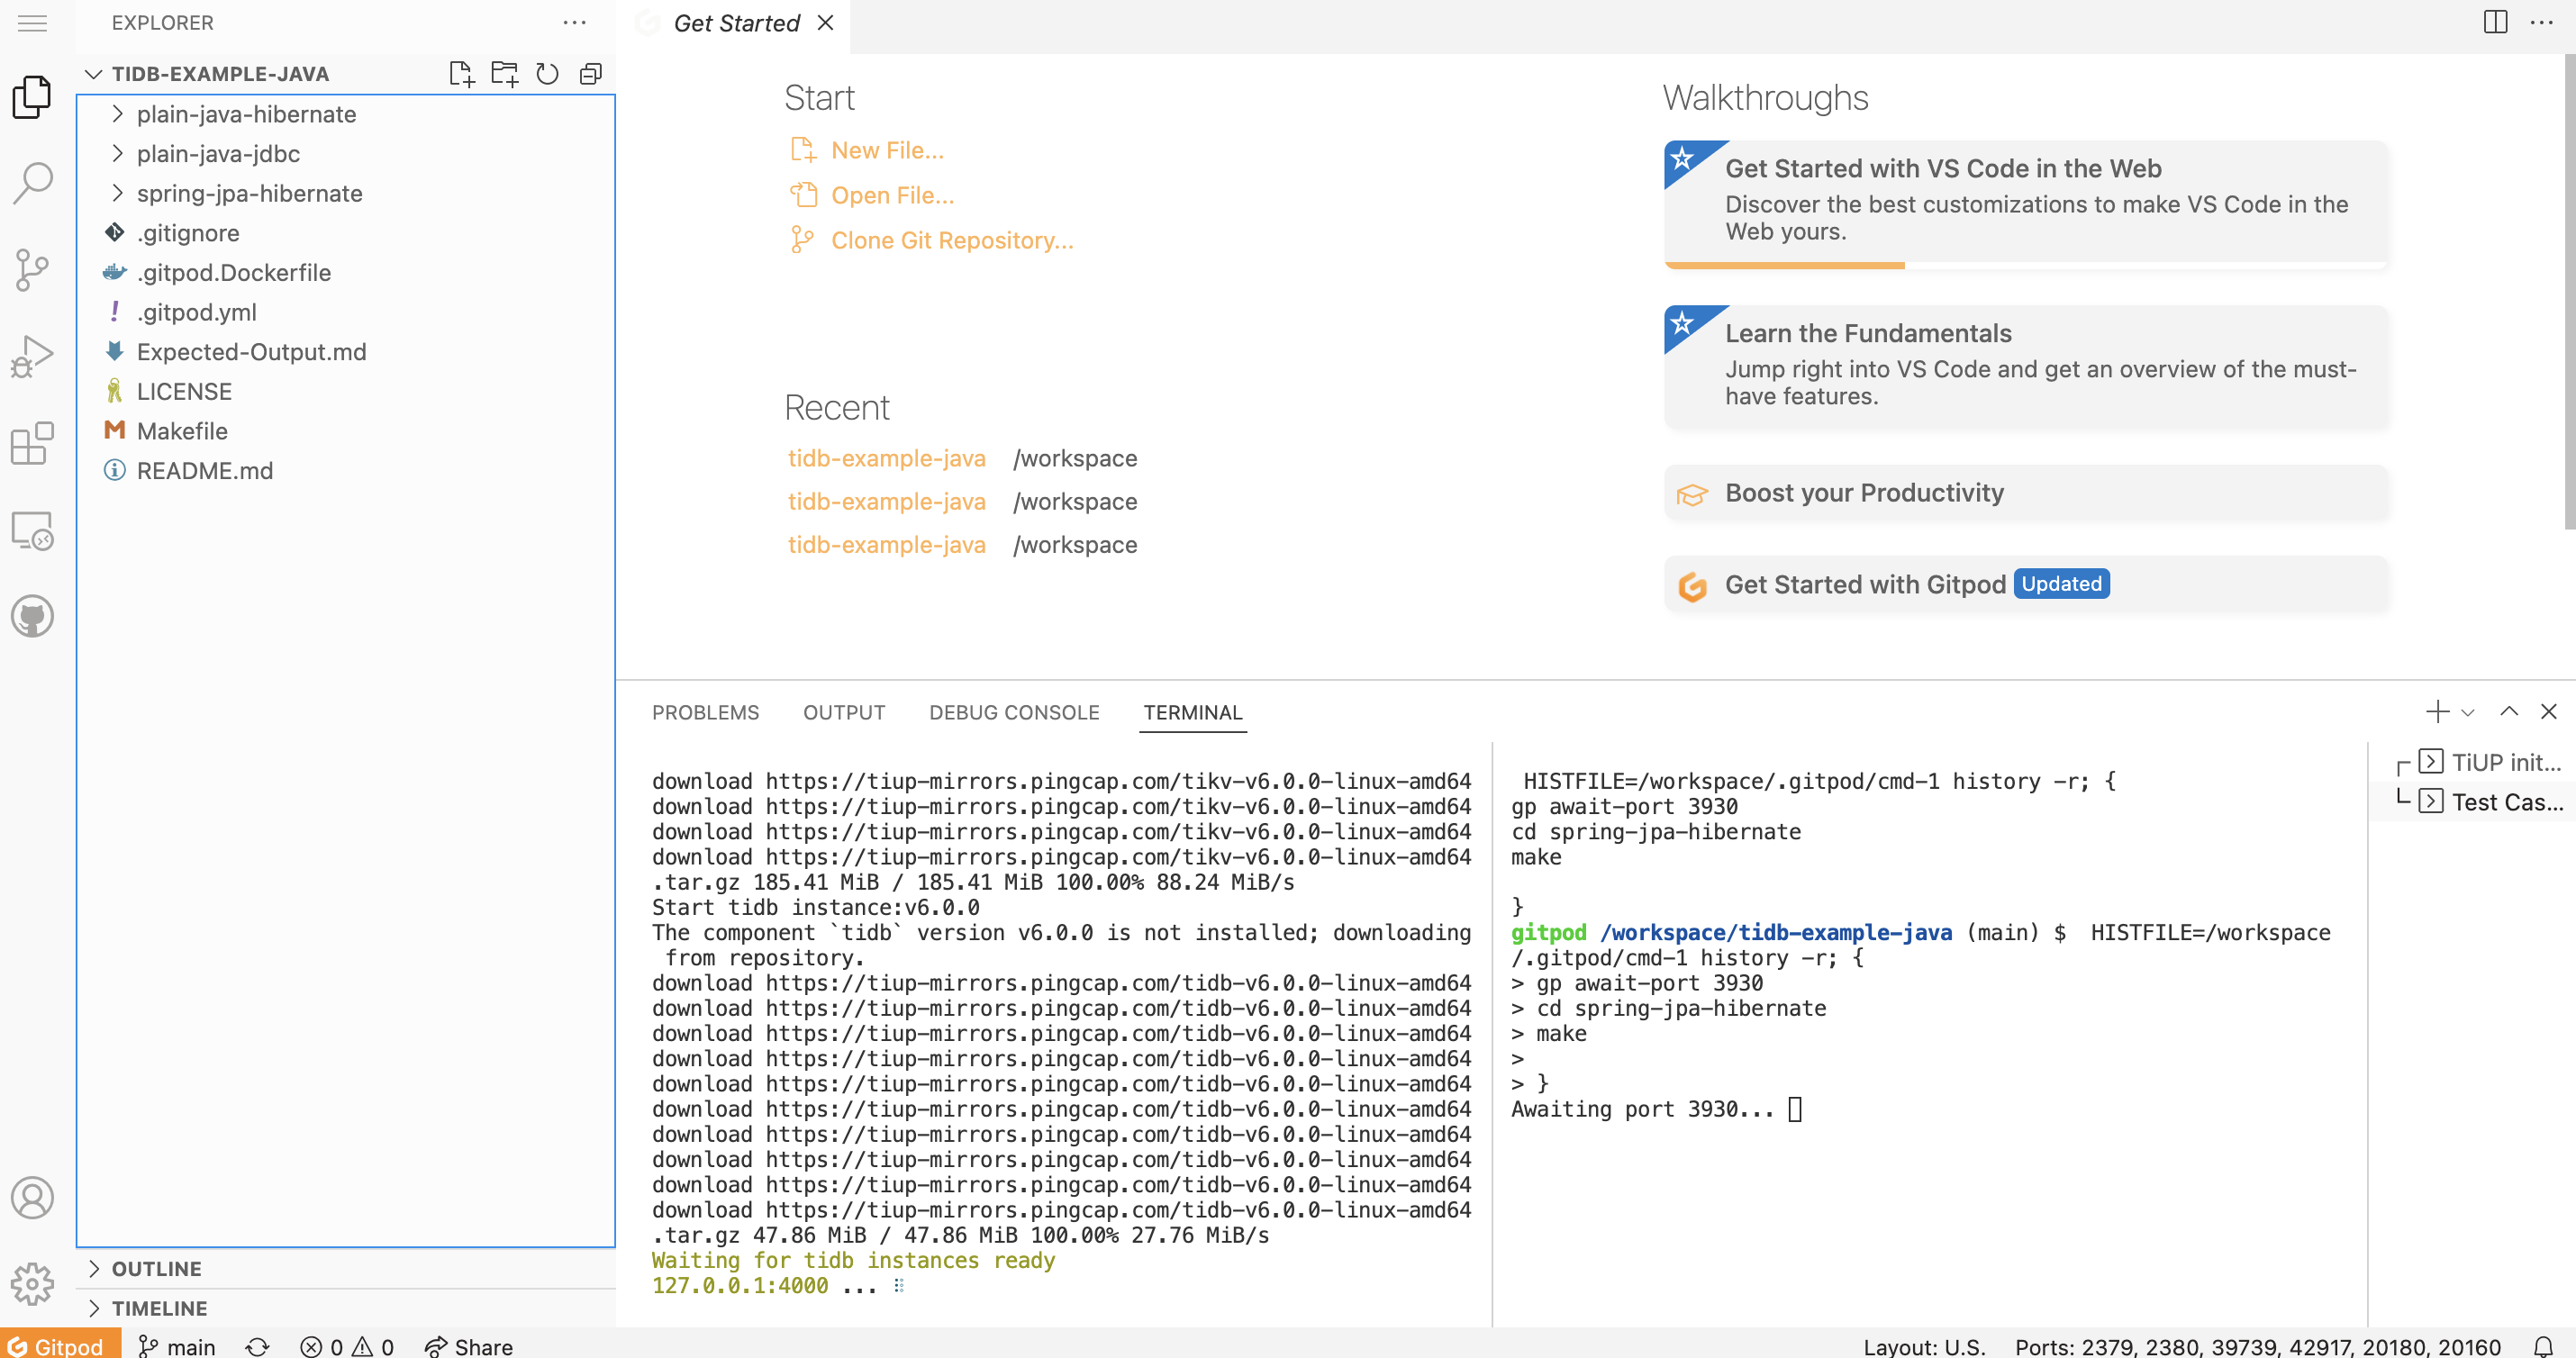
ページ内のこのシナリオでは、 TiUPを使用して TiDB Playground を構築します。ターミナルエリアの左側で進行状況を確認できます。
TiDB Playground の準備が整うと、別のSpring JPA Hibernateのタスクが実行されます。ターミナルエリアの右側で進行状況を確認できます。
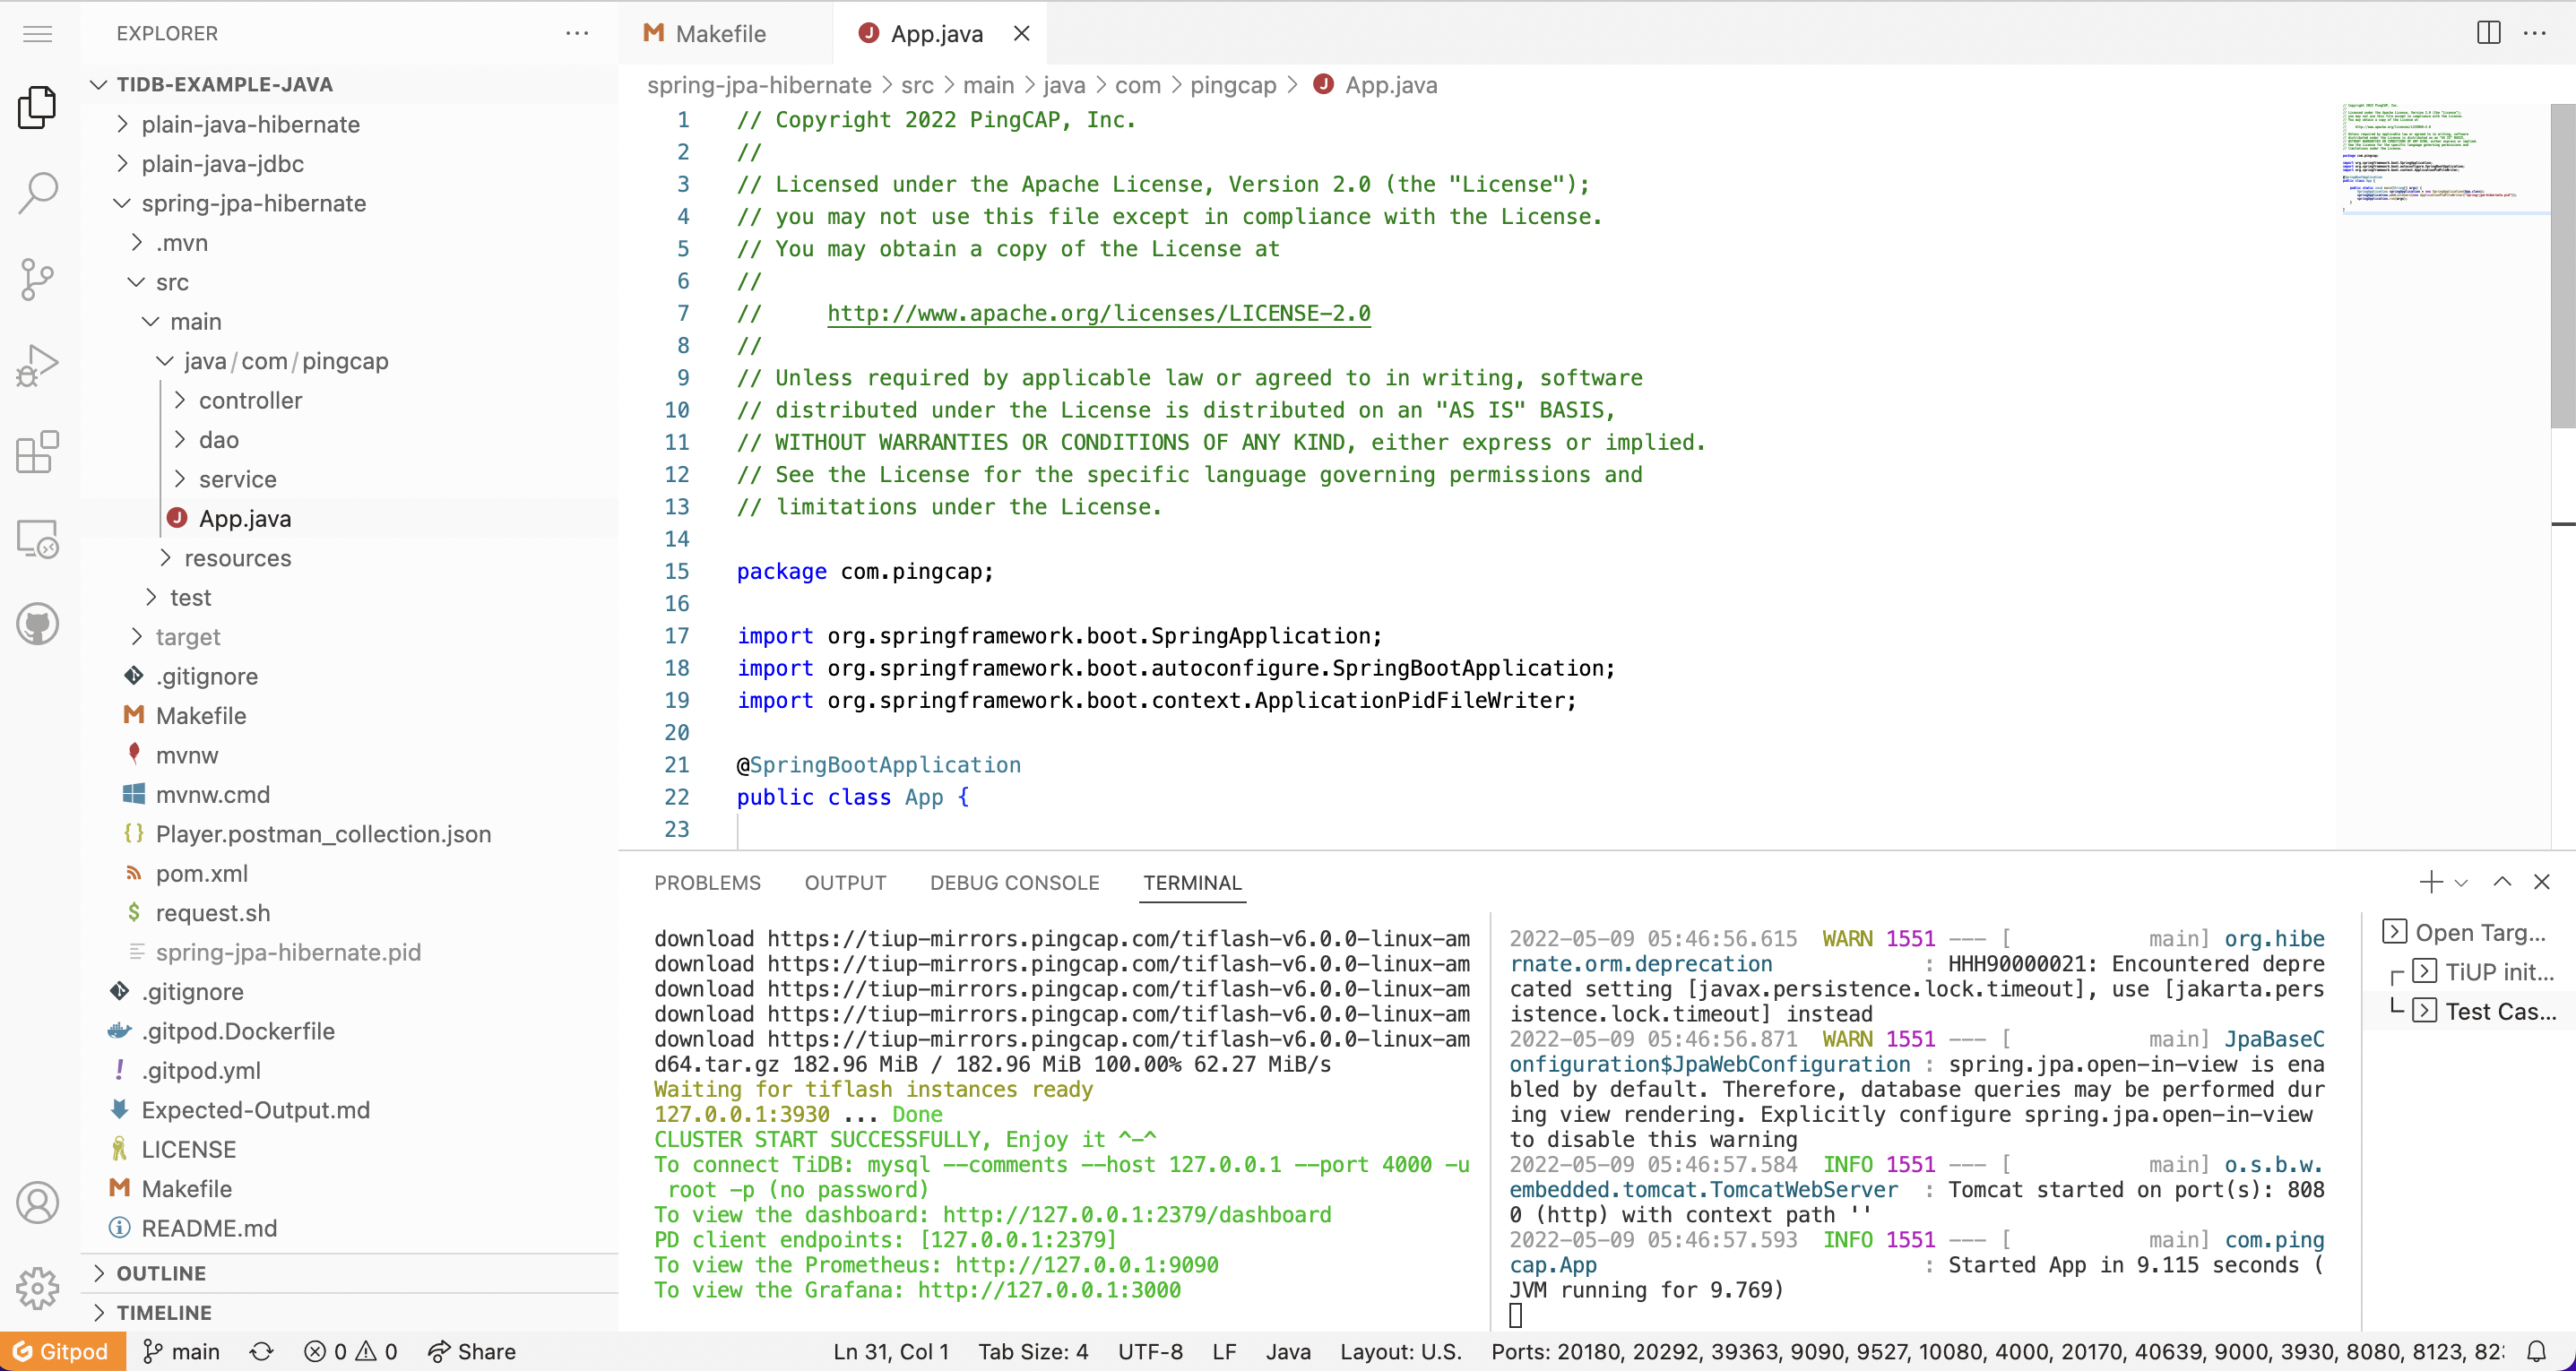
これらのタスクがすべて完了すると、次のようなページが表示されます。このページで、左側のナビゲーション ペインのREMOTE EXPLORER領域を確認し (Gitpod は URL ベースのポート転送をサポートしています)、ポート8080の URL を見つけます。

HTTP リクエストの送信で API をテストできます。 http://localhost:8080 URL をREMOTE EXPLORER領域で見つけた URL に置き換えてください。
カスタム Gitpod 構成と Docker イメージの使用
Gitpod 構成をカスタマイズする
example.gitpod.ymlを参照して、プロジェクトのルート ディレクトリに.gitpod. ymlファイルを作成し、Gitpod ワークスペースを構成します。
# This configuration file was automatically generated by Gitpod.
# Please adjust to your needs (see https://www.gitpod.io/docs/config-gitpod-file)
# and commit this file to your remote git repository to share the goodness with others.

# image:
#   file: .gitpod.Dockerfile

tasks:
  - name: Open Target File
    command: |
      if [ -n "$targetFile" ]; then code ${targetFile//[_]//};  fi
  - name: TiUP init playground
    command: |
      $HOME/.tiup/bin/tiup playground
  - name: Test Case
    openMode: split-right
    init: echo "*** Waiting for TiUP Playground Ready! ***"
    command: |
      gp await-port 3930
      if [ "$targetMode" == "plain-java-jdbc" ]
      then
        cd plain-java-jdbc
        code src/main/resources/dbinit.sql
        code src/main/java/com/pingcap/JDBCExample.java
        make mysql
      elif [ "$targetMode" == "plain-java-hibernate" ]
      then
        cd plain-java-hibernate
        make
      elif [ "$targetMode" == "spring-jpa-hibernate" ]
      then
        cd spring-jpa-hibernate
        make
      fi
ports:
  - port: 8080
    visibility: public
  - port: 4000
    visibility: public
  - port: 2379-36663
    onOpen: ignore
Gitpod Docker イメージをカスタマイズする
デフォルトでは、Gitpod は Workspace-Full という名前の標準の Docker イメージをワークスペースのベースとして使用します。このデフォルト イメージから起動されたワークスペースには、Docker、Go、 Java、Node.js、C/C++、Python、Ruby、Rust、PHP、およびHomebrew、Tailscale、Nginx などのツールがプリインストールされています。
パブリック Docker イメージまたは Dockerfile を使用して、プロジェクトに必要な依存関係をインストールすることもできます。
たとえば、次のように Dockerfile ( 例.gitpod.Dockerfileも参照) を使用できます。
FROM gitpod/workspace-java-17

RUN sudo apt install mysql-client -y
RUN curl --proto '=https' --tlsv1.2 -sSf https://tiup-mirrors.pingcap.com/install.sh | sh
次に、 .gitpod.ymlを更新する必要があります。
# This configuration file was automatically generated by Gitpod.
# Please adjust to your needs (see https://www.gitpod.io/docs/config-gitpod-file)
# and commit this file to your remote git repository to share the goodness with others.

image:
  # Import your Dockerfile here.
  file: .gitpod.Dockerfile

tasks:
  - name: Open Target File
    command: |
      if [ -n "$targetFile" ]; then code ${targetFile//[_]//};  fi
  - name: TiUP init playground
    command: |
      $HOME/.tiup/bin/tiup playground
  - name: Test Case
    openMode: split-right
    init: echo "*** Waiting for TiUP Playground Ready! ***"
    command: |
      gp await-port 3930
      if [ "$targetMode" == "plain-java-jdbc" ]
      then
        cd plain-java-jdbc
        code src/main/resources/dbinit.sql
        code src/main/java/com/pingcap/JDBCExample.java
        make mysql
      elif [ "$targetMode" == "plain-java-hibernate" ]
      then
        cd plain-java-hibernate
        make
      elif [ "$targetMode" == "spring-jpa-hibernate" ]
      then
        cd spring-jpa-hibernate
        make
      fi
ports:
  - port: 8080
    visibility: public
  - port: 4000
    visibility: public
  - port: 2379-36663
    onOpen: ignore
変更を適用
.gitpod.ymlファイルの構成が完了したら、対応する GitHub リポジトリで最新のコードが利用可能であることを確認してください。
https://gitpod.io/#<YOUR_REPO_URL>にアクセスして、最新のコードが適用された新しい Gitpod ワークスペースを作成します。
確立されたすべてのワークスペースについては、 https://gitpod.io/workspacesにアクセスしてください。
まとめ
Gitpod は、完全で自動化された事前構成済みのクラウドネイティブ開発環境を提供します。ローカル構成なしで、ブラウザーでコードを直接開発、実行、およびテストできます。