集成 TiDB 与 ProxySQL
本文档提供了 ProxySQL 的高层次介绍,描述了如何在开发环境和生产环境中将 ProxySQL 与 TiDB 集成,并通过查询路由场景演示了关键的集成优势。
如果你希望进一步了解 TiDB 和 ProxySQL,可以参考以下链接:
什么是 ProxySQL?
ProxySQL 是一个高性能的开源 SQL 代理。它拥有灵活的架构,可以以多种方式部署,非常适合各种使用场景。例如,ProxySQL 可用于通过缓存频繁访问的数据来提升性能。
ProxySQL 从零开始设计,目标是快速、高效且易于使用。它完全兼容 MySQL,并支持你期望从高质量 SQL 代理获得的所有功能。此外,ProxySQL 还具备许多独特特性,使其成为广泛应用场景的理想选择。
为什么要集成 ProxySQL?
- ProxySQL 可以通过减少与 TiDB 交互时的延时来提升应用性能。无论你构建的是基于 Lambda 等无服务器函数的可扩展应用,工作负载不可预测且可能激增,还是需要执行大量数据加载查询的应用,都可以通过 ProxySQL 的强大功能(如连接池和缓存常用查询)获得直接收益。
- ProxySQL 可以作为应用安全的额外防护层,利用查询规则(ProxySQL 提供的易于配置的功能)防御 SQL 注入等 SQL 漏洞。
- 由于 ProxySQL 和 TiDB 都是开源项目,你可以获得零厂商锁定的优势。
部署架构
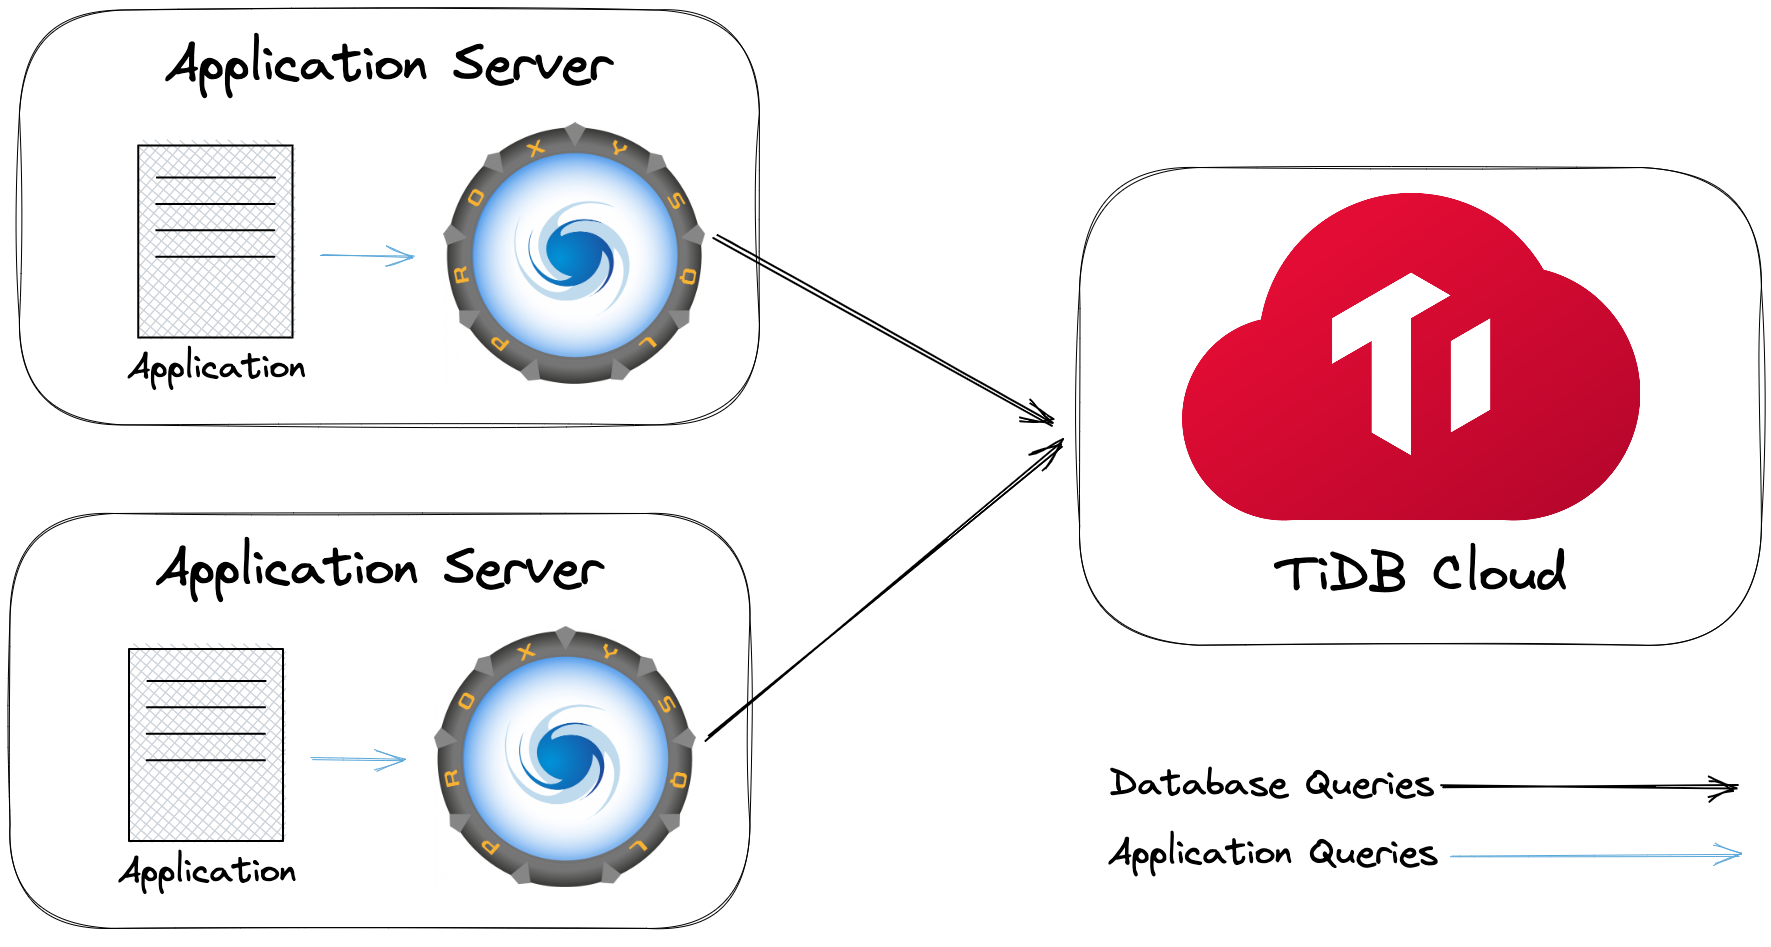
将 ProxySQL 与 TiDB 部署的最直接方式,是将 ProxySQL 作为应用层与 TiDB 之间的独立中间层。然而,这种方式无法保证扩展性和容错性,并且由于网络跳转会增加额外延时。为避免这些问题,另一种部署架构是将 ProxySQL 作为 sidecar 部署,如下所示:
开发环境
本节介绍如何在开发环境中将 TiDB 与 ProxySQL 集成。在开始 ProxySQL 集成前,请根据 TiDB 集群类型选择以下任一方案,并确保已满足所有前置条件。
前置条件
根据你选择的方案,可能需要以下软件包:
你可以按照以下安装说明操作:
下载并启动 Docker(Docker Desktop 已包含 Docker Compose)。
运行以下命令安装 Python 和
mysql-client:/bin/bash -c "$(curl -fsSL https://raw.githubusercontent.com/Homebrew/install/HEAD/install.sh)" brew install python mysql-client
curl -fsSL https://get.docker.com | bash -s docker
yum install -y git python39 docker-ce docker-ce-cli containerd.io docker-compose-plugin mysql
systemctl start docker
下载并安装 Git。
从 Git Windows Download 页面下载 64-bit Git for Windows Setup 安装包。
按照安装向导安装 Git 包。你可以多次点击 Next 使用默认安装设置。

下载并安装 MySQL Shell。
从 MySQL Community Server Download 页面下载 MySQL Installer 的 ZIP 文件。
解压文件,在
bin文件夹中找到mysql.exe。你需要将bin文件夹的路径添加到系统变量,并在 Git Bash 中设置到PATH变量:echo 'export PATH="(your bin folder)":$PATH' >>~/.bash_profile source ~/.bash_profile例如:
echo 'export PATH="/c/Program Files (x86)/mysql-8.0.31-winx64/bin":$PATH' >>~/.bash_profile
source ~/.bash_profile
下载并安装 Docker。
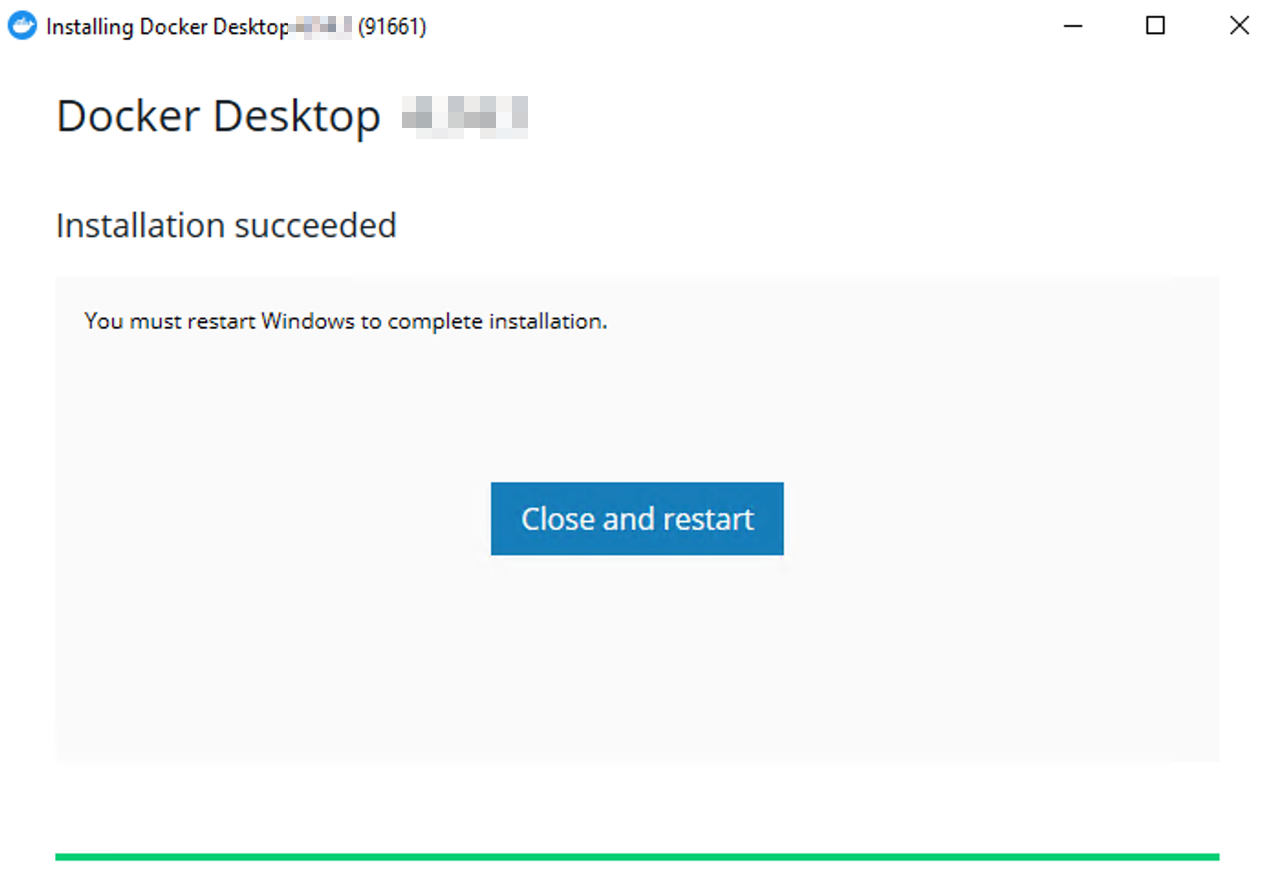
从 Docker Download 页面下载 Docker Desktop 安装包。
双击安装包运行。安装完成后会提示重启。
从 Python Download 页面下载最新版 Python 3 安装包并运行。
方案 1:集成 TiDB Cloud 与 ProxySQL
在本集成方案中,你将使用 ProxySQL Docker 镜像 和 TiDB Cloud Starter 集群。以下步骤会将 ProxySQL 设置在 16033 端口,请确保该端口可用。
步骤 1. 创建 TiDB Cloud Starter 集群
创建一个免费的 TiDB Cloud Starter 集群。记住你为集群设置的 root 密码。
获取你的集群主机名、端口和用户名,供后续使用。
- 在 Clusters 页面,点击你的集群名称进入集群概览页。
- 在集群概览页,找到 Connection 面板,复制
Endpoint、Port和User字段,其中Endpoint即为集群主机名。
步骤 2. 生成 ProxySQL 配置文件
克隆 TiDB 与 ProxySQL 的集成示例代码仓库:
git clone https://github.com/pingcap-inc/tidb-proxysql-integration.gitgit clone https://github.com/pingcap-inc/tidb-proxysql-integration.gitgit clone https://github.com/pingcap-inc/tidb-proxysql-integration.git进入
tidb-cloud-connect文件夹:cd tidb-proxysql-integration/example/tidb-cloud-connectcd tidb-proxysql-integration/example/tidb-cloud-connectcd tidb-proxysql-integration/example/tidb-cloud-connect运行
proxysql-config.py生成 ProxySQL 配置文件:python3 proxysql-config.pypython3 proxysql-config.pypython proxysql-config.py按提示输入你的集群 endpoint 作为
Serverless Tier Host,然后输入集群的用户名和密码。以下为示例输出。你会看到当前
tidb-cloud-connect文件夹下生成了三个配置文件。[Begin] generating configuration files.. tidb-cloud-connect.cnf generated successfully. proxysql-prepare.sql generated successfully. proxysql-connect.py generated successfully. [End] all files generated successfully and placed in the current folder.
步骤 3. 配置 ProxySQL
启动 Docker。如果 Docker 已启动可跳过此步骤:
双击已安装的 Docker 图标启动。
systemctl start docker双击已安装的 Docker 图标启动。
拉取 ProxySQL 镜像并在后台启动 ProxySQL 容器:
docker compose up -ddocker compose up -ddocker compose up -d通过以下命令集成 ProxySQL,在 ProxySQL Admin Interface 内执行
proxysql-prepare.sql:docker compose exec proxysql sh -c "mysql -uadmin -padmin -h127.0.0.1 -P6032 < ./proxysql-prepare.sql"docker compose exec proxysql sh -c "mysql -uadmin -padmin -h127.0.0.1 -P6032 < ./proxysql-prepare.sql"docker compose exec proxysql sh -c "mysql -uadmin -padmin -h127.0.0.1 -P6032 < ./proxysql-prepare.sql"以下为示例输出。你会看到输出中显示了你的集群主机名,说明 ProxySQL 与 TiDB Cloud Starter 集群的连通性已建立。
*************************** 1. row ***************************
    hostgroup_id: 0
        hostname: gateway01.us-west-2.prod.aws.tidbcloud.com
            port: 4000
        gtid_port: 0
            status: ONLINE
            weight: 1
        compression: 0
    max_connections: 1000
max_replication_lag: 0
            use_ssl: 1
    max_latency_ms: 0
            comment:
步骤 4. 通过 ProxySQL 连接 TiDB 集群
运行
proxysql-connect.py连接 TiDB 集群。该脚本会自动启动 MySQL 客户端,并使用你在步骤 2中指定的用户名和密码进行连接。python3 proxysql-connect.pypython3 proxysql-connect.pypython proxysql-connect.py连接到 TiDB 集群后,可以使用以下 SQL 语句验证连接:
SELECT VERSION();如果显示 TiDB 版本,说明你已通过 ProxySQL 成功连接到 TiDB Cloud Starter 集群。随时输入
quit并按 enter 退出 MySQL 客户端。停止并移除容器,并返回上级目录,运行以下命令:
docker compose down
cd -
docker compose down cd -docker compose down cd -
方案 2:集成 TiDB(自托管)与 ProxySQL
在本集成方案中,你将使用 TiDB 和 ProxySQL 的 Docker 镜像搭建环境。你也可以根据兴趣尝试其他 TiDB(自托管)安装方式。
以下步骤会将 ProxySQL 和 TiDB 分别设置在 6033 和 4000 端口,请确保这些端口可用。
启动 Docker。如果 Docker 已启动可跳过此步骤:
双击已安装的 Docker 图标启动。
systemctl start docker双击已安装的 Docker 图标启动。
克隆 TiDB 与 ProxySQL 的集成示例代码仓库:
git clone https://github.com/pingcap-inc/tidb-proxysql-integration.gitgit clone https://github.com/pingcap-inc/tidb-proxysql-integration.gitgit clone https://github.com/pingcap-inc/tidb-proxysql-integration.git拉取 ProxySQL 和 TiDB 的最新镜像:
cd tidb-proxysql-integration && docker compose pullcd tidb-proxysql-integration && docker compose pullcd tidb-proxysql-integration && docker compose pull启动包含 TiDB 和 ProxySQL 的集成环境(以容器方式运行):
docker compose up -ddocker compose up -ddocker compose up -d登录 ProxySQL
6033端口时,可以使用root用户名和空密码。通过 ProxySQL 连接 TiDB:
mysql -u root -h 127.0.0.1 -P 6033mysql -u root -h 127.0.0.1 -P 6033mysql -u root -h 127.0.0.1 -P 6033连接到 TiDB 集群后,可以使用以下 SQL 语句验证连接:
SELECT VERSION();如果显示 TiDB 版本,说明你已通过 ProxySQL 成功连接到 TiDB 容器。
停止并移除容器,并返回上级目录,运行以下命令:
docker compose down
cd -
docker compose down cd -docker compose down cd -
生产环境
在生产环境中,建议你直接使用 TiDB Cloud Dedicated,以获得全托管体验。
前置条件
下载并安装 MySQL 客户端。例如 MySQL Shell。
在 CentOS 上集成 TiDB Cloud 与 ProxySQL
ProxySQL 可在多种平台上安装。以下以 CentOS 为例。
完整支持平台及对应版本要求,参见 ProxySQL documentation。
步骤 1. 创建 TiDB Cloud Dedicated 集群
详细步骤参见 Create a TiDB Cluster。
步骤 2. 安装 ProxySQL
将 ProxySQL 添加到 YUM 仓库:
cat > /etc/yum.repos.d/proxysql.repo << EOF [proxysql] name=ProxySQL YUM repository baseurl=https://repo.proxysql.com/ProxySQL/proxysql-2.4.x/centos/\$releasever gpgcheck=1 gpgkey=https://repo.proxysql.com/ProxySQL/proxysql-2.4.x/repo_pub_key EOF安装 ProxySQL:
yum install -y proxysql启动 ProxySQL:
systemctl start proxysql
更多 ProxySQL 支持平台及安装方法,参见 ProxySQL README 或 ProxySQL installation documentation。
步骤 3. 配置 ProxySQL
要将 ProxySQL 作为 TiDB 的代理,需要对 ProxySQL 进行配置。你可以选择在 ProxySQL Admin Interface 内执行 SQL 语句(推荐)或使用配置文件。
方案 1:通过 Admin Interface 配置 ProxySQL
通过标准 ProxySQL Admin interface 重新配置 ProxySQL 内部,可通过任意 MySQL 命令行客户端访问(默认端口为
6032):mysql -u admin -padmin -h 127.0.0.1 -P6032 --prompt 'ProxySQL Admin> '上述操作会进入 ProxySQL 管理提示符。
配置要使用的 TiDB 集群,可以向 ProxySQL 添加一个或多个 TiDB 集群。以下语句以添加一个 TiDB Cloud Dedicated 集群为例。你需要将
<tidb cloud dedicated cluster host>和<tidb cloud dedicated cluster port>替换为你的 TiDB Cloud endpoint 和端口(默认端口为4000)。INSERT INTO mysql_servers(hostgroup_id, hostname, port) VALUES ( 0, '<tidb cloud dedicated cluster host>', <tidb cloud dedicated cluster port> ); LOAD mysql servers TO runtime; SAVE mysql servers TO DISK;配置代理登录用户,确保用户在 TiDB 集群上拥有适当权限。以下语句中,需将 'tidb cloud dedicated cluster username' 和 'tidb cloud dedicated cluster password' 替换为实际的集群用户名和密码。
INSERT INTO mysql_users( username, password, active, default_hostgroup, transaction_persistent ) VALUES ( '<tidb cloud dedicated cluster username>', '<tidb cloud dedicated cluster password>', 1, 0, 1 ); LOAD mysql users TO runtime; SAVE mysql users TO DISK;
方案 2:通过配置文件配置 ProxySQL
此方案仅作为配置 ProxySQL 的备选方法。更多信息参见 Configuring ProxySQL through the config file。
删除现有 SQLite 数据库(配置会存储于此):
rm /var/lib/proxysql/proxysql.db按需修改
/etc/proxysql.cnf配置文件。例如:mysql_servers: ( { address="<tidb cloud dedicated cluster host>" port=<tidb cloud dedicated cluster port> hostgroup=0 max_connections=2000 } ) mysql_users: ( { username = "<tidb cloud dedicated cluster username>" password = "<tidb cloud dedicated cluster password>" default_hostgroup = 0 max_connections = 1000 default_schema = "test" active = 1 transaction_persistent = 1 } )上述示例中:
address和port:指定 TiDB Cloud 集群的 endpoint 和端口。username和password:指定 TiDB Cloud 集群的用户名和密码。
重启 ProxySQL:
systemctl restart proxysql重启后,SQLite 数据库会自动创建。
典型场景
本节以查询路由为例,展示集成 ProxySQL 与 TiDB 后可获得的一些优势。
查询规则
数据库可能因高并发、错误代码或恶意垃圾流量而过载。通过 ProxySQL 的查询规则,你可以快速有效地应对这些问题,实现查询的重定向、重写或拒绝。
克隆 TiDB 与 ProxySQL 的集成示例代码仓库。如果之前已克隆可跳过此步骤。
git clone https://github.com/pingcap-inc/tidb-proxysql-integration.gitgit clone https://github.com/pingcap-inc/tidb-proxysql-integration.gitgit clone https://github.com/pingcap-inc/tidb-proxysql-integration.git进入 ProxySQL 规则示例目录:
cd tidb-proxysql-integration/example/proxy-rule-admin-interfacecd tidb-proxysql-integration/example/proxy-rule-admin-interfacecd tidb-proxysql-integration/example/proxy-rule-admin-interface运行以下命令,启动两个 TiDB 容器和一个 ProxySQL 容器:
docker compose up -ddocker compose up -ddocker compose up -d如果一切正常,将启动以下容器:
- 两个 TiDB 集群的 Docker 容器,分别暴露端口
4001、4002 - 一个 ProxySQL Docker 容器,暴露端口
6034
- 两个 TiDB 集群的 Docker 容器,分别暴露端口
在两个 TiDB 容器中,使用
mysql创建表并插入不同数据('tidb-server01-port-4001'、'tidb-server02-port-4002'),以便区分容器。mysql -u root -h 127.0.0.1 -P 4001 << EOF DROP TABLE IF EXISTS test.tidb_server; CREATE TABLE test.tidb_server (server_name VARCHAR(255)); INSERT INTO test.tidb_server (server_name) VALUES ('tidb-server01-port-4001'); EOF mysql -u root -h 127.0.0.1 -P 4002 << EOF DROP TABLE IF EXISTS test.tidb_server; CREATE TABLE test.tidb_server (server_name VARCHAR(255)); INSERT INTO test.tidb_server (server_name) VALUES ('tidb-server02-port-4002'); EOFmysql -u root -h 127.0.0.1 -P 4001 << EOF DROP TABLE IF EXISTS test.tidb_server; CREATE TABLE test.tidb_server (server_name VARCHAR(255)); INSERT INTO test.tidb_server (server_name) VALUES ('tidb-server01-port-4001'); EOF mysql -u root -h 127.0.0.1 -P 4002 << EOF DROP TABLE IF EXISTS test.tidb_server; CREATE TABLE test.tidb_server (server_name VARCHAR(255)); INSERT INTO test.tidb_server (server_name) VALUES ('tidb-server02-port-4002'); EOFmysql -u root -h 127.0.0.1 -P 4001 << EOF DROP TABLE IF EXISTS test.tidb_server; CREATE TABLE test.tidb_server (server_name VARCHAR(255)); INSERT INTO test.tidb_server (server_name) VALUES ('tidb-server01-port-4001'); EOF mysql -u root -h 127.0.0.1 -P 4002 << EOF DROP TABLE IF EXISTS test.tidb_server; CREATE TABLE test.tidb_server (server_name VARCHAR(255)); INSERT INTO test.tidb_server (server_name) VALUES ('tidb-server02-port-4002'); EOF运行以下命令配置 ProxySQL,在 ProxySQL Admin Interface 内执行
proxysql-prepare.sql,建立 TiDB 容器与 ProxySQL 的代理连接。docker compose exec proxysql sh -c "mysql -uadmin -padmin -h127.0.0.1 -P6032 < ./proxysql-prepare.sql"docker compose exec proxysql sh -c "mysql -uadmin -padmin -h127.0.0.1 -P6032 < ./proxysql-prepare.sql"docker compose exec proxysql sh -c "mysql -uadmin -padmin -h127.0.0.1 -P6032 < ./proxysql-prepare.sql"以下是 ProxySQL 匹配查询规则的补充说明:
- ProxySQL 按
rule_id的正序逐条匹配规则。 ^符号匹配 SQL 语句开头,$匹配结尾。
更多 ProxySQL 正则表达式与模式匹配内容,参见 ProxySQL 文档中的 mysql-query_processor_regex。
全部参数列表参见 mysql_query_rules。
- ProxySQL 按
验证配置并检查查询规则是否生效。
以
root用户登录 ProxySQL MySQL Interface:mysql -u root -h 127.0.0.1 -P 6034mysql -u root -h 127.0.0.1 -P 6034mysql -u root -h 127.0.0.1 -P 6034执行以下 SQL 语句:
执行
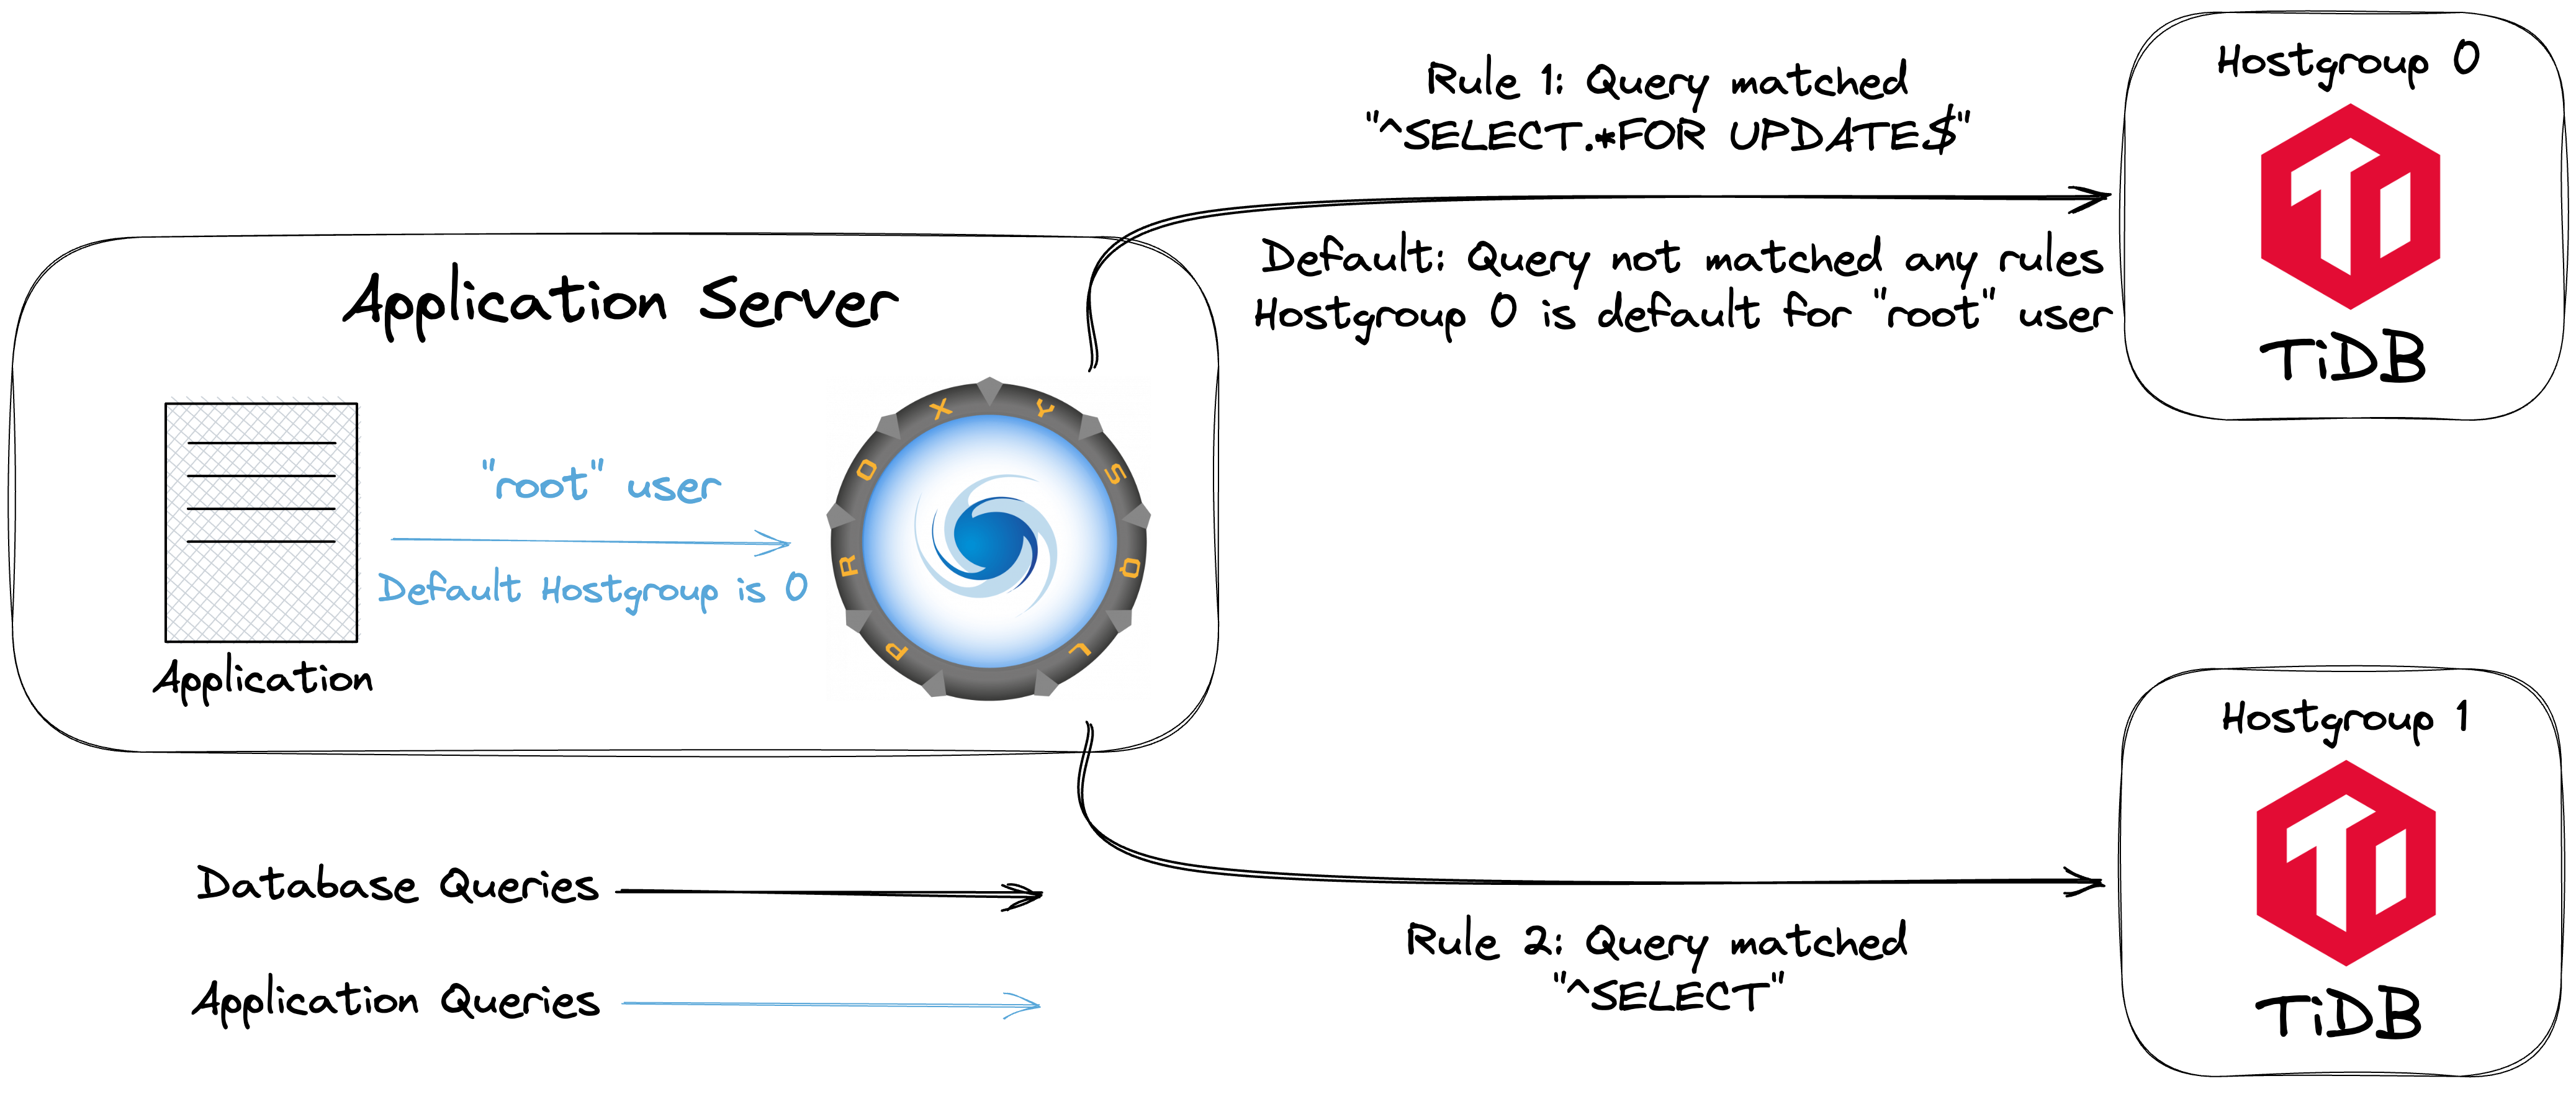
SELECT语句:SELECT * FROM test.tidb_server;此语句将匹配 rule_id
2,并被转发到hostgroup 1的 TiDB 集群。执行
SELECT ... FOR UPDATE语句:SELECT * FROM test.tidb_server FOR UPDATE;此语句将匹配 rule_id
1,并被转发到hostgroup 0的 TiDB 集群。开启事务:
BEGIN; INSERT INTO test.tidb_server (server_name) VALUES ('insert this and rollback later'); SELECT * FROM test.tidb_server; ROLLBACK;在该事务中,
BEGIN语句不会匹配任何规则,使用默认主机组(本例为hostgroup 0)。由于 ProxySQL 默认启用用户 transaction_persistent,事务内所有语句都在同一主机组执行,因此INSERT和SELECT * FROM test.tidb_server;也会被转发到hostgroup 0的 TiDB 集群。
以下为示例输出。如果你获得类似输出,说明已成功配置 ProxySQL 查询规则。
+-------------------------+ | server_name | +-------------------------+ | tidb-server02-port-4002 | +-------------------------+ +-------------------------+ | server_name | +-------------------------+ | tidb-server01-port-4001 | +-------------------------+ +--------------------------------+ | server_name | +--------------------------------+ | tidb-server01-port-4001 | | insert this and rollback later | +--------------------------------+随时输入
quit并按 enter 退出 MySQL 客户端。
停止并移除容器,并返回上级目录,运行以下命令:
docker compose down cd -docker compose down cd -docker compose down cd -
需要帮助?
- 在 Discord 或 Slack 社区提问。
- 提交 TiDB Cloud 工单
- 提交 TiDB 自托管工单