Build a TiDB Application Using Spring Boot
This tutorial shows you how to build a Spring Boot web application using TiDB. The Spring Data JPA module is used as the framework for data access capabilities. You can download the code for this sample application from GitHub.
This is a sample application for building a RESTful API, which shows a generic Spring Boot backend service using TiDB as the database. The following process was designed to recreate a real-world scenario:
This is an example of a game where each player has two attributes: coins and goods. Each player is uniquely identified by an id field. Players can trade freely if they have sufficient coins and goods.
You can build your own application based on this example.
Step 1: Launch your TiDB cluster
The following introduces how to start a TiDB cluster.
Use a TiDB Serverless cluster
For detailed steps, see Create a TiDB Serverless cluster.
Use a local cluster
For detailed steps, see Deploy a local test cluster or Deploy a TiDB Cluster Using TiUP.
Step 2: Install JDK
Download and install the Java Development Kit (JDK) on your computer. It is a necessary tool for Java development. Spring Boot supports JDK for Java 8 and later versions. However, due to the Hibernate version, it is recommended that you use JDK for Java 11 and later versions.
Both Oracle JDK and OpenJDK are supported. You can choose at your own discretion. This tutorial uses JDK 17 from OpenJDK.
Step 3: Install Maven
This sample application uses Apache Maven to manage the application's dependencies. Spring supports Maven 3.3 and later versions. As dependency management software, the latest stable version of Maven is recommended.
To install Maven from the command line.
macOS:
brew install mavenDebian-based Linux distributions (such as Ubuntu):
apt-get install mavenRed Hat-based Linux distributions (such as Fedora, CentOS):
dnf:
dnf install mavenyum:
yum install maven
For other installation methods, refer to the Maven official documentation.
Step 4: Get the application code
Download or clone the sample code repository and navigate to the spring-jpa-hibernate directory.
Step 5: Run the application
In this step, the application code is compiled and run, which produces a web application. Hibernate creates a player_jpa table within the test database. If you make requests using the application's RESTful API, these requests run database transactions on the TiDB cluster.
If you want to learn more about the code of this application, refer to Implementation details.
Step 5.1 Change parameters
If you are using a TiDB Serverless cluster, change the spring.datasource.url, spring.datasource.username, spring.datasource.password parameters in the application.yml (located in src/main/resources).
spring:
  datasource:
    url: jdbc:mysql://localhost:4000/test
    username: root
    #    password: xxx
    driver-class-name: com.mysql.cj.jdbc.Driver
  jpa:
    show-sql: true
    database-platform: org.hibernate.dialect.TiDBDialect
    hibernate:
      ddl-auto: create-drop
Suppose that the password you set is 123456, and the connection parameters you get from the cluster details page are the following:
- Endpoint:
xxx.tidbcloud.com - Port:
4000 - User:
2aEp24QWEDLqRFs.root
Accordingly, the parameters must be set as folows:
spring:
  datasource:
    url: jdbc:mysql://xxx.tidbcloud.com:4000/test?sslMode=VERIFY_IDENTITY&enabledTLSProtocols=TLSv1.2,TLSv1.3
    username: 2aEp24QWEDLqRFs.root
    password: 123456
    driver-class-name: com.mysql.cj.jdbc.Driver
  jpa:
    show-sql: true
    database-platform: org.hibernate.dialect.TiDBDialect
    hibernate:
      ddl-auto: create-drop
Step 5.2 Run
Open a terminal session and make sure you are in the spring-jpa-hibernate directory. If you are not already in this directory, navigate to the directory with the following command:
cd <path>/tidb-example-java/spring-jpa-hibernate
Build and run with Make (recommended)
make
Build and run manually
If you prefer to build manually, follow these steps:
Clear cache and package:
mvn clean packageRun applications with JAR files:
java -jar target/spring-jpa-hibernate-0.0.1.jar
Step 5.3 Output
The final part of the output should look like the following:
  .   ____          _            __ _ _
 /\\ / ___'_ __ _ _(_)_ __  __ _ \ \ \ \
( ( )\___ | '_ | '_| | '_ \/ _` | \ \ \ \
 \\/  ___)| |_)| | | | | || (_| |  ) ) ) )
  '  |____| .__|_| |_|_| |_\__, | / / / /
 =========|_|==============|___/=/_/_/_/
 :: Spring Boot ::                (v3.0.1)

2023-01-05T14:06:54.427+08:00  INFO 22005 --- [           main] com.pingcap.App                          : Starting App using Java 17.0.2 with PID 22005 (/Users/cheese/IdeaProjects/tidb-example-java/spring-jpa-hibernate/target/classes started by cheese in /Users/cheese/IdeaProjects/tidb-example-java)
2023-01-05T14:06:54.428+08:00  INFO 22005 --- [           main] com.pingcap.App                          : No active profile set, falling back to 1 default profile: "default"
2023-01-05T14:06:54.642+08:00  INFO 22005 --- [           main] .s.d.r.c.RepositoryConfigurationDelegate : Bootstrapping Spring Data JPA repositories in DEFAULT mode.
2023-01-05T14:06:54.662+08:00  INFO 22005 --- [           main] .s.d.r.c.RepositoryConfigurationDelegate : Finished Spring Data repository scanning in 17 ms. Found 1 JPA repository interfaces.
2023-01-05T14:06:54.830+08:00  INFO 22005 --- [           main] o.s.b.w.embedded.tomcat.TomcatWebServer  : Tomcat initialized with port(s): 8080 (http)
2023-01-05T14:06:54.833+08:00  INFO 22005 --- [           main] o.apache.catalina.core.StandardService   : Starting service [Tomcat]
2023-01-05T14:06:54.833+08:00  INFO 22005 --- [           main] o.apache.catalina.core.StandardEngine    : Starting Servlet engine: [Apache Tomcat/10.1.4]
2023-01-05T14:06:54.865+08:00  INFO 22005 --- [           main] o.a.c.c.C.[Tomcat].[localhost].[/]       : Initializing Spring embedded WebApplicationContext
2023-01-05T14:06:54.865+08:00  INFO 22005 --- [           main] w.s.c.ServletWebServerApplicationContext : Root WebApplicationContext: initialization completed in 421 ms
2023-01-05T14:06:54.916+08:00  INFO 22005 --- [           main] o.hibernate.jpa.internal.util.LogHelper  : HHH000204: Processing PersistenceUnitInfo [name: default]
2023-01-05T14:06:54.929+08:00  INFO 22005 --- [           main] org.hibernate.Version                    : HHH000412: Hibernate ORM core version 6.1.6.Final
2023-01-05T14:06:54.969+08:00  WARN 22005 --- [           main] org.hibernate.orm.deprecation            : HHH90000021: Encountered deprecated setting [javax.persistence.sharedCache.mode], use [jakarta.persistence.sharedCache.mode] instead
2023-01-05T14:06:55.005+08:00  INFO 22005 --- [           main] com.zaxxer.hikari.HikariDataSource       : HikariPool-1 - Starting...
2023-01-05T14:06:55.074+08:00  INFO 22005 --- [           main] com.zaxxer.hikari.pool.HikariPool        : HikariPool-1 - Added connection com.mysql.cj.jdbc.ConnectionImpl@5e905f2c
2023-01-05T14:06:55.075+08:00  INFO 22005 --- [           main] com.zaxxer.hikari.HikariDataSource       : HikariPool-1 - Start completed.
2023-01-05T14:06:55.089+08:00  INFO 22005 --- [           main] SQL dialect                              : HHH000400: Using dialect: org.hibernate.dialect.TiDBDialect
Hibernate: drop table if exists player_jpa
Hibernate: drop sequence player_jpa_id_seq
Hibernate: create sequence player_jpa_id_seq start with 1 increment by 1
Hibernate: create table player_jpa (id bigint not null, coins integer, goods integer, primary key (id)) engine=InnoDB
2023-01-05T14:06:55.332+08:00  INFO 22005 --- [           main] o.h.e.t.j.p.i.JtaPlatformInitiator       : HHH000490: Using JtaPlatform implementation: [org.hibernate.engine.transaction.jta.platform.internal.NoJtaPlatform]
2023-01-05T14:06:55.335+08:00  INFO 22005 --- [           main] j.LocalContainerEntityManagerFactoryBean : Initialized JPA EntityManagerFactory for persistence unit 'default'
2023-01-05T14:06:55.579+08:00  WARN 22005 --- [           main] JpaBaseConfiguration$JpaWebConfiguration : spring.jpa.open-in-view is enabled by default. Therefore, database queries may be performed during view rendering. Explicitly configure spring.jpa.open-in-view to disable this warning
2023-01-05T14:06:55.710+08:00  INFO 22005 --- [           main] o.s.b.w.embedded.tomcat.TomcatWebServer  : Tomcat started on port(s): 8080 (http) with context path ''
2023-01-05T14:06:55.714+08:00  INFO 22005 --- [           main] com.pingcap.App                          : Started App in 1.432 seconds (process running for 1.654)
The output log indicates the application behavior during startup. In this example, the application starts a Servlet using Tomcat, uses Hibernate as the ORM, uses HikariCP as the database connection pool implementation, and uses org.hibernate.dialect.TiDBDialect as the database dialect. After startup, Hibernate deletes and re-creates the player_jpa table and the player_jpa_id_seq sequence. At the end of startup, the application listens on port 8080 to provide HTTP services to the outside.
If you want to learn more about the code of this application, refer to implementation details.
Step 6: HTTP requests
After the service is up and running, you can send the HTTP requests to the backend application. http://localhost:8080 is the base URL that provides services. This tutorial uses a series of HTTP requests to show how to use the service.
Step 6.1 Use Postman requests (recommended)
You can download this configuration file locally and import it into Postman as shown here:
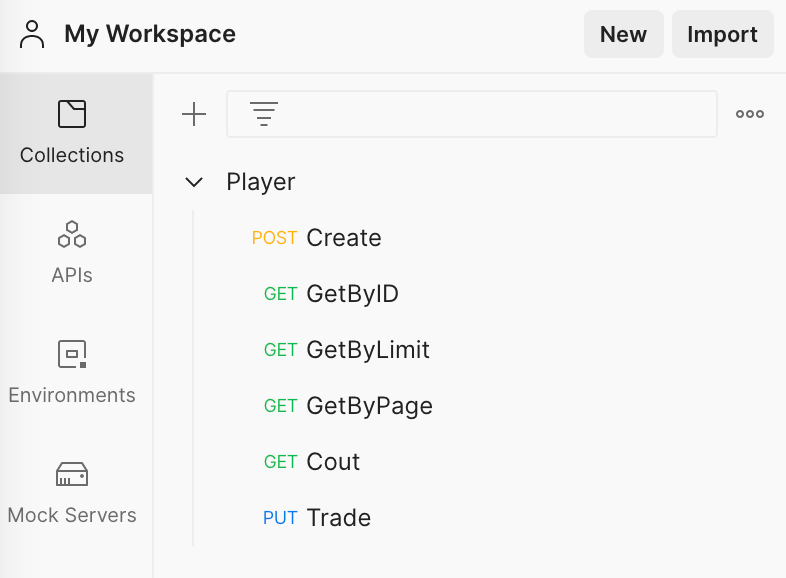
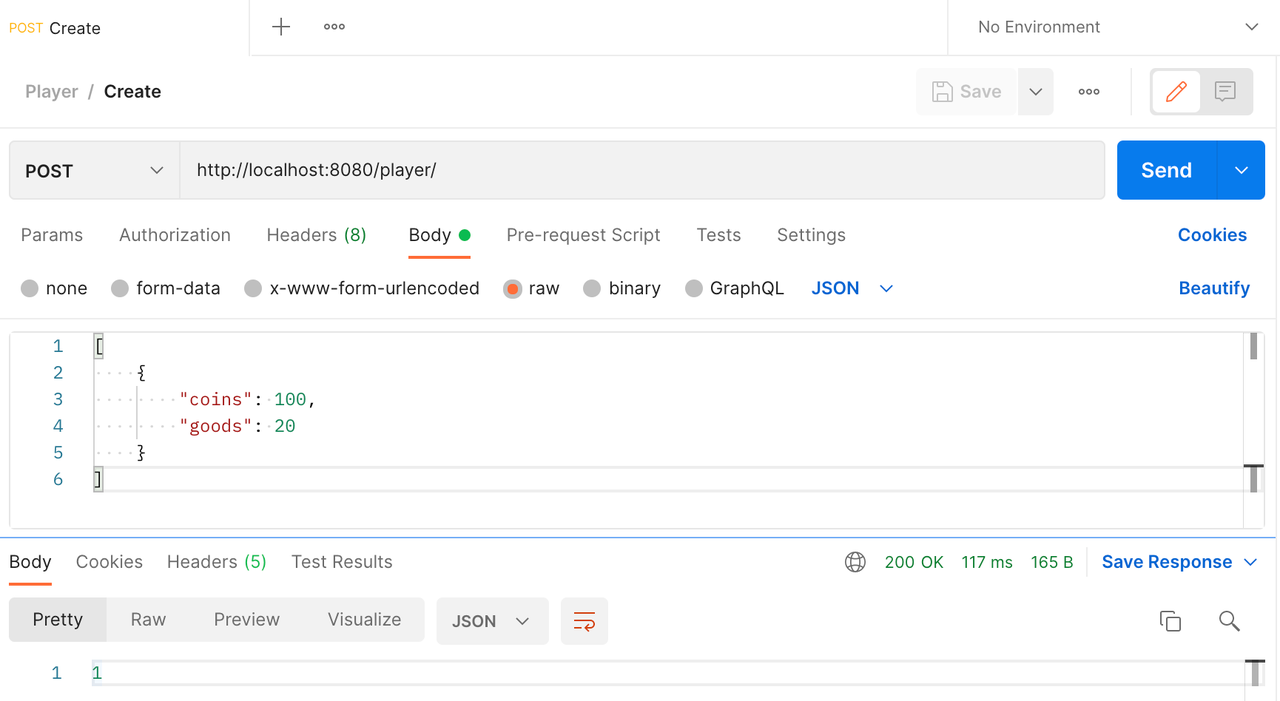
Create players
Click on the Create tab and the Send button to send a POST request to http://localhost:8080/player/. The return value is the number of players added, which is expected to be 1.
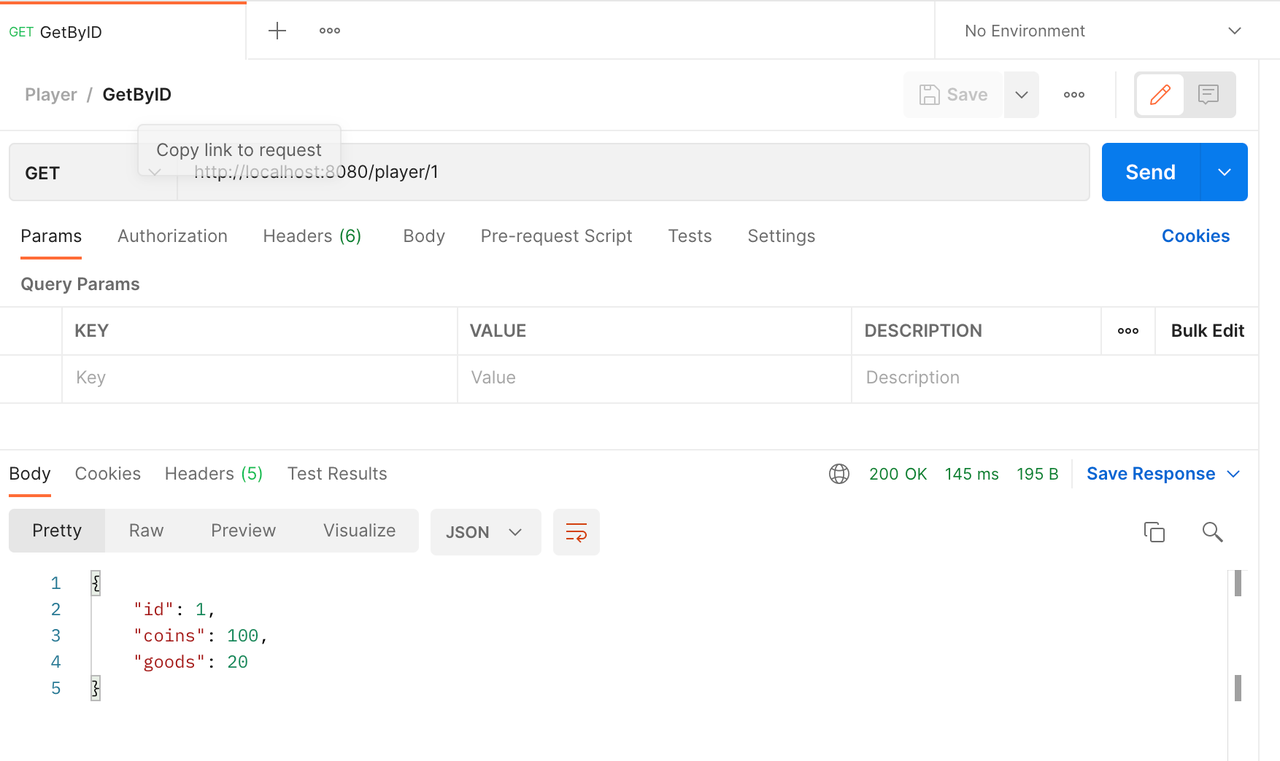
Get player information by ID
Click on the GetByID tab and the Send button to send a GET request to http://localhost:8080/player/1. The return value is the information of the player with ID 1.
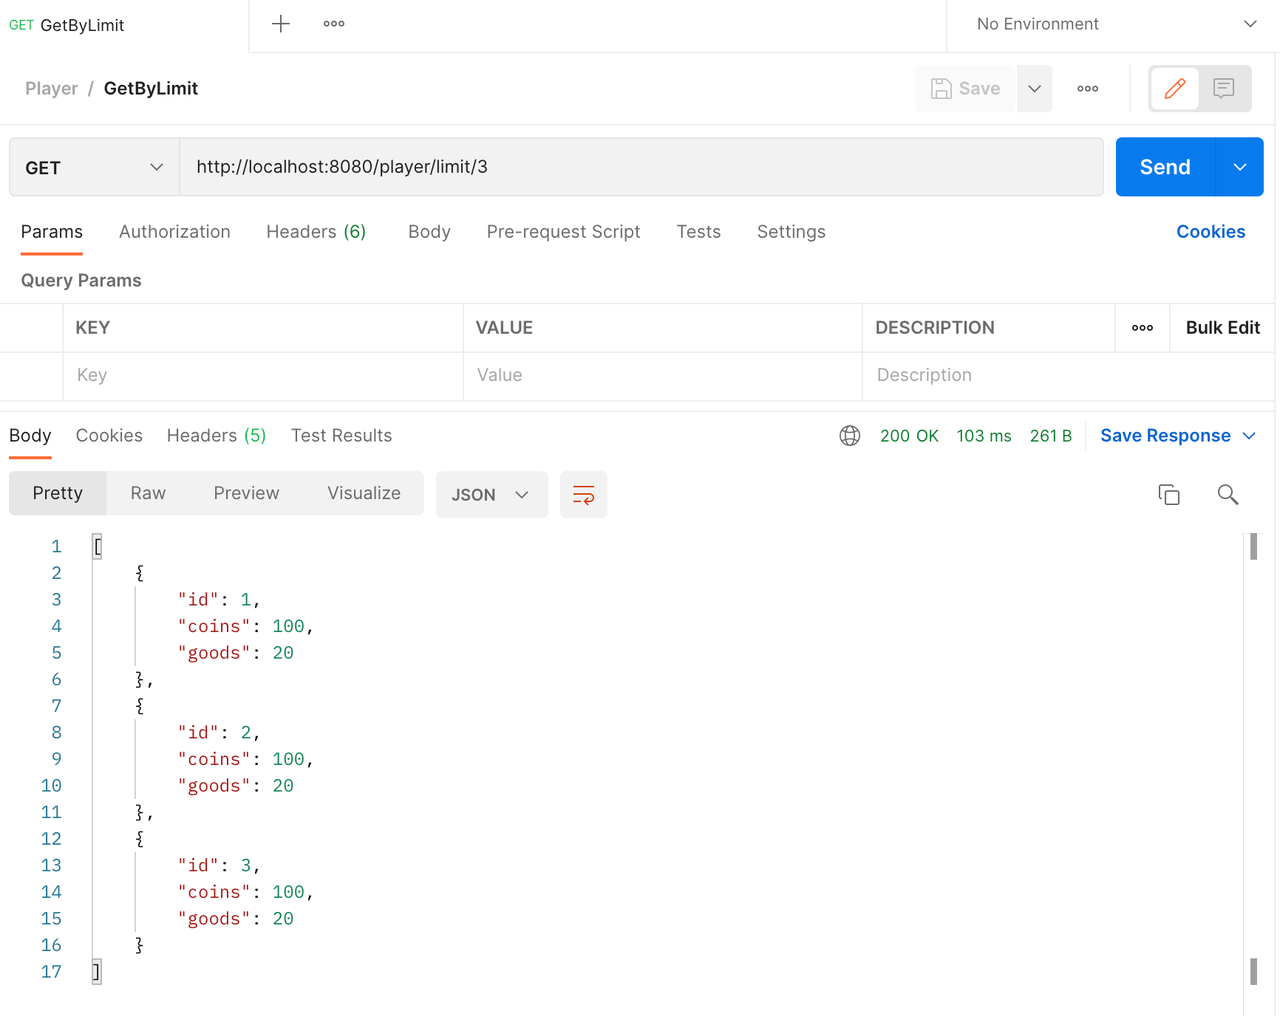
Get player information in bulk by limit
Click on the GetByLimit tab and the Send button to send a GET request to http://localhost:8080/player/limit/3. The return value is a list of information for up to 3 players.
Get player information by page
Click on the GetByPage tab and the Send button to send a GET request to http://localhost:8080/player/page?index=0&size=2. The return value is the page with index 0, with 2 players per page. The return value also contains the paging information such as offset, totalPages, and sort.

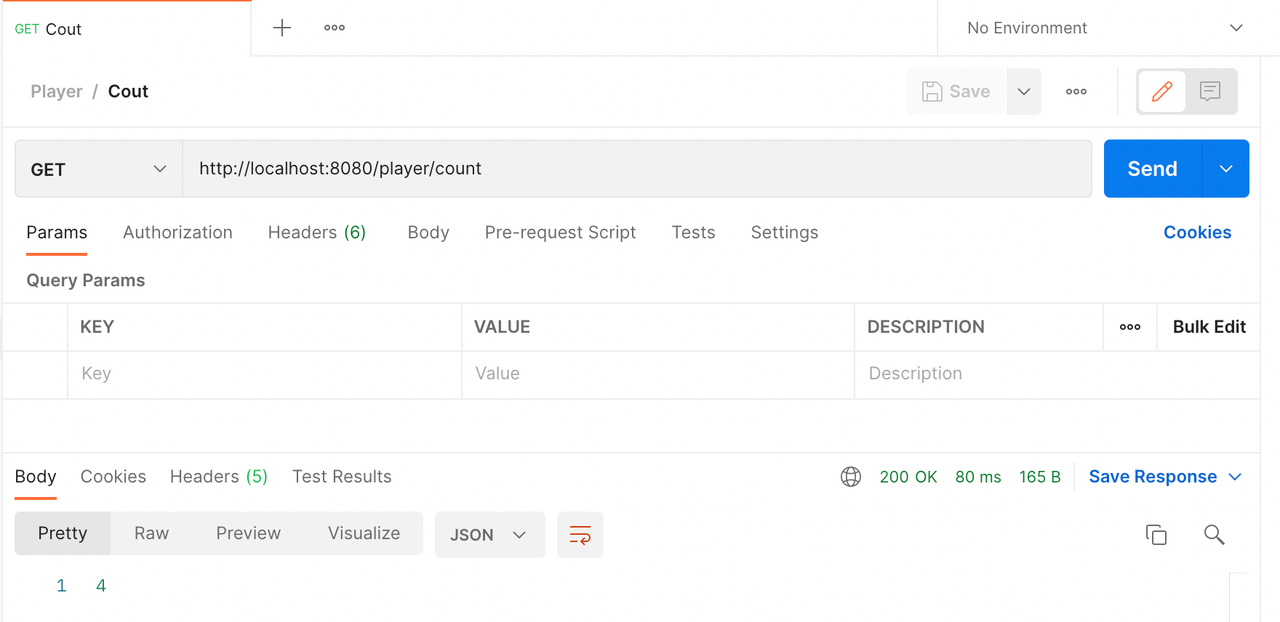
Count players
Click the Count tab and the Send button to send a GET request to http://localhost:8080/player/count. The return value is the number of players.
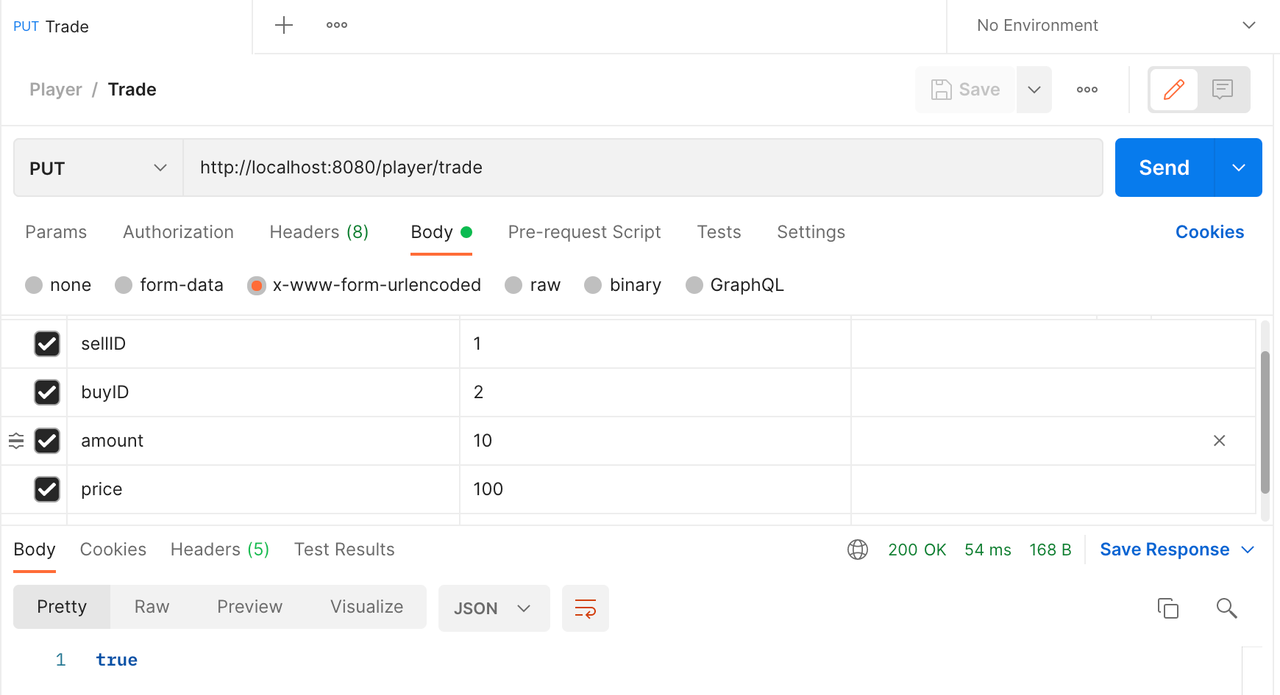
Player trading
Click on the Trade tab and the Send button to send a PUT request to http://localhost:8080/player/trade. The request parameters are the seller's ID sellID, the buyer's ID buyID, the number of goods purchased amount, the number of coins consumed for the purchase price.
The return value is whether the transaction is successful or not. When there are insufficient goods for the seller, insufficient coins for the buyer, or a database error, the database transaction guarantees that the trade is not successful and no player's coins or goods are lost.
Step 6.2 Using curl requests
You can also use curl to make requests directly.
Create players
To create players, you can send a POST request to the /player endpoint. For example:
curl --location --request POST 'http://localhost:8080/player/' --header 'Content-Type: application/json' --data-raw '[{"coins":100,"goods":20}]'
The request uses JSON as the payload. The example above indicates creating a player with 100 coins and 20 goods. The return value is the number of players created.
1
Get player information by ID
To get the player information, you can send a GET request to the /player endpoint. You need to specify the id of the player in the path parameter as follows: /player/{id}. The following example shows how to get the information of a player with id 1:
curl --location --request GET 'http://localhost:8080/player/1'
The return value is the player's information:
{
  "coins": 200,
  "goods": 10,
  "id": 1
}
Get player information in bulk by limit
To get the player information in bulk, you can send a GET request to the /player/limit endpoint. You need to specify the total number of players in the path parameter as follows: /player/limit/{limit}. The following example shows how to get the information of up to 3 players:
curl --location --request GET 'http://localhost:8080/player/limit/3'
The return value is a list of player information:
[
  {
    "coins": 200,
    "goods": 10,
    "id": 1
  },
  {
    "coins": 0,
    "goods": 30,
    "id": 2
  },
  {
    "coins": 100,
    "goods": 20,
    "id": 3
  }
]
Get player information by page
To get paginated player information, you can send a GET request to the /player/page endpoint. To specify additional parameters, you need to use the URL parameter. The following example shows how to get the information from a page whose index is 0, where each page has a maximum size of 2 players.
curl --location --request GET 'http://localhost:8080/player/page?index=0&size=2'
The return value is the page with index 0, where 2 players are listed per page. In addition, the return value contains pagination information such as offset, total pages, and whether the results are sorted.
{
  "content": [
    {
      "coins": 200,
      "goods": 10,
      "id": 1
    },
    {
      "coins": 0,
      "goods": 30,
      "id": 2
    }
  ],
  "empty": false,
  "first": true,
  "last": false,
  "number": 0,
  "numberOfElements": 2,
  "pageable": {
    "offset": 0,
    "pageNumber": 0,
    "pageSize": 2,
    "paged": true,
    "sort": {
      "empty": true,
      "sorted": false,
      "unsorted": true
    },
    "unpaged": false
  },
  "size": 2,
  "sort": {
    "empty": true,
    "sorted": false,
    "unsorted": true
  },
  "totalElements": 4,
  "totalPages": 2
}
Count players
To get the number of players, you can send a GET request to the /player/count endpoint:
curl --location --request GET 'http://localhost:8080/player/count'
The return value is the number of players:
4
Player trading
To initiate a transaction between players, you can send a PUT request to the /player/trade endpoint. For example:
curl --location --request PUT 'http://localhost:8080/player/trade' \
  --header 'Content-Type: application/x-www-form-urlencoded' \
  --data-urlencode 'sellID=1' \
  --data-urlencode 'buyID=2' \
  --data-urlencode 'amount=10' \
  --data-urlencode 'price=100'
The request uses Form Data as the payload. The example request indicates that the seller's ID (sellID) is 1, the buyer's ID (buyID) is 2, the number of goods purchased (amount) is 10, and the number of coins consumed for purchase (price) is 100.
The return value is whether the transaction is successful or not. When there are insufficient goods for the seller, insufficient coins for the buyer, or a database error, the database transaction guarantees that the trade is not successful and no player's coins or goods are lost.
true
Step 6.3 Requests with Shell script
You can download this shell script for testing purposes. The script performs the following operations:
- Create 10 players in a loop.
- Get the information of players with the
idof 1. - Get a list of up to 3 players.
- Get a page of players with the
indexof 0 and thesizeof 2. - Get the total number of players.
- Perform a transaction, where the player with the
idof 1 is the seller and the player with theidof 2 is the buyer, and 10goodsare purchased at the cost of 100coins.
You can run this script with make request or ./request.sh. The result should look like this:
cheese@CheesedeMacBook-Pro spring-jpa-hibernate % make request
./request.sh
loop to create 10 players:
1111111111

get player 1:
{"id":1,"coins":200,"goods":10}

get players by limit 3:
[{"id":1,"coins":200,"goods":10},{"id":2,"coins":0,"goods":30},{"id":3,"coins":100,"goods":20}]

get first players:
{"content":[{"id":1,"coins":200,"goods":10},{"id":2,"coins":0,"goods":30}],"pageable":{"sort":{"empty":true,"unsorted":true,"sorted":false},"offset":0,"pageNumber":0,"pageSize":2,"paged":true,"unpaged":false},"last":false,"totalPages":7,"totalElements":14,"first":true,"size":2,"number":0,"sort":{"empty":true,"unsorted":true,"sorted":false},"numberOfElements":2,"empty":false}

get players count:
14

trade by two players:
false
Implementation details
This subsection describes the components in the sample application project.
Overview
The catalog tree for this example project is shown below (some incomprehensible parts are removed):
.
├── pom.xml
└── src
    └── main
        ├── java
        │   └── com
        │       └── pingcap
        │           ├── App.java
        │           ├── controller
        │           │   └── PlayerController.java
        │           ├── dao
        │           │   ├── PlayerBean.java
        │           │   └── PlayerRepository.java
        │           └── service
        │               ├── PlayerService.java
        │               └── impl
        │                   └── PlayerServiceImpl.java
        └── resources
            └── application.yml
pom.xmldeclares the project's Maven configuration, such as dependencies and packaging.application.ymldeclares the project's user configuration, such as database address, password, and database dialect used.App.javais the entry point of the project.controlleris the package that exposes the HTTP interface to the outside.serviceis the package that implements the interface and logic of the project.daois the package that implements the connection to the database and the persistence of the data.
Configuration
This part briefly describes the Maven configuration in the pom.xml file and the user configuration in the application.yml file.
Maven configuration
The pom.xml file is a Maven configuration file that declares the project's Maven dependencies, packaging methods, and packaging information. You can replicate the process of generating this configuration file by creating a blank application with the same dependency, or copying it directly to your project.
<?xml version="1.0" encoding="UTF-8"?>
<project xmlns="http://maven.apache.org/POM/4.0.0" xmlns:xsi="http://www.w3.org/2001/XMLSchema-instance"
    xsi:schemaLocation="http://maven.apache.org/POM/4.0.0 https://maven.apache.org/xsd/maven-4.0.0.xsd">
    <modelVersion>4.0.0</modelVersion>
    <parent>
        <groupId>org.springframework.boot</groupId>
        <artifactId>spring-boot-starter-parent</artifactId>
        <version>3.0.1</version>
        <relativePath/> <!-- lookup parent from repository -->
    </parent>

    <groupId>com.pingcap</groupId>
    <artifactId>spring-jpa-hibernate</artifactId>
    <version>0.0.1</version>
    <name>spring-jpa-hibernate</name>
    <description>an example for spring boot, jpa, hibernate and TiDB</description>

    <properties>
        <java.version>17</java.version>
        <maven.compiler.source>17</maven.compiler.source>
        <maven.compiler.target>17</maven.compiler.target>
    </properties>

    <dependencies>
        <dependency>
            <groupId>org.springframework.boot</groupId>
            <artifactId>spring-boot-starter-data-jpa</artifactId>
        </dependency>

        <dependency>
            <groupId>org.springframework.boot</groupId>
            <artifactId>spring-boot-starter-web</artifactId>
        </dependency>

        <dependency>
            <groupId>mysql</groupId>
            <artifactId>mysql-connector-java</artifactId>
            <scope>runtime</scope>
        </dependency>

        <dependency>
            <groupId>org.springframework.boot</groupId>
            <artifactId>spring-boot-starter-test</artifactId>
            <scope>test</scope>
        </dependency>
    </dependencies>

    <build>
        <plugins>
            <plugin>
                <groupId>org.springframework.boot</groupId>
                <artifactId>spring-boot-maven-plugin</artifactId>
            </plugin>
        </plugins>
    </build>
</project>
User configuration
The application.yml configuration file declares the user configuration, such as database address, password, and the database dialect used.
spring:
  datasource:
    url: jdbc:mysql://localhost:4000/test
    username: root
    #    password: xxx
    driver-class-name: com.mysql.cj.jdbc.Driver
  jpa:
    show-sql: true
    database-platform: org.hibernate.dialect.TiDBDialect
    hibernate:
      ddl-auto: create-drop
The configuration is written in YAML. The fields are described as follows:
spring.datasource.url: URL of the database connection.spring.datasource.username: the database username.spring.datasource.password: the database password. Empty. You need to comment out or delete this field.spring.datasource.driver-class-name: the database driver. Because TiDB is compatible with MySQL, use a mysql-connector-java driver classcom.mysql.cj.jdbc.jpa.show-sql: when this field is set totrue, the SQL statements run by JPA are printed.jpa.database-platform: the selected database dialect. Because the application connects to TiDB, choose TiDB dialect. Note that this dialect is only available in Hibernate6.0.0.Beta2and later versions, so choose the applicable dependency version.jpa.hibernate.ddl-auto:create-dropcreates the table at the beginning of the program and deletes the table on exit. Do not set this option in a production environment. Because this is a sample application, this option is set to minimize the impact on the database data.
Entry point
The App.java file is the entry point:
package com.pingcap;

import org.springframework.boot.SpringApplication;
import org.springframework.boot.autoconfigure.SpringBootApplication;
import org.springframework.boot.context.ApplicationPidFileWriter;

@SpringBootApplication
public class App {
   public static void main(String[] args) {
      SpringApplication springApplication = new SpringApplication(App.class);
      springApplication.addListeners(new ApplicationPidFileWriter("spring-jpa-hibernate.pid"));
      springApplication.run(args);
   }
}
The entry class starts with the standard configuration annotation @SpringBootApplication for Spring Boot applications. For more information, see Using the @SpringBootApplication Annotation in the Spring Boot official documentation. Then, the program uses the ApplicationPidFileWriter to write a PID (process identification number) file called spring-jpa-hibernate.pid during application startup. The PID file can be used to close this application from an external source.
Data access object
The dao (Data Access Object) package implements the persistence of data objects.
Entity objects
The PlayerBean.java file is an entity object, which corresponds to a table in the database:
package com.pingcap.dao;

import jakarta.persistence.*;

/**
 * it's core entity in hibernate
 * @Table appoint to table name
 */
@Entity
@Table(name = "player_jpa")
public class PlayerBean {
    /**
     * @ID primary key
     * @GeneratedValue generated way. this field will use generator named "player_id"
     * @SequenceGenerator using `sequence` feature to create a generator,
     *    and it named "player_jpa_id_seq" in database, initial form 1 (by `initialValue`
     *    parameter default), and every operator will increase 1 (by `allocationSize`)
     */
    @Id
    @GeneratedValue(generator="player_id")
    @SequenceGenerator(name="player_id", sequenceName="player_jpa_id_seq", allocationSize=1)
    private Long id;

    /**
     * @Column field
     */
    @Column(name = "coins")
    private Integer coins;
    @Column(name = "goods")
    private Integer goods;

    public Long getId() {
        return id;
    }

    public void setId(Long id) {
        this.id = id;
    }

    public Integer getCoins() {
        return coins;
    }

    public void setCoins(Integer coins) {
        this.coins = coins;
    }

    public Integer getGoods() {
        return goods;
    }

    public void setGoods(Integer goods) {
        this.goods = goods;
    }
}
The entity class has several annotations that give Hibernate additional information to bind the entity class to the table.
@Entitydeclares thatPlayerBeanis an entity class.@Tablerelates this entity class to theplayer_jpatable using the annotation attributename.@Iddeclares that this property is related to the primary key column of the table.@GeneratedValueindicates that the value of this column is generated automatically and should not be set manually. The attributegeneratoris used to specify the name of the generator asplayer_id.@SequenceGeneratordeclares a generator that uses sequence, and uses the annotation attributenameto declare the name of the generator asplayer_id(consistent with the name specified in@GeneratedValue). The annotation attributesequenceNameis used to specify the name of the sequence in the database. Finally, the annotation attributeallocationSizeis used to declare the sequence's step size to be 1.@Columndeclares each private attribute as a column of theplayer_jpatable, and uses the annotation attributenameto determine the name of the column corresponding to the attribute.
Repository
To abstract the database layer, Spring applications use the Repository interface, or a sub-interface of the Repository. This interface maps to a database object, such as a table. JPA implements some pre-built methods, such as INSERT, or SELECT using the primay key.
package com.pingcap.dao;

import jakarta.persistence.LockModeType;
import org.springframework.data.domain.Page;
import org.springframework.data.domain.Pageable;
import org.springframework.data.jpa.repository.JpaRepository;
import org.springframework.data.jpa.repository.Lock;
import org.springframework.data.jpa.repository.Query;
import org.springframework.data.repository.query.Param;
import org.springframework.stereotype.Repository;

import java.util.List;

@Repository
public interface PlayerRepository extends JpaRepository<PlayerBean, Long> {
    /**
     * use HQL to query by page
     * @param pageable a pageable parameter required by hibernate
     * @return player list package by page message
     */
    @Query(value = "SELECT player_jpa FROM PlayerBean player_jpa")
    Page<PlayerBean> getPlayersByPage(Pageable pageable);

    /**
     * use SQL to query by limit, using named parameter
     * @param limit sql parameter
     * @return player list (max size by limit)
     */
    @Query(value = "SELECT * FROM player_jpa LIMIT :limit", nativeQuery = true)
    List<PlayerBean> getPlayersByLimit(@Param("limit") Integer limit);

    /**
     * query player and add a lock for update
     * @param id player id
     * @return player
     */
    @Lock(value = LockModeType.PESSIMISTIC_WRITE)
    @Query(value = "SELECT player FROM PlayerBean player WHERE player.id = :id")
    // @Query(value = "SELECT * FROM player_jpa WHERE id = :id FOR UPDATE", nativeQuery = true)
    PlayerBean getPlayerAndLock(@Param("id") Long id);
}
The PlayerRepository interface extends the JpaRepository interface used by Spring for JPA data access. The @Query annotation is used to tell Hibernate how to implement queries in this interface. Two query syntaxes are used:
- In the
getPlayersByPageinterface, Hibernate Query Language (HQL) is used. - In the
getPlayersByLimitinterface, native SQL is used. When the interface uses the native SQL syntax, the@Queryannotation parameternativeQuerymust be set totrue.
In the SQL for the getPlayersByLimit annotation, :limit is called a named parameter in Hibernate. Hibernate automatically finds and splices the parameter by name within the interface where the annotation resides. You can also use @Param to specify a name different from the parameter for injection.
In getPlayerAndLock, an annotation @Lock is used to declare that pessimistic locking is applied. For details on other locking methods, see Entity Locking. The @Lock annotation must be used with HQL; otherwise, an error occurs. If you want to use SQL directly for locking, you can use the annotation from the comment:
@Query(value = "SELECT * FROM player_jpa WHERE id = :id FOR UPDATE", nativeQuery = true)
The SQL statement above uses FOR UPDATE to add locks directly. You can also dive deeper into the principles with the TiDB SELECT statement.
Logic implementation
The logic implementation layer is the service package, which contains the interfaces and logic implemented by the project.
Interface
The PlayerService.java file defines the logical interface and implements the interface rather than writing a class directly. This is to keep the example as close to actual use as possible and to reflect the open-closed principle of the design. You may omit this interface and inject the implementation class directly in the dependency class, but this approach is not recommended.
package com.pingcap.service;

import com.pingcap.dao.PlayerBean;
import org.springframework.data.domain.Page;

import java.util.List;

public interface PlayerService {
    /**
     * create players by passing in a List of PlayerBean
     *
     * @param players will create players list
     * @return The number of create accounts
     */
    Integer createPlayers(List<PlayerBean> players);

    /**
     * buy goods and transfer funds between one player and another in one transaction
     * @param sellId sell player id
     * @param buyId buy player id
     * @param amount goods amount, if sell player has not enough goods, the trade will break
     * @param price price should pay, if buy player has not enough coins, the trade will break
     */
    void buyGoods(Long sellId, Long buyId, Integer amount, Integer price) throws RuntimeException;

    /**
     * get the player info by id.
     *
     * @param id player id
     * @return the player of this id
     */
    PlayerBean getPlayerByID(Long id);

    /**
     * get a subset of players from the data store by limit.
     *
     * @param limit return max size
     * @return player list
     */
    List<PlayerBean> getPlayers(Integer limit);

    /**
     * get a page of players from the data store.
     *
     * @param index page index
     * @param size page size
     * @return player list
     */
    Page<PlayerBean> getPlayersByPage(Integer index, Integer size);

    /**
     * count players from the data store.
     *
     * @return all players count
     */
    Long countPlayers();
}
Implementation (Important)
The PlayerService.java file implements the PlayerService interface, which contains all the data processing logic.
package com.pingcap.service.impl;

import com.pingcap.dao.PlayerBean;
import com.pingcap.dao.PlayerRepository;
import com.pingcap.service.PlayerService;
import jakarta.transaction.Transactional;
import org.springframework.beans.factory.annotation.Autowired;
import org.springframework.data.domain.Page;
import org.springframework.data.domain.PageRequest;
import org.springframework.stereotype.Service;

import java.util.List;

/**
 * PlayerServiceImpl implements PlayerService interface
 * @Transactional it means every method in this class, will package by a pair of
 *     transaction.begin() and transaction.commit(). and it will be call
 *     transaction.rollback() when method throw an exception
 */
@Service
@Transactional
public class PlayerServiceImpl implements PlayerService {
    @Autowired
    private PlayerRepository playerRepository;

    @Override
    public Integer createPlayers(List<PlayerBean> players) {
        return playerRepository.saveAll(players).size();
    }

    @Override
    public void buyGoods(Long sellId, Long buyId, Integer amount, Integer price) throws RuntimeException {
        PlayerBean buyPlayer = playerRepository.getPlayerAndLock(buyId);
        PlayerBean sellPlayer = playerRepository.getPlayerAndLock(sellId);
        if (buyPlayer == null || sellPlayer == null) {
            throw new RuntimeException("sell or buy player not exist");
        }

        if (buyPlayer.getCoins() < price || sellPlayer.getGoods() < amount) {
            throw new RuntimeException("coins or goods not enough, rollback");
        }

        buyPlayer.setGoods(buyPlayer.getGoods() + amount);
        buyPlayer.setCoins(buyPlayer.getCoins() - price);
        playerRepository.save(buyPlayer);

        sellPlayer.setGoods(sellPlayer.getGoods() - amount);
        sellPlayer.setCoins(sellPlayer.getCoins() + price);
        playerRepository.save(sellPlayer);
    }

    @Override
    public PlayerBean getPlayerByID(Long id) {
        return playerRepository.findById(id).orElse(null);
    }

    @Override
    public List<PlayerBean> getPlayers(Integer limit) {
        return playerRepository.getPlayersByLimit(limit);
    }

    @Override
    public Page<PlayerBean> getPlayersByPage(Integer index, Integer size) {
        return playerRepository.getPlayersByPage(PageRequest.of(index, size));
    }

    @Override
    public Long countPlayers() {
        return playerRepository.count();
    }
}
The @Service annotation is used to declare that the lifecycle of this object is managed by Spring.
The PlayerServiceImpl implementation class also has a @Transactional annotation in addition to the @Service annotation. When transaction management is enabled in the application (which can be turned on using @EnableTransactionManagement, but is turned on by default by Spring Boot. You don not need to manually configure it.), Spring automatically wraps all objects with the @Transactional annotation in a proxy and uses this proxy for object invocation processing.
You can simply assume that when the agent calls a function inside an object with the @Transactional annotation:
- At the top of the function, it starts the transaction with
transaction.begin(). - When the function returns, it calls
transaction.commit()to commit the transaction. - When any runtime error occurs, the agent calls
transaction.rollback()to roll back.
You can refer to Database Transactions for more information on transactions, or read Understanding the Spring Framework's Declarative Transaction Implementation on the Spring website.
In all implementation classes, the buyGoods function is requires attention. When the function encounters an illogical operation, it throws an exception and directs Hibernate to perform a transaction rollback to prevent incorrect data.
External HTTP Interface
The controller package exposes the HTTP interface to the outside world and allows access to the service via the REST API.
package com.pingcap.controller;

import com.pingcap.dao.PlayerBean;
import com.pingcap.service.PlayerService;
import org.springframework.beans.factory.annotation.Autowired;
import org.springframework.data.domain.Page;
import org.springframework.lang.NonNull;
import org.springframework.web.bind.annotation.*;

import java.util.List;

@RestController
@RequestMapping("/player")
public class PlayerController {
    @Autowired
    private PlayerService playerService;

    @PostMapping
    public Integer createPlayer(@RequestBody @NonNull List<PlayerBean> playerList) {
        return playerService.createPlayers(playerList);
    }

    @GetMapping("/{id}")
    public PlayerBean getPlayerByID(@PathVariable Long id) {
        return playerService.getPlayerByID(id);
    }

    @GetMapping("/limit/{limit_size}")
    public List<PlayerBean> getPlayerByLimit(@PathVariable("limit_size") Integer limit) {
        return playerService.getPlayers(limit);
    }

    @GetMapping("/page")
    public Page<PlayerBean> getPlayerByPage(@RequestParam Integer index, @RequestParam("size") Integer size) {
        return playerService.getPlayersByPage(index, size);
    }

    @GetMapping("/count")
    public Long getPlayersCount() {
        return playerService.countPlayers();
    }

    @PutMapping("/trade")
    public Boolean trade(@RequestParam Long sellID, @RequestParam Long buyID, @RequestParam Integer amount, @RequestParam Integer price) {
        try {
            playerService.buyGoods(sellID, buyID, amount, price);
        } catch (RuntimeException e) {
            return false;
        }

        return true;
    }
}
PlayerController uses annotations as many as possible to demonstrate features. In real projects, keep the style consistent while following the rules of your company or team. The annotations in PlayerController are explained as follows:
@RestControllerdeclaresPlayerControlleras a Web Controller and serializes the return value asJSONoutput.@RequestMappingmaps the URL endpoint to/player, that is, thisWeb Controlleronly listens for requests sent to the/playerURL.@AutowiredmeansSpringcontainer can autowire relationships between collaborating beans. The declaration requires aPlayerServiceobject, which is an interface and does not specify which implementation class to use. This is assembled by Spring. For the rules of this assembly, see The IoC container on Spring's official website.@PostMappingdeclares that this function responds to a POST request in HTTP.@RequestBodydeclares that the entire HTTP payload is parsed into theplayerListparameter.@NonNulldeclares that the parameter must not be null; otherwise, it returns an error.
@GetMappingdeclares that this function responds to a GET request in HTTP.@PathVariableshows that the annotation has placeholders like{id}and{limit_size}, which are bound to the variable annotated by@PathVariable. Such binding is based on the annotation attributename. If the annotation attributenameis not specified, it is the same as the variable name. The variable name can be omitted, that is,@PathVariable(name="limit_size")can be written as@PathVariable("limit_size").
@PutMappingdeclares that this function responds to a PUT request in HTTP.@RequestParamdeclares that this function parses URL parameters, form parameters, and other parameters in the request and binds them to the annotated variables.
Create a blank application with the same dependency (optional)
This application is built using Spring Initializr. You can quickly get a blank application with the same dependencies as this sample application by clicking on the following options and changing a few configuration items:
Project
- Maven Project
Language
- Java
Spring Boot
- Latest stable version
Project Metadata
- Group: com.pingcap
- Artifact: spring-jpa-hibernate
- Name: spring-jpa-hibernate
- Package name: com.pingcap
- Packaging: Jar
- Java: 17
Dependencies
- Spring Web
- Spring Data JPA
- MySQL Driver
The complete configuration is as follows:
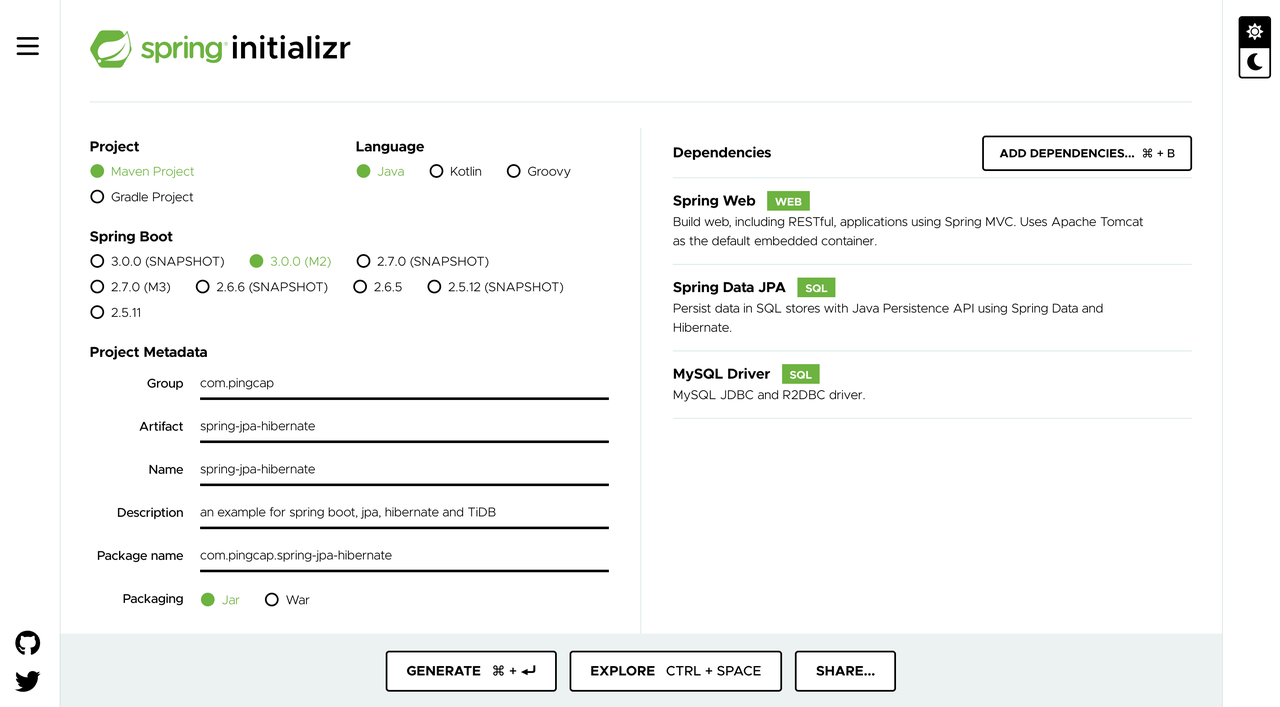
After the configuration, you can get a blank Spring Boot application with the same dependencies as the sample application.