Configure SSO for TiDB Dashboard
TiDB Dashboard supports OIDC-based Single Sign-On (SSO). After enabling the SSO feature of TiDB Dashboard, the configured SSO service is used for your sign-in authentication and then you can access TiDB Dashboard without entering the SQL user password.
Configure OIDC SSO
Enable SSO
Sign into TiDB Dashboard.
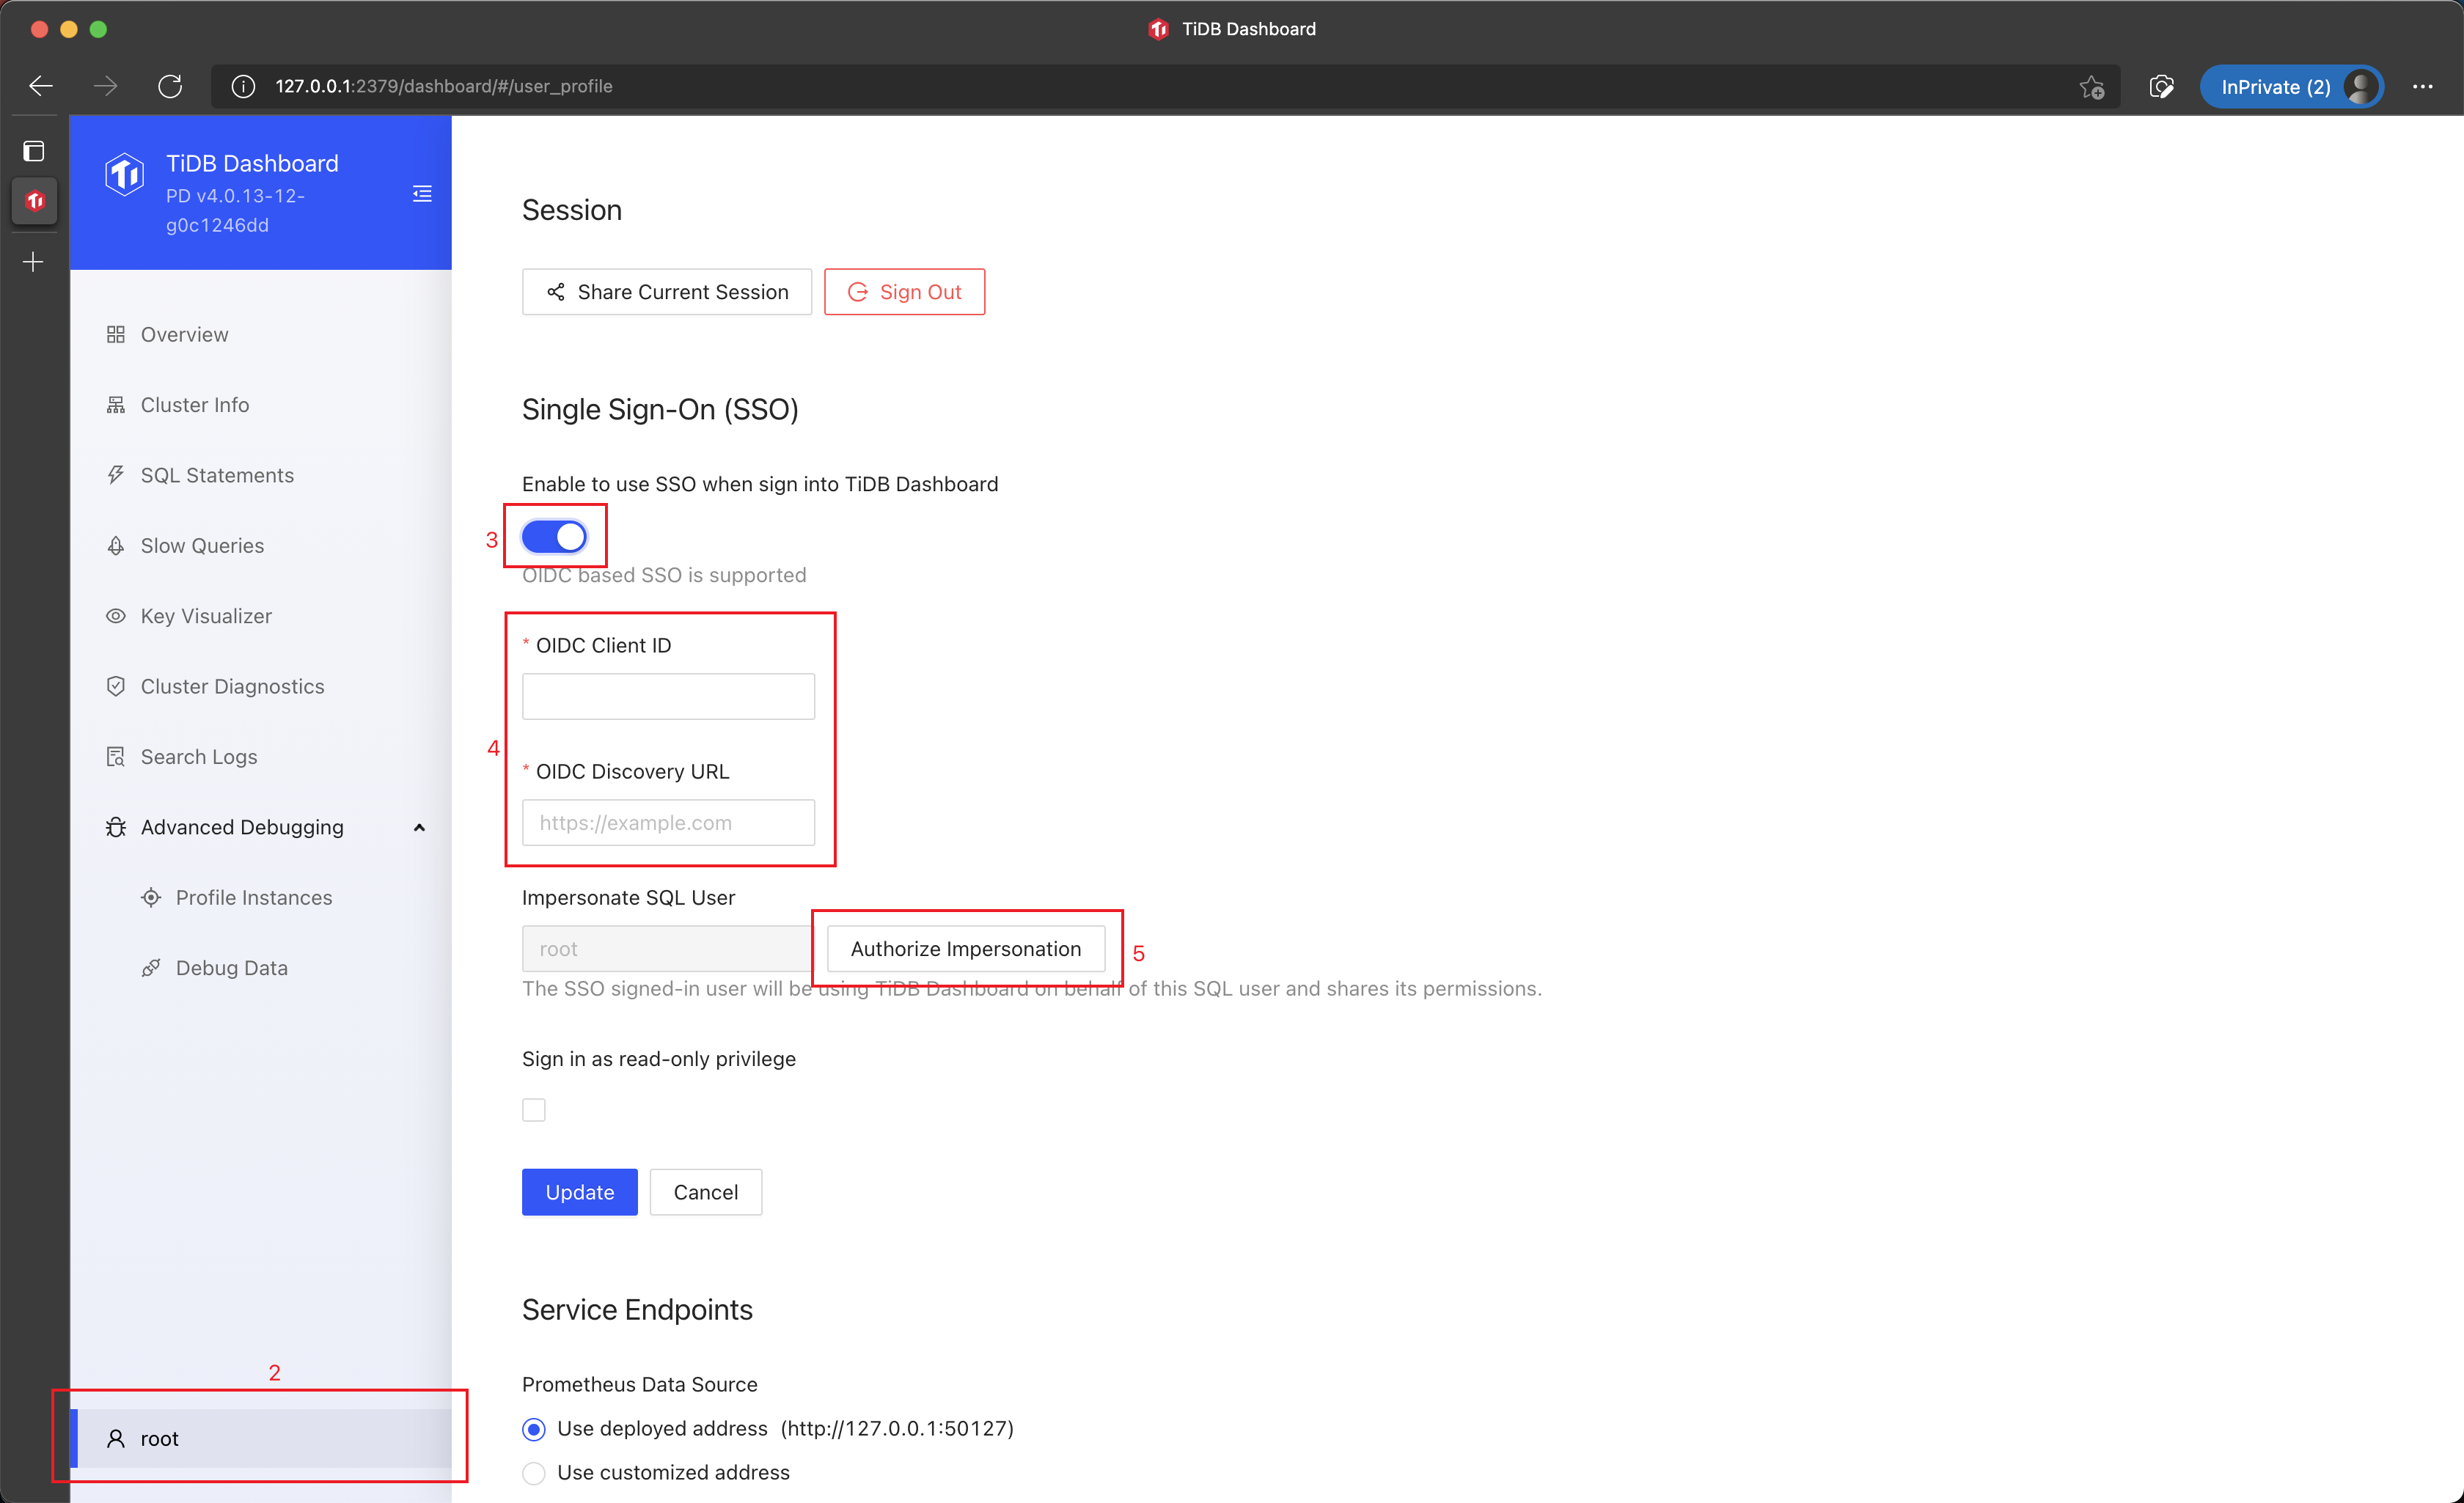
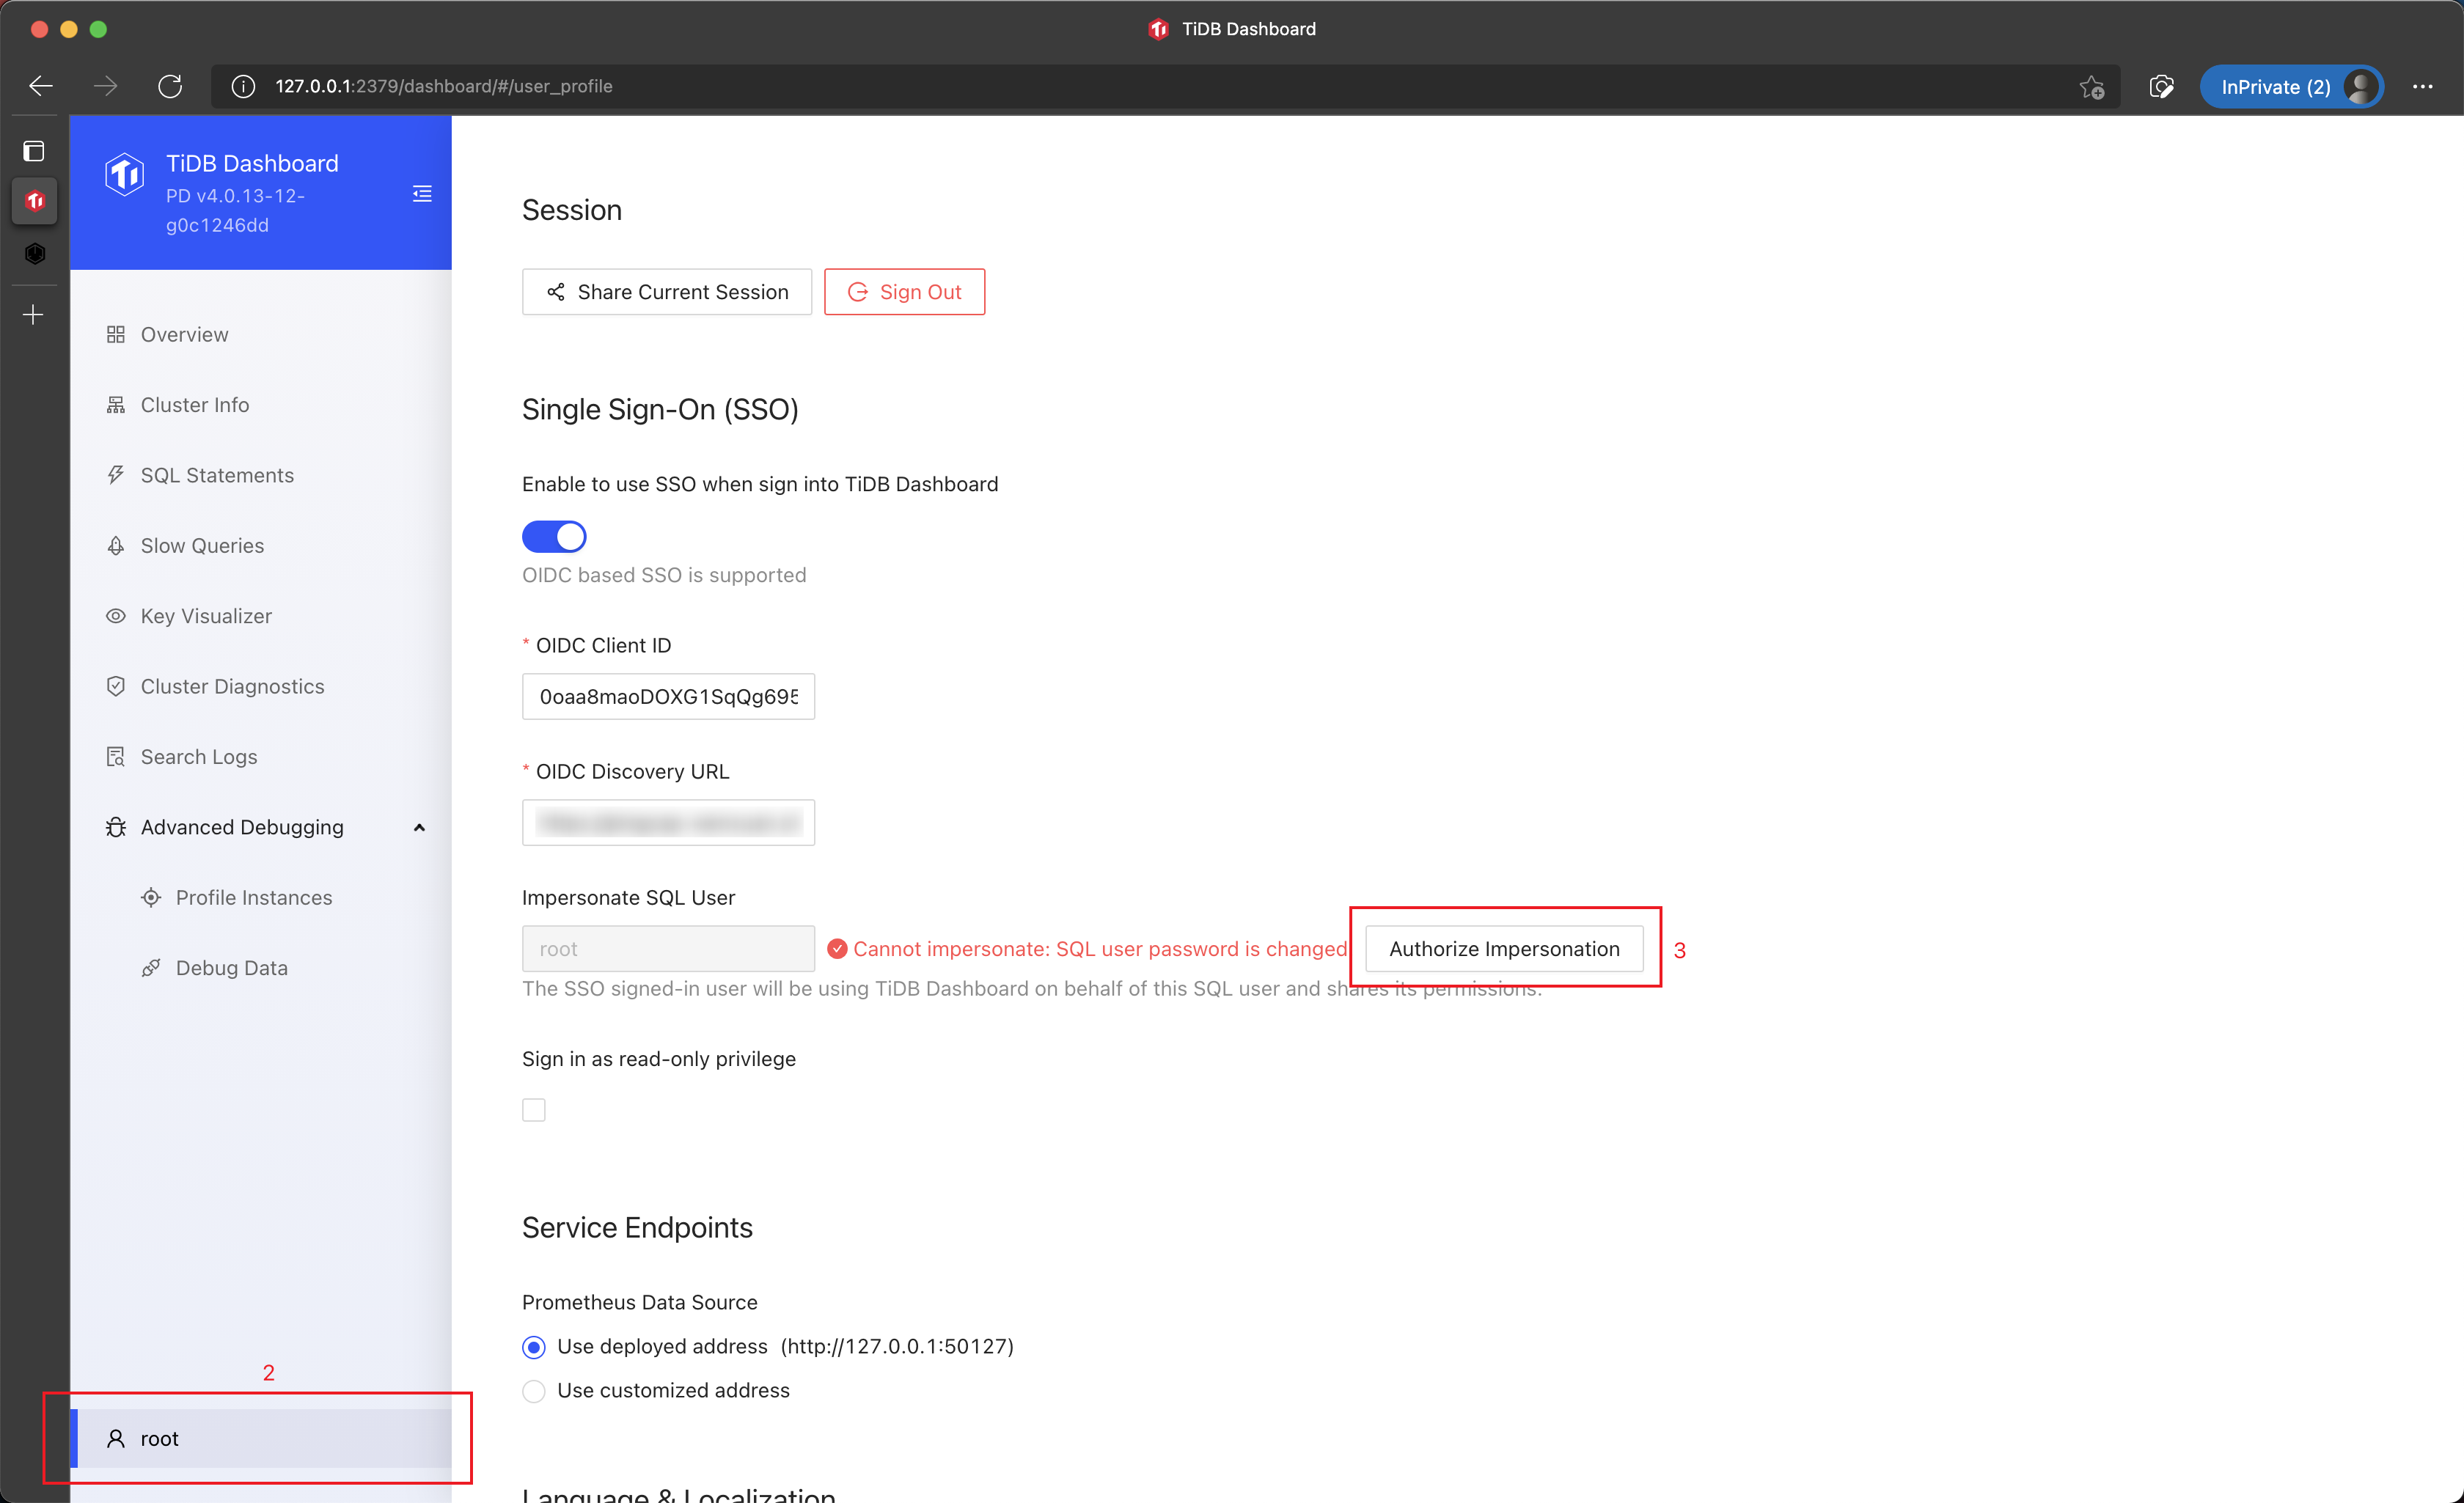
Click the username in the left sidebar to access the configuration page.
In the Single Sign-On section, select Enable to use SSO when sign into TiDB Dashboard.
Fill the OIDC Client ID and the OIDC Discovery URL fields in the form.
Generally, you can obtain the two fields from the SSO service provider:
- OIDC Client ID is also called OIDC Token Issuer.
- OIDC Discovery URL is also called OIDC Token Audience.
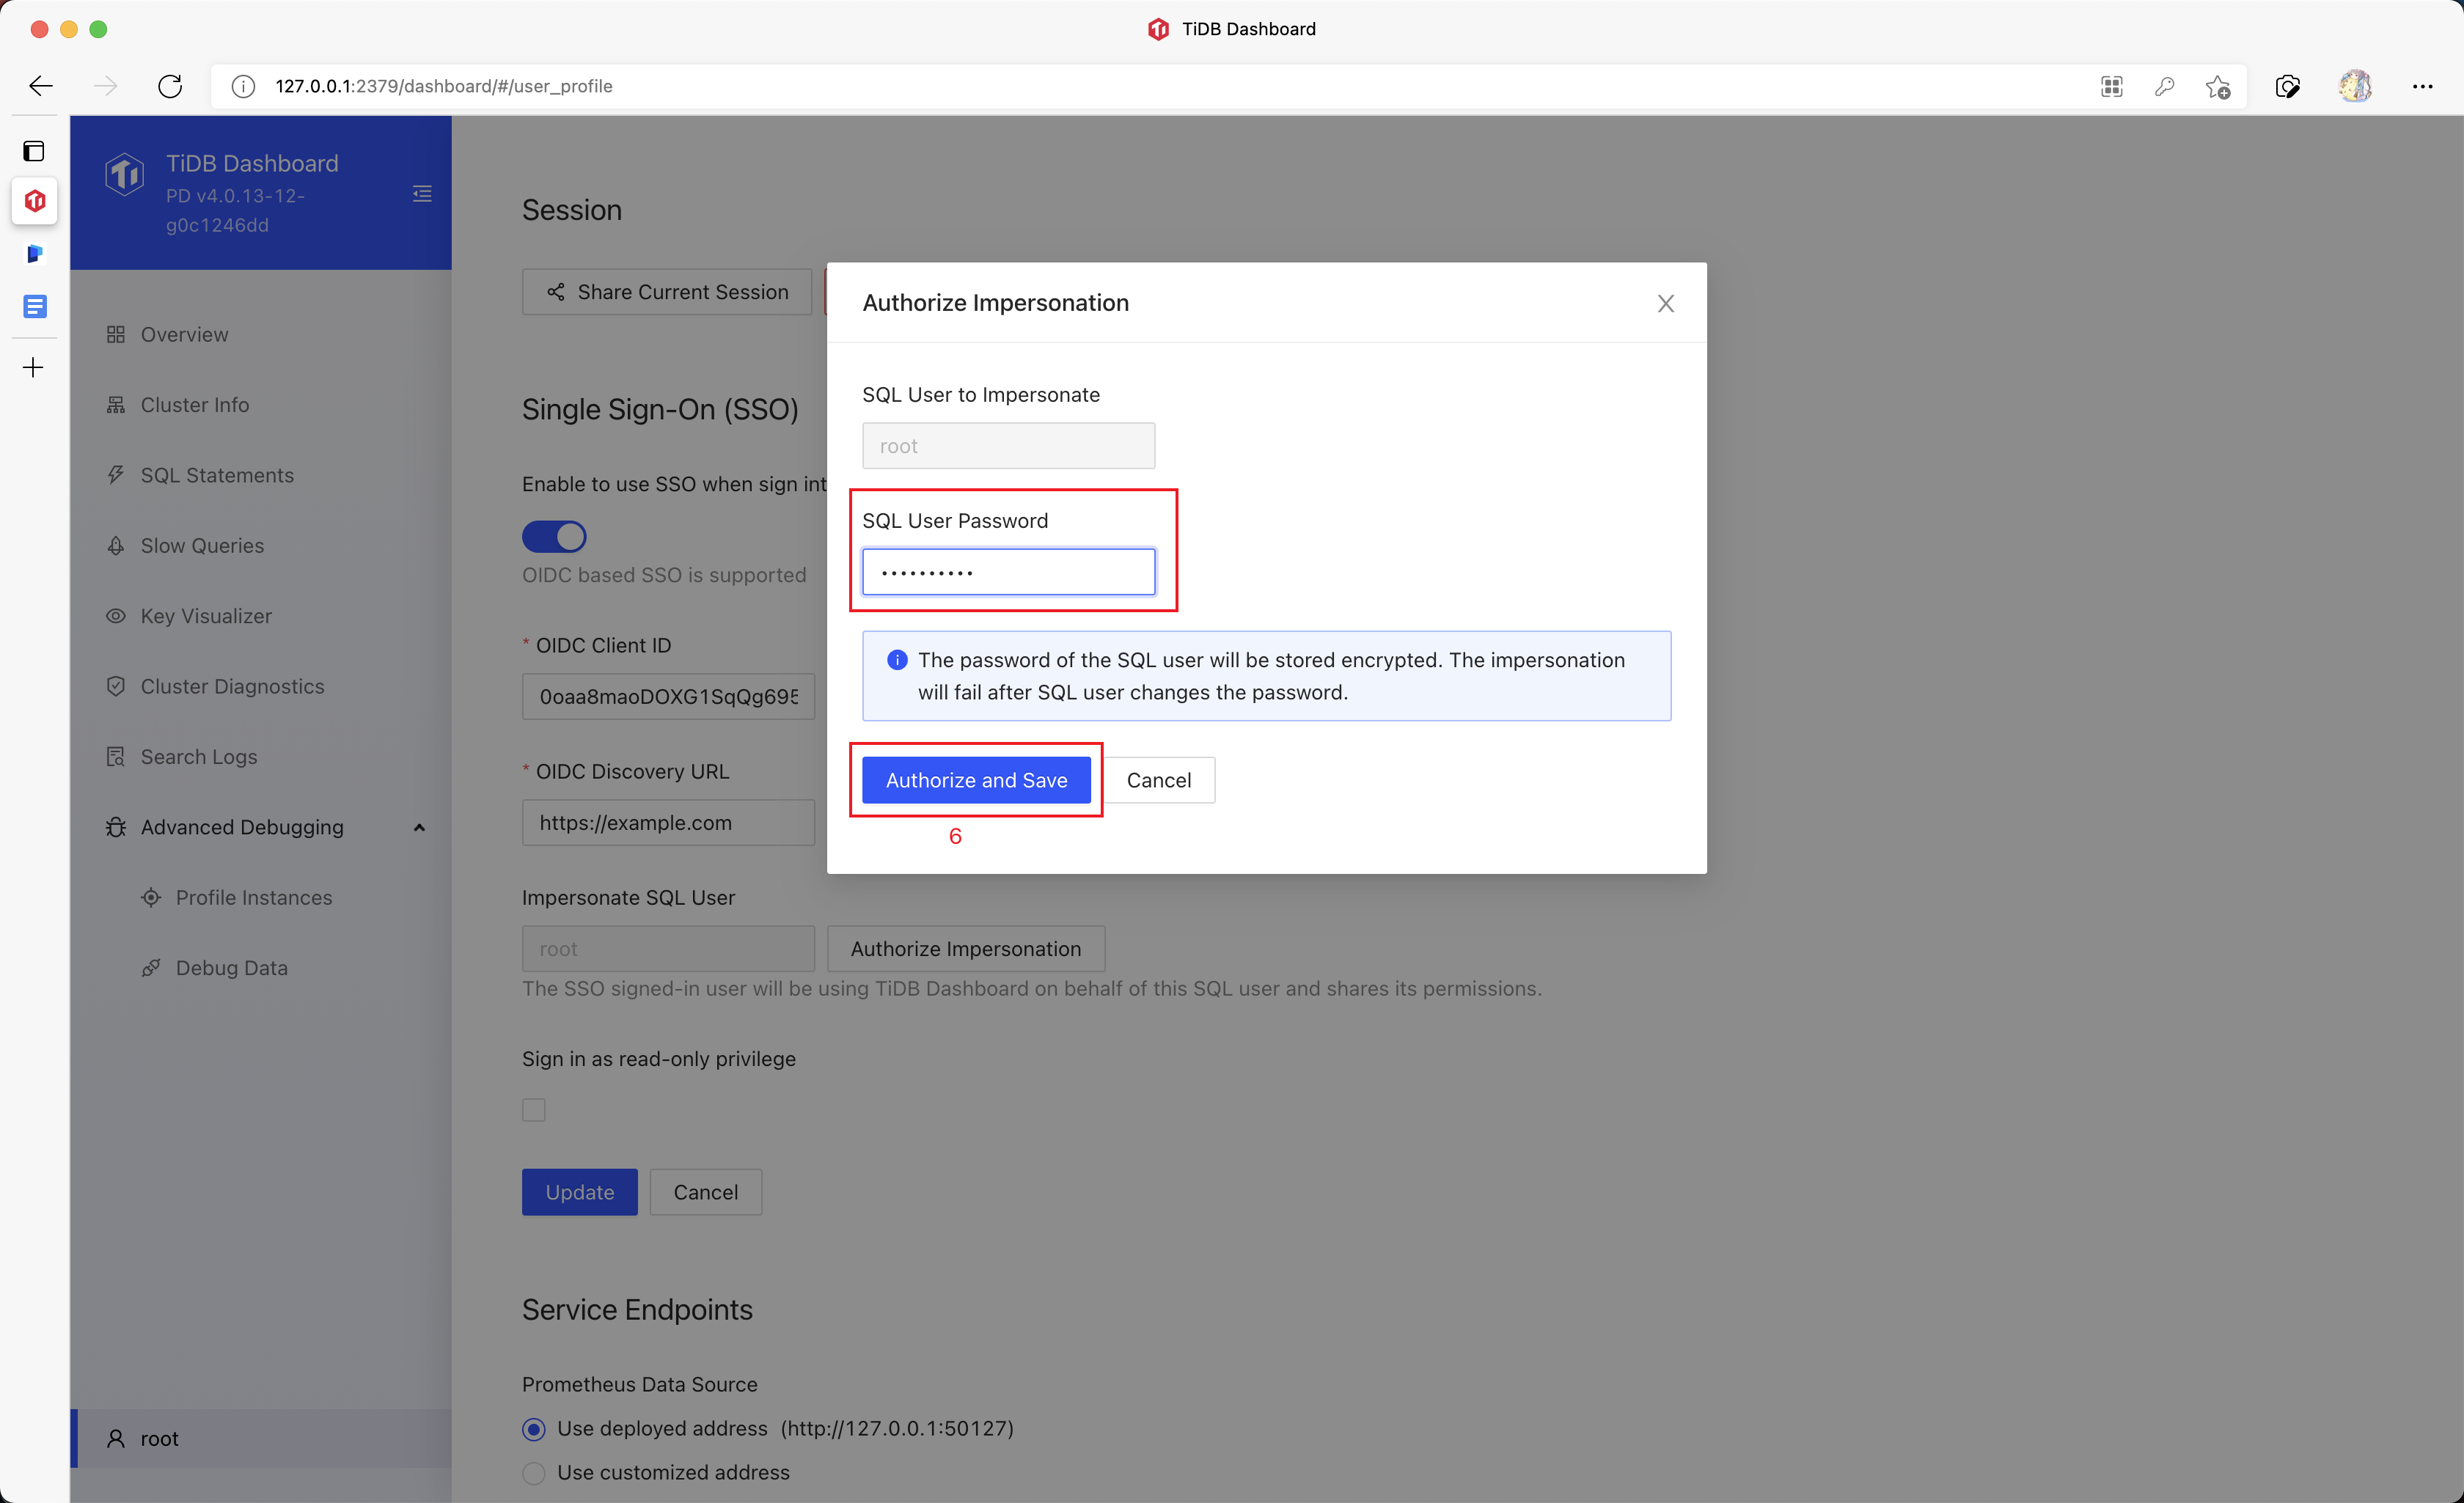
Click Authorize Impersonation and input the SQL password.
TiDB Dashboard will store this SQL password and use it to impersonate a normal SQL sign-in after an SSO sign-in is finished.
Click Authorize and Save.
Click Update (Update) to save the configuration.
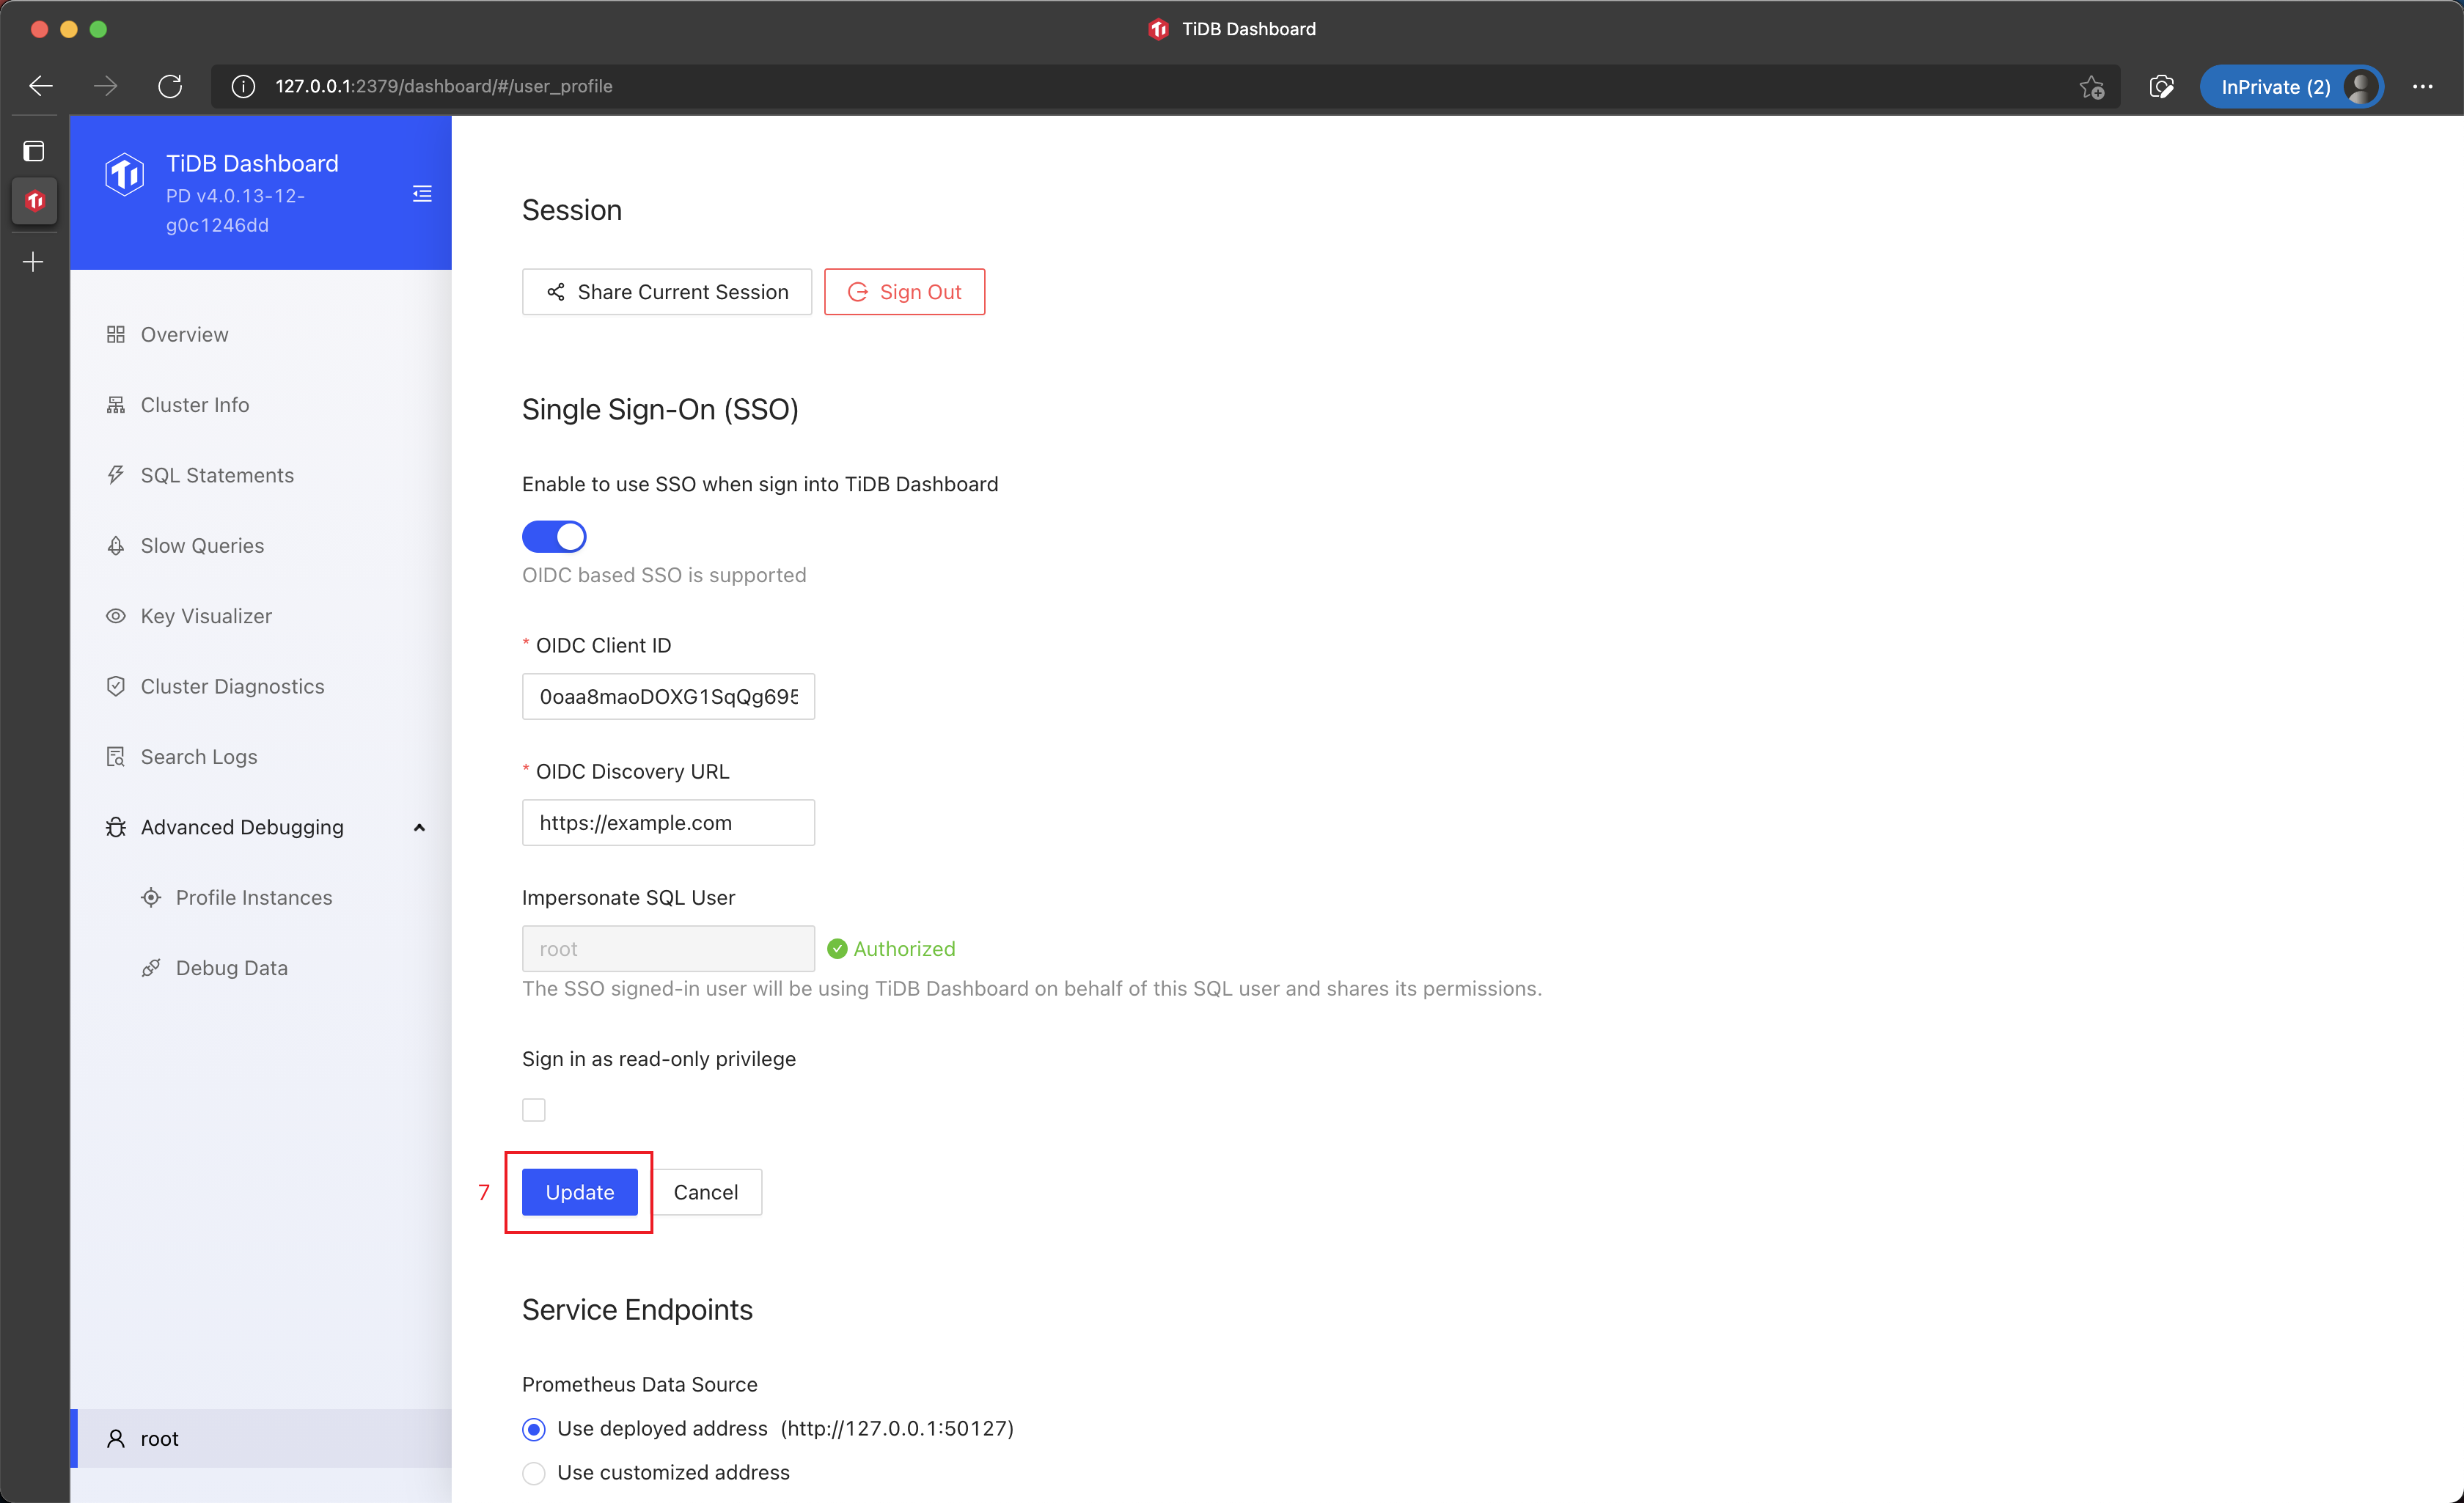
Now SSO sign-in has been enabled for TiDB Dashboard.
Disable SSO
You can disable the SSO, which will completely erase the stored SQL password:
Sign into TiDB Dashboard.
Click the username in the left sidebar to access the configuration page.
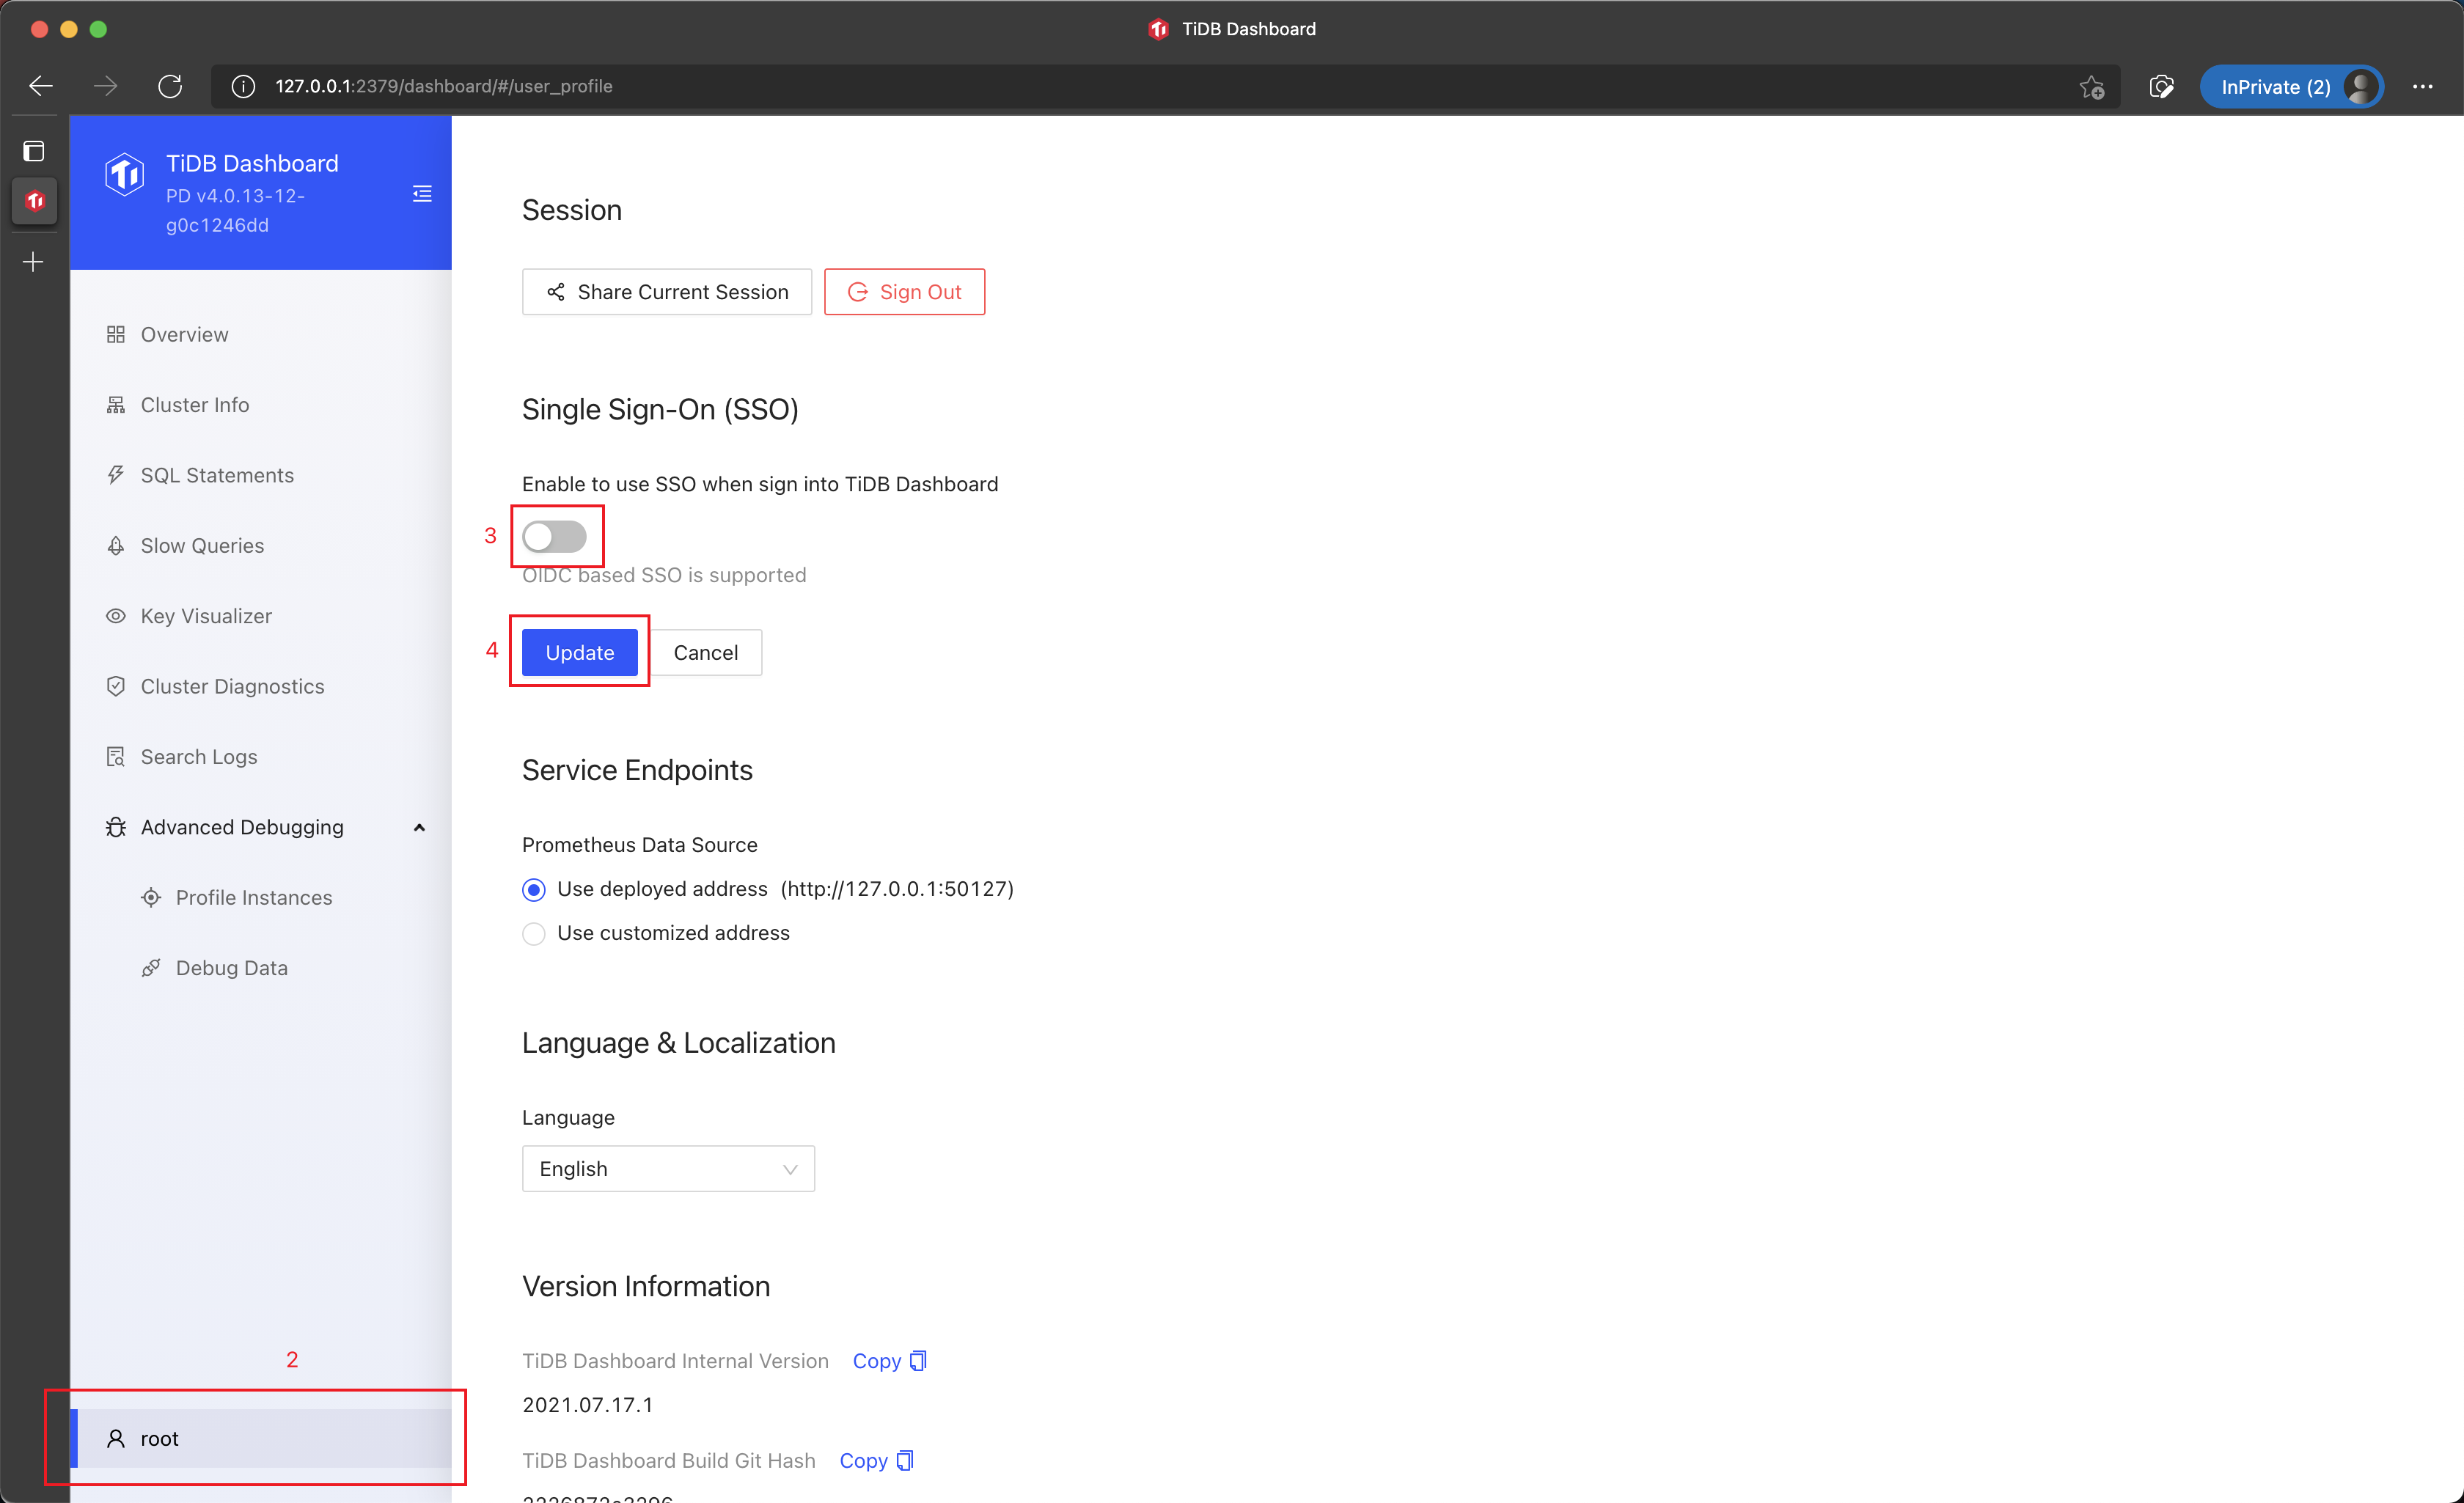
In the Single Sign-On section, deselect Enable to use SSO when sign into TiDB Dashboard.
Click Update (Update) to save the configuration.
Re-enter the password after a password change
The SSO sign-in will fail once the password of the SQL user is changed. In this case, you can bring back the SSO sign-in by re-entering the SQL password:
Sign into TiDB Dashboard.
Click the username in the left sidebar to access the configuration page.
In the Single Sign-On section, Click Authorize Impersonation and input the updated SQL password.
Click Authorize and Save.
Sign in via SSO
Once SSO is configured for TiDB Dashboard, you can sign in via SSO by taking following steps:
In the sign-in page of TiDB Dashboard, click Sign in via Company Account.

Sign into the system with SSO service configured.
You are redirected back to TiDB Dashboard to finish the sign-in.
Example 1: Use Okta for TiDB Dashboard SSO sign-in
Okta is an OIDC SSO identity service, which is compatible with the SSO feature of TiDB Dashboard. The steps below demonstrate how to configure Okta and TiDB Dashboard so that Okta can be used as the TiDB Dashboard SSO provider.
Step 1: Configure Okta
First, create an Okta Application Integration to integrate SSO.
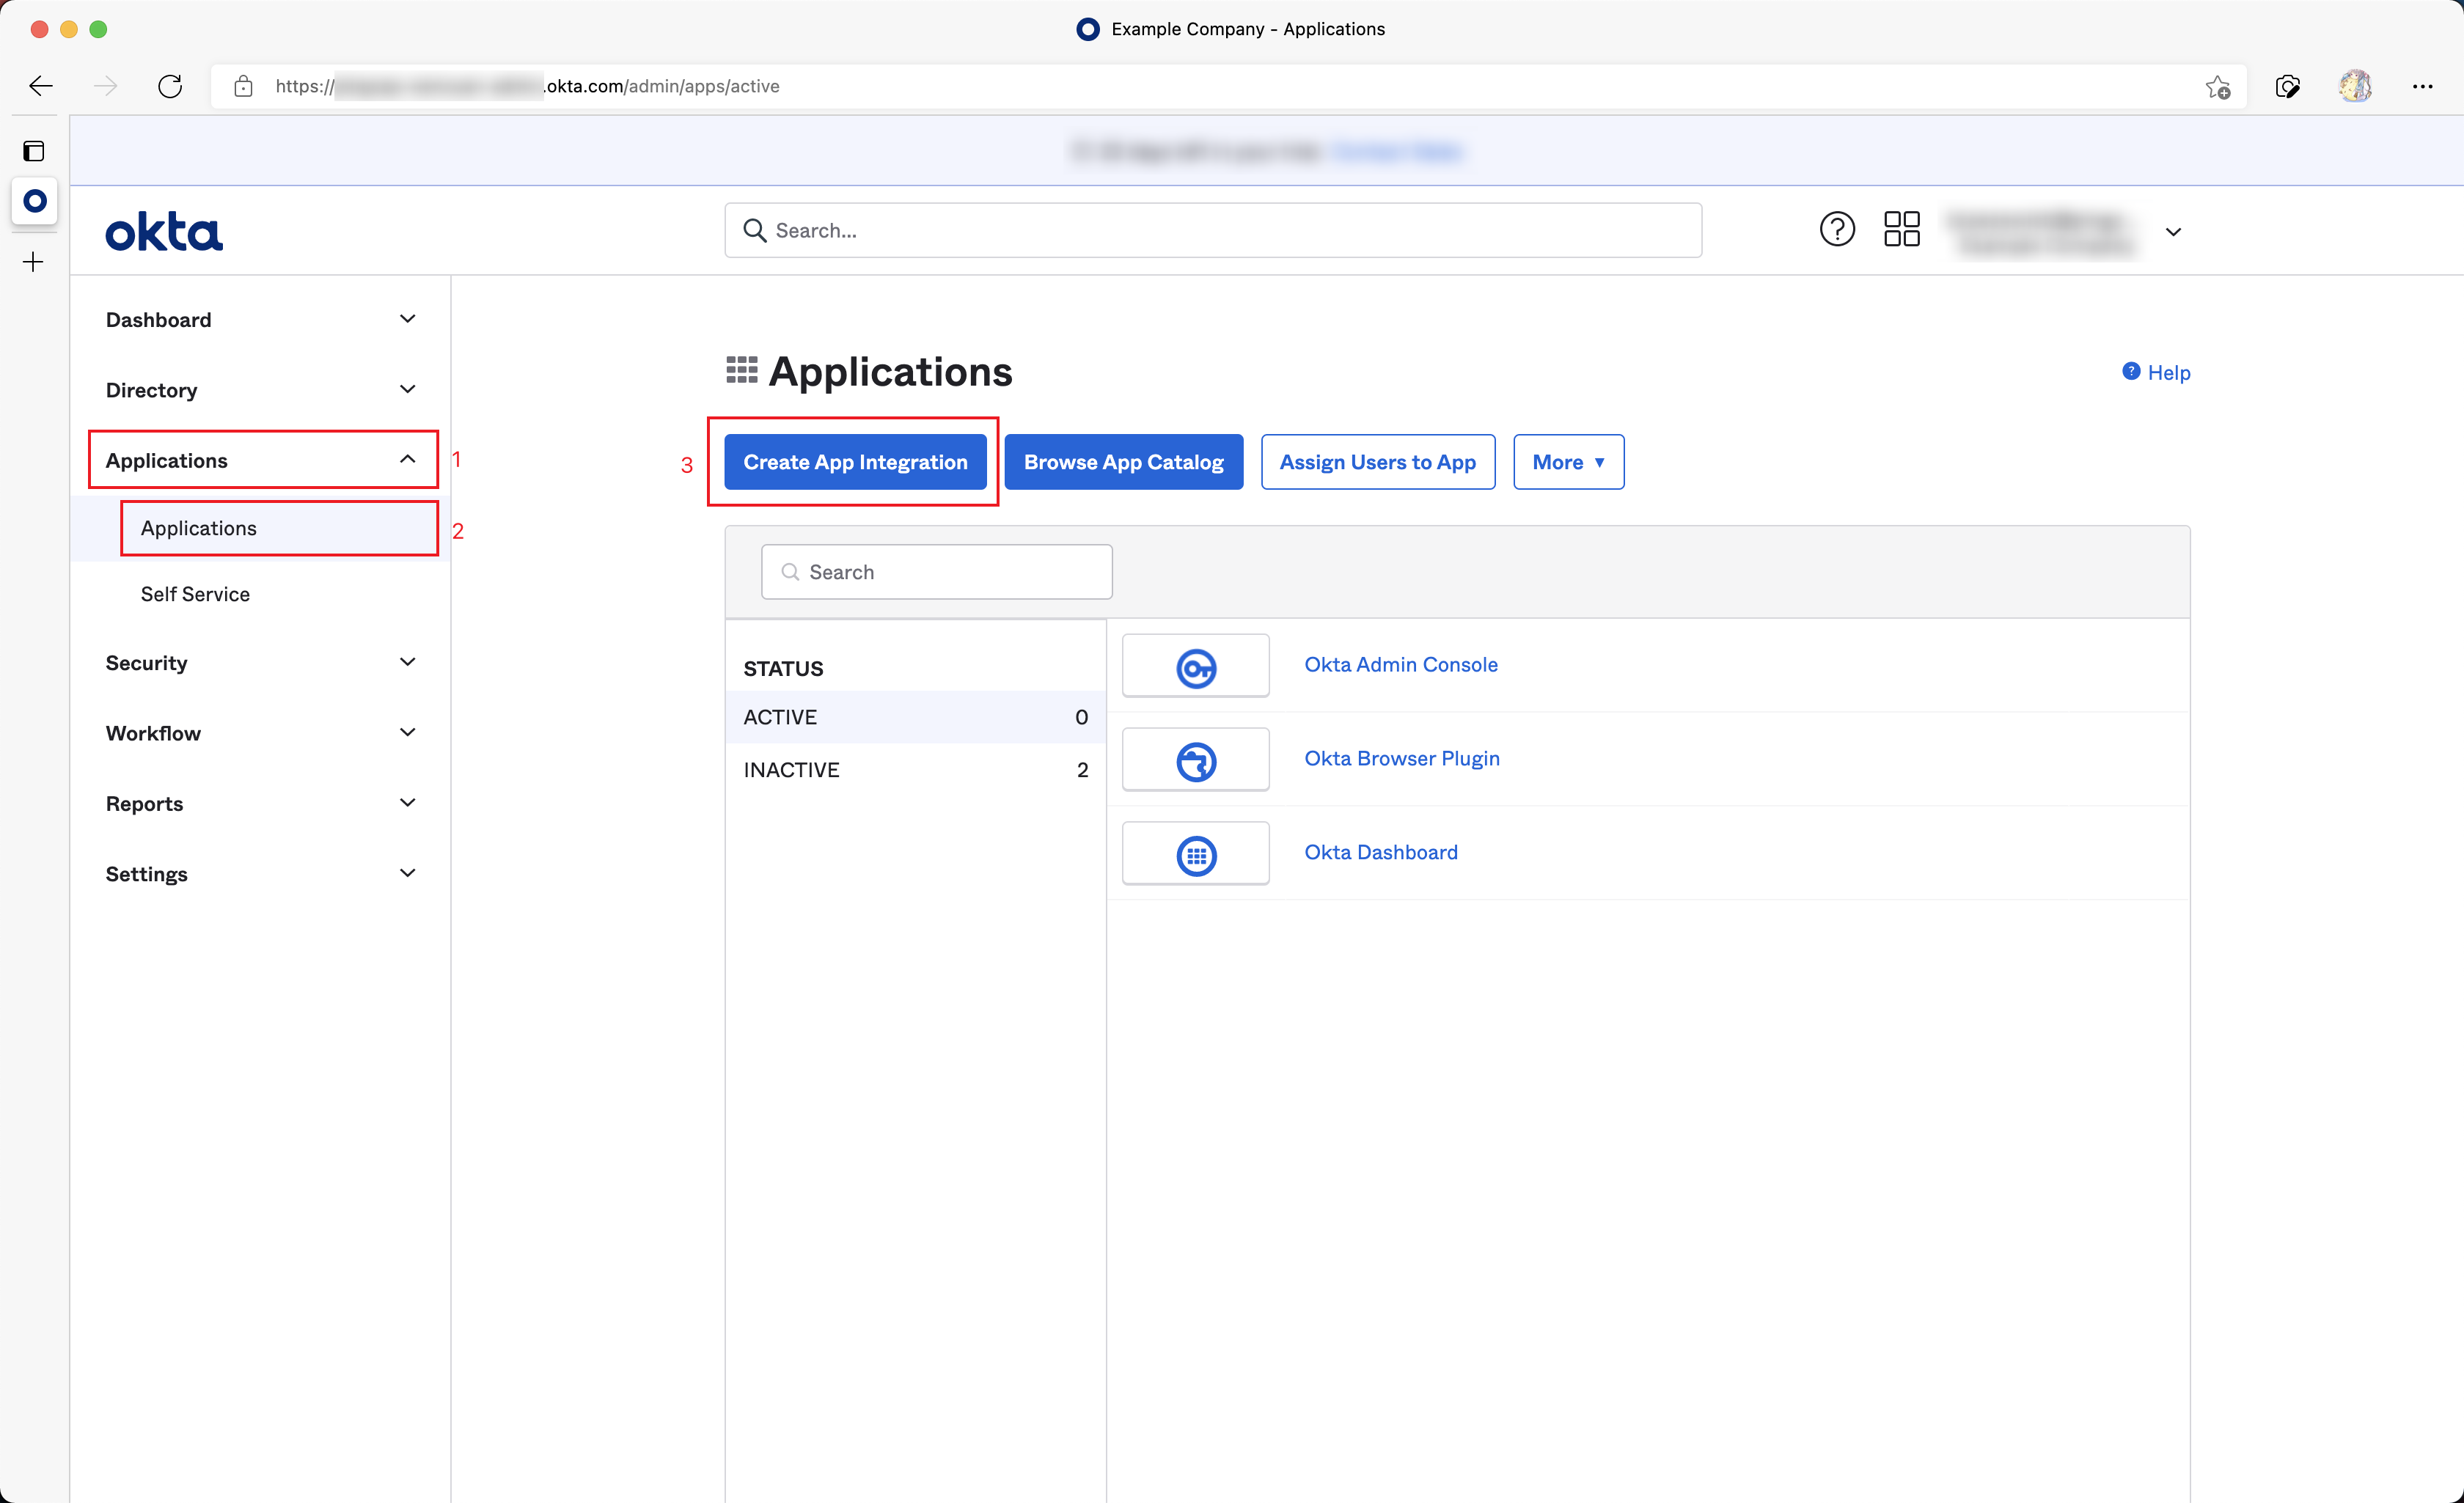
Access the Okta administration site.
Navigate from the left sidebar Applications > Applications.
Click Create App Integration.
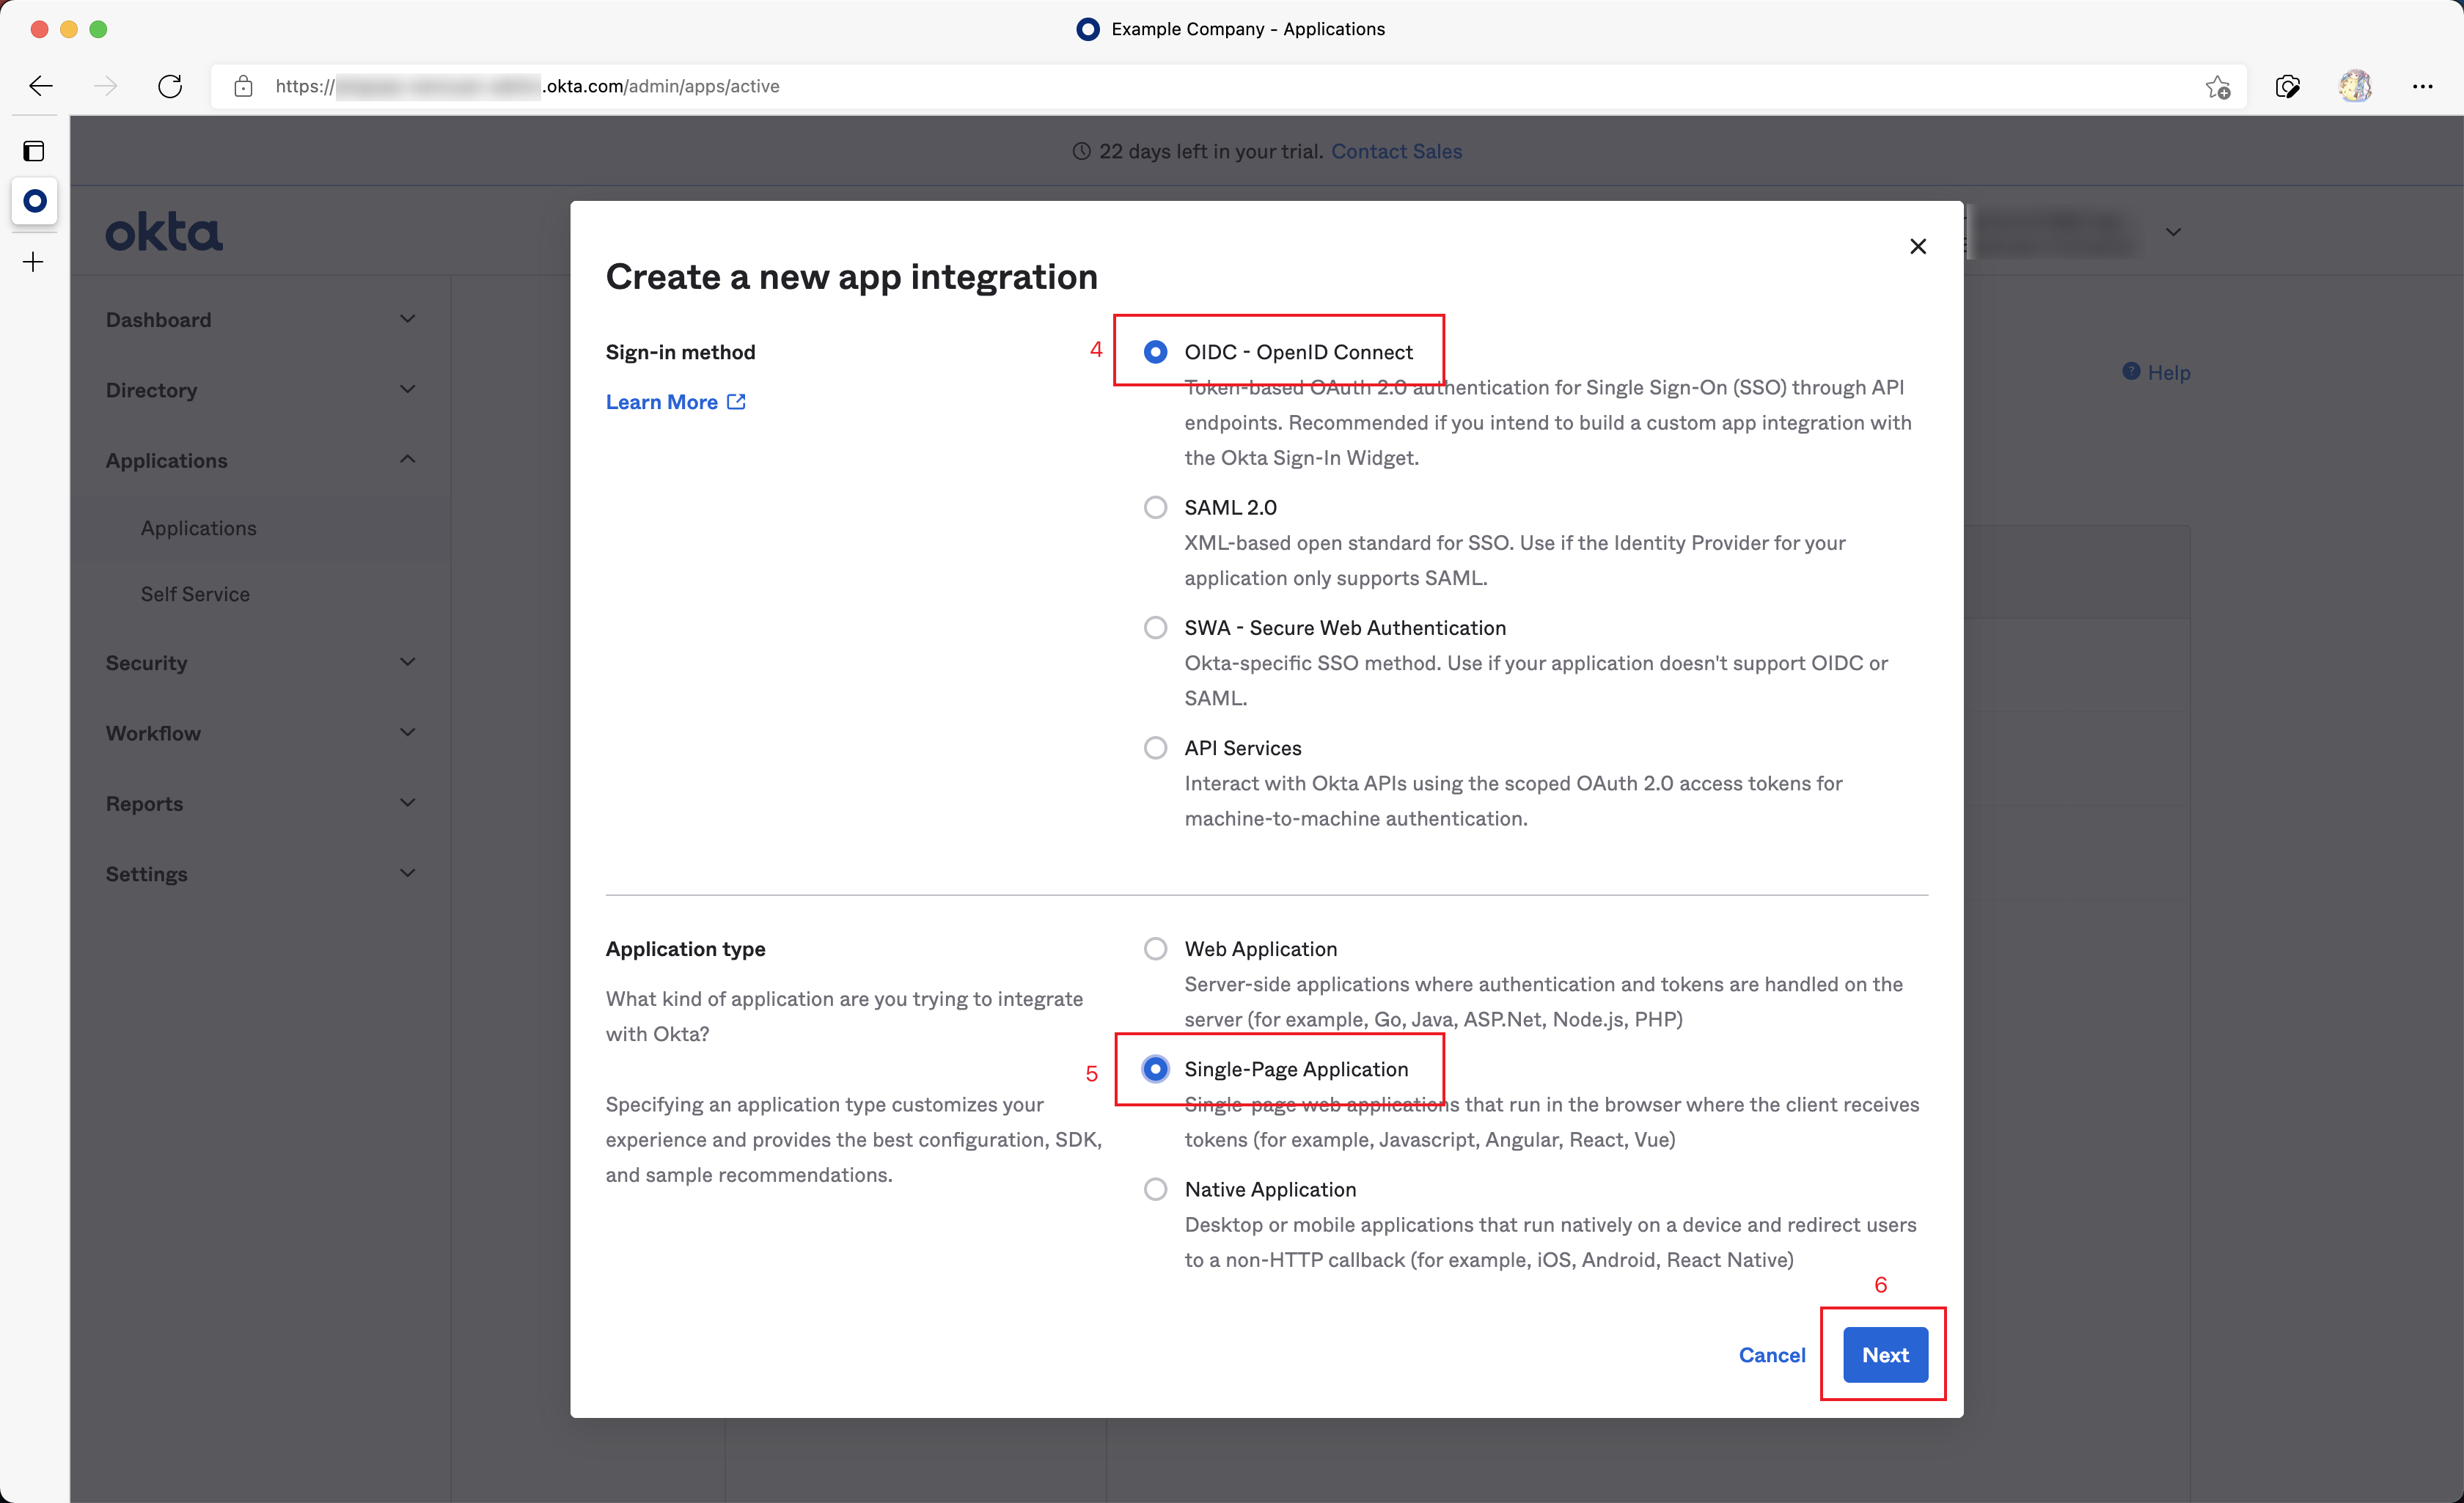
In the poped up dialog, choose OIDC - OpenID Connect in Sign-in method.
Choose Single-Page Application in Application Type.
Click the Next button.
Fill Sign-in redirect URIs as follows:
http://DASHBOARD_IP:PORT/dashboard/?sso_callback=1Substitute
DASHBOARD_IP:PORTwith the actual domain (or IP address) and port that you use to access the TiDB Dashboard in the browser.Fill Sign-out redirect URIs as follows:
http://DASHBOARD_IP:PORT/dashboard/Similarly, substitute
DASHBOARD_IP:PORTwith the actual domain (or IP address) and port.
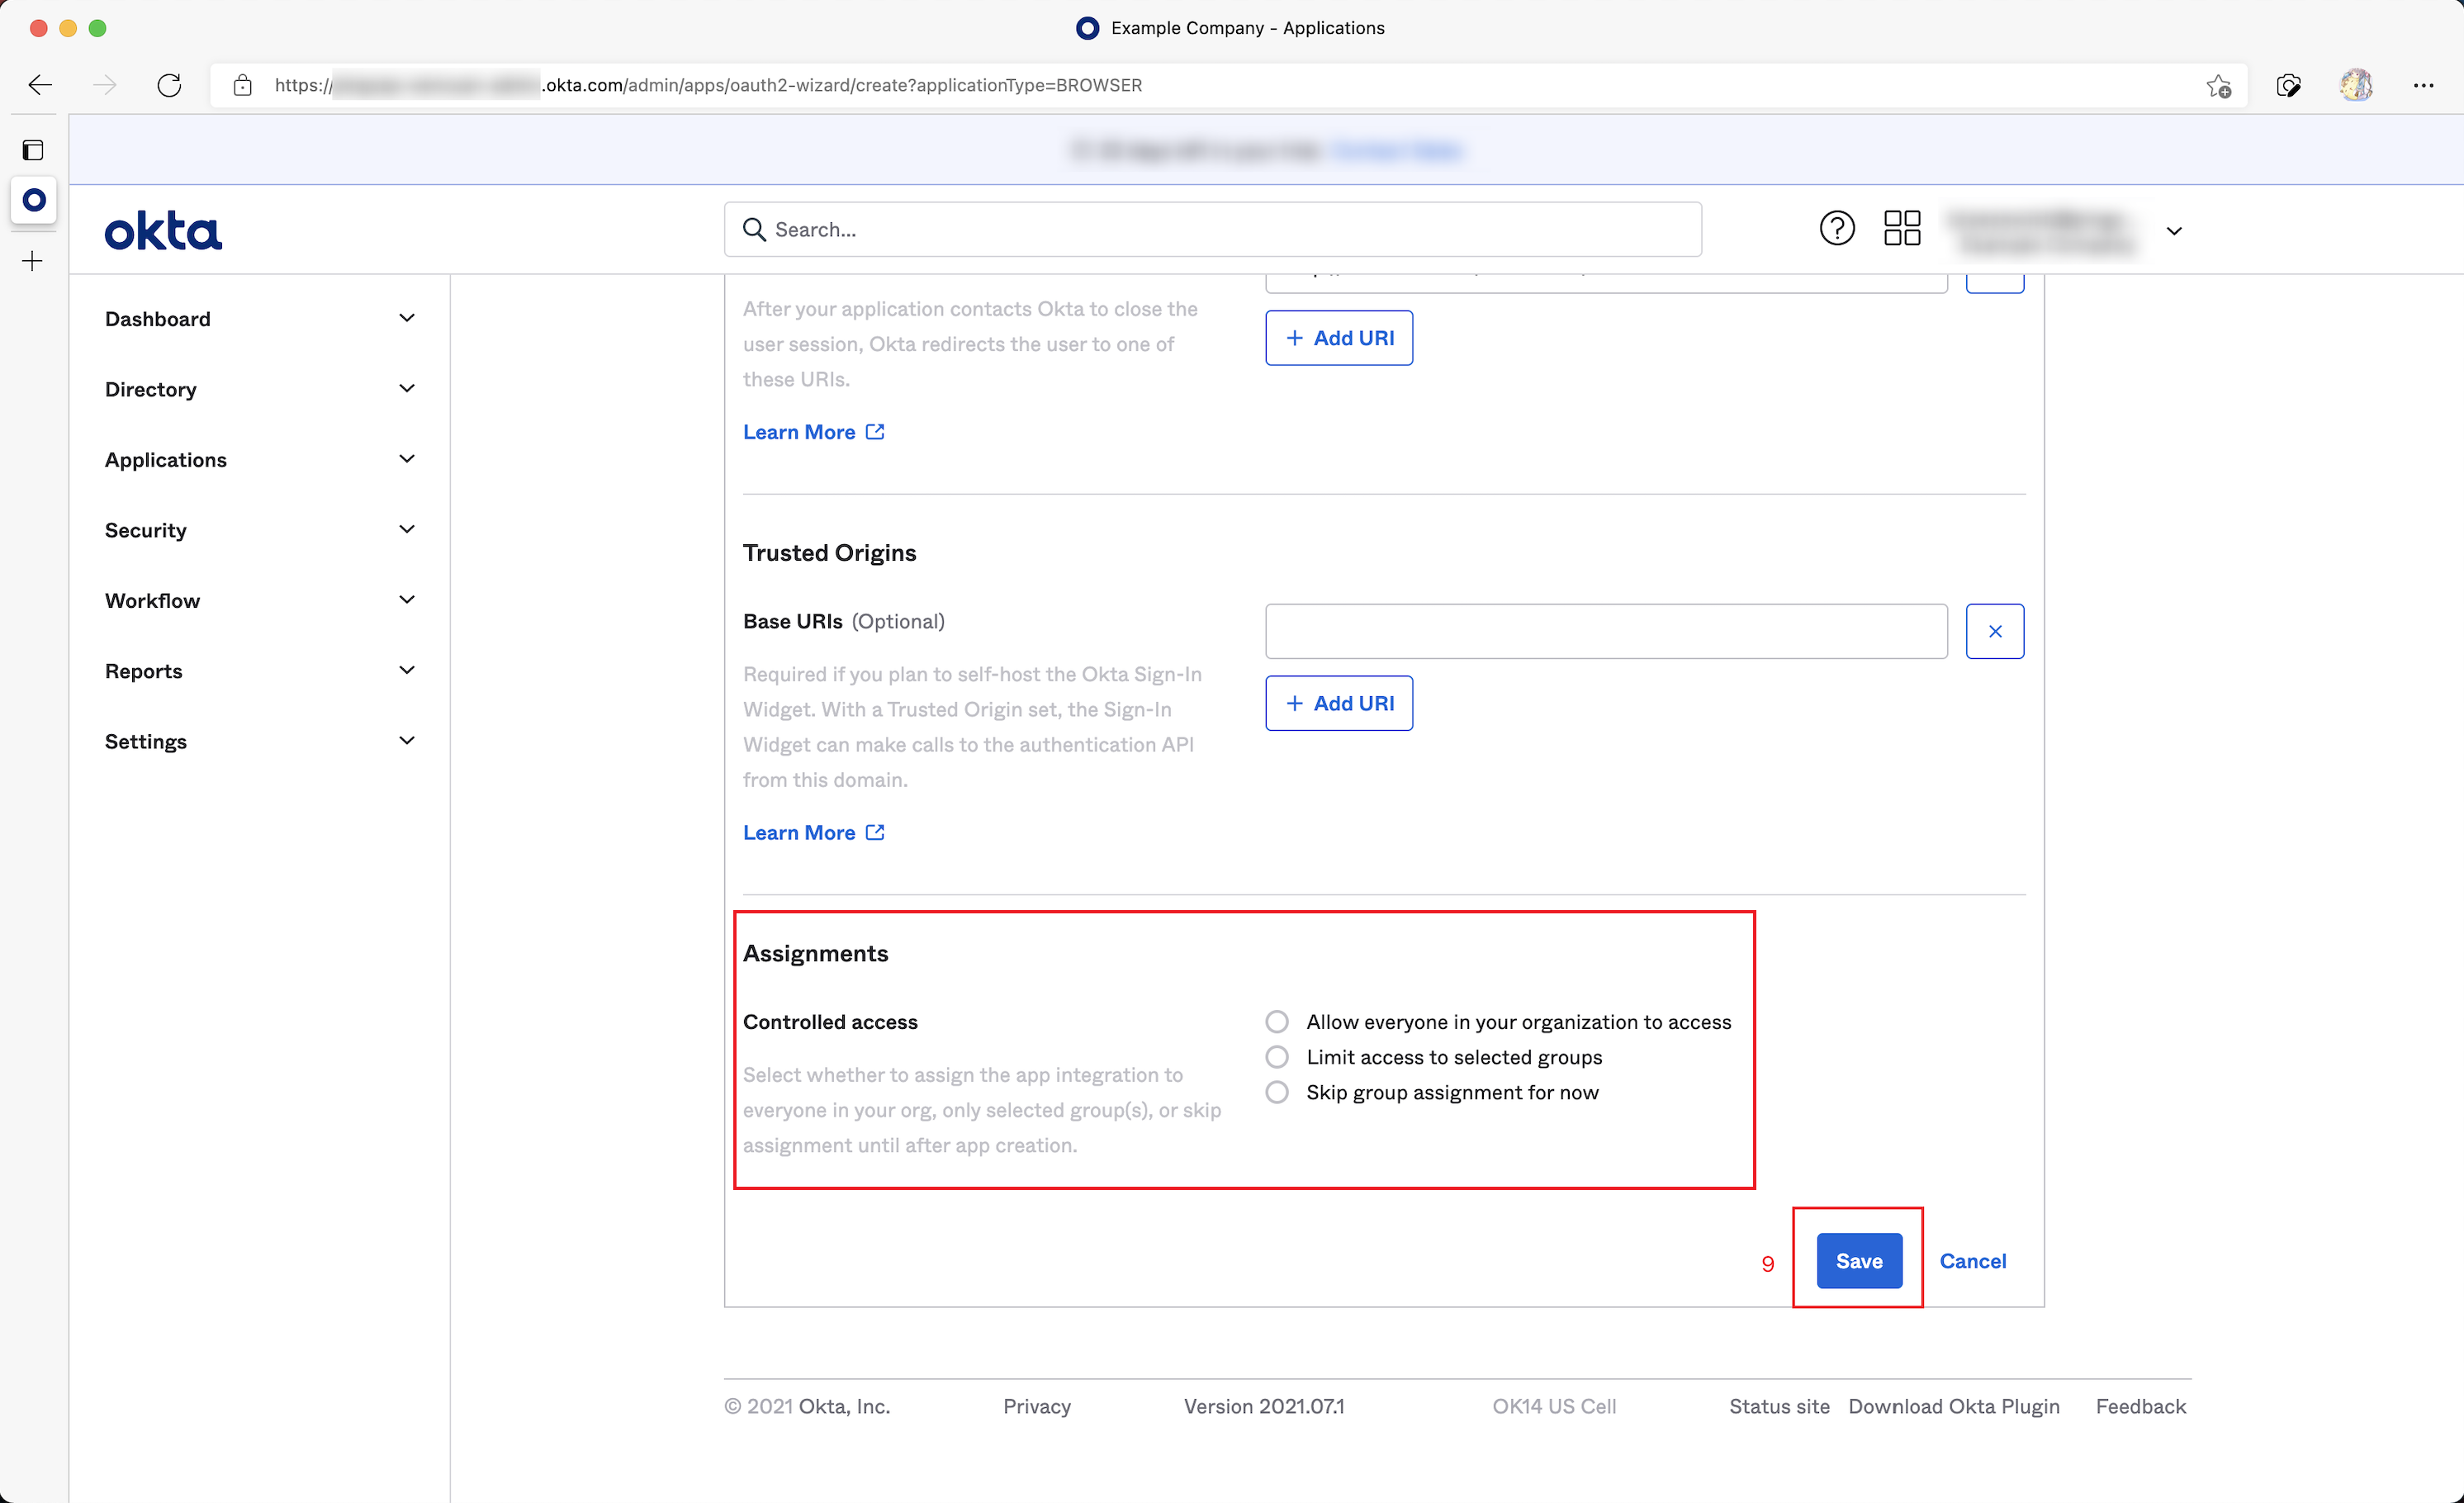
Configure what type of users in your organization is allowed for SSO sign-in in the Assignments field, and then click Save to save the configuration.
Step 2: Obtain OIDC information and fill in TiDB Dashboard
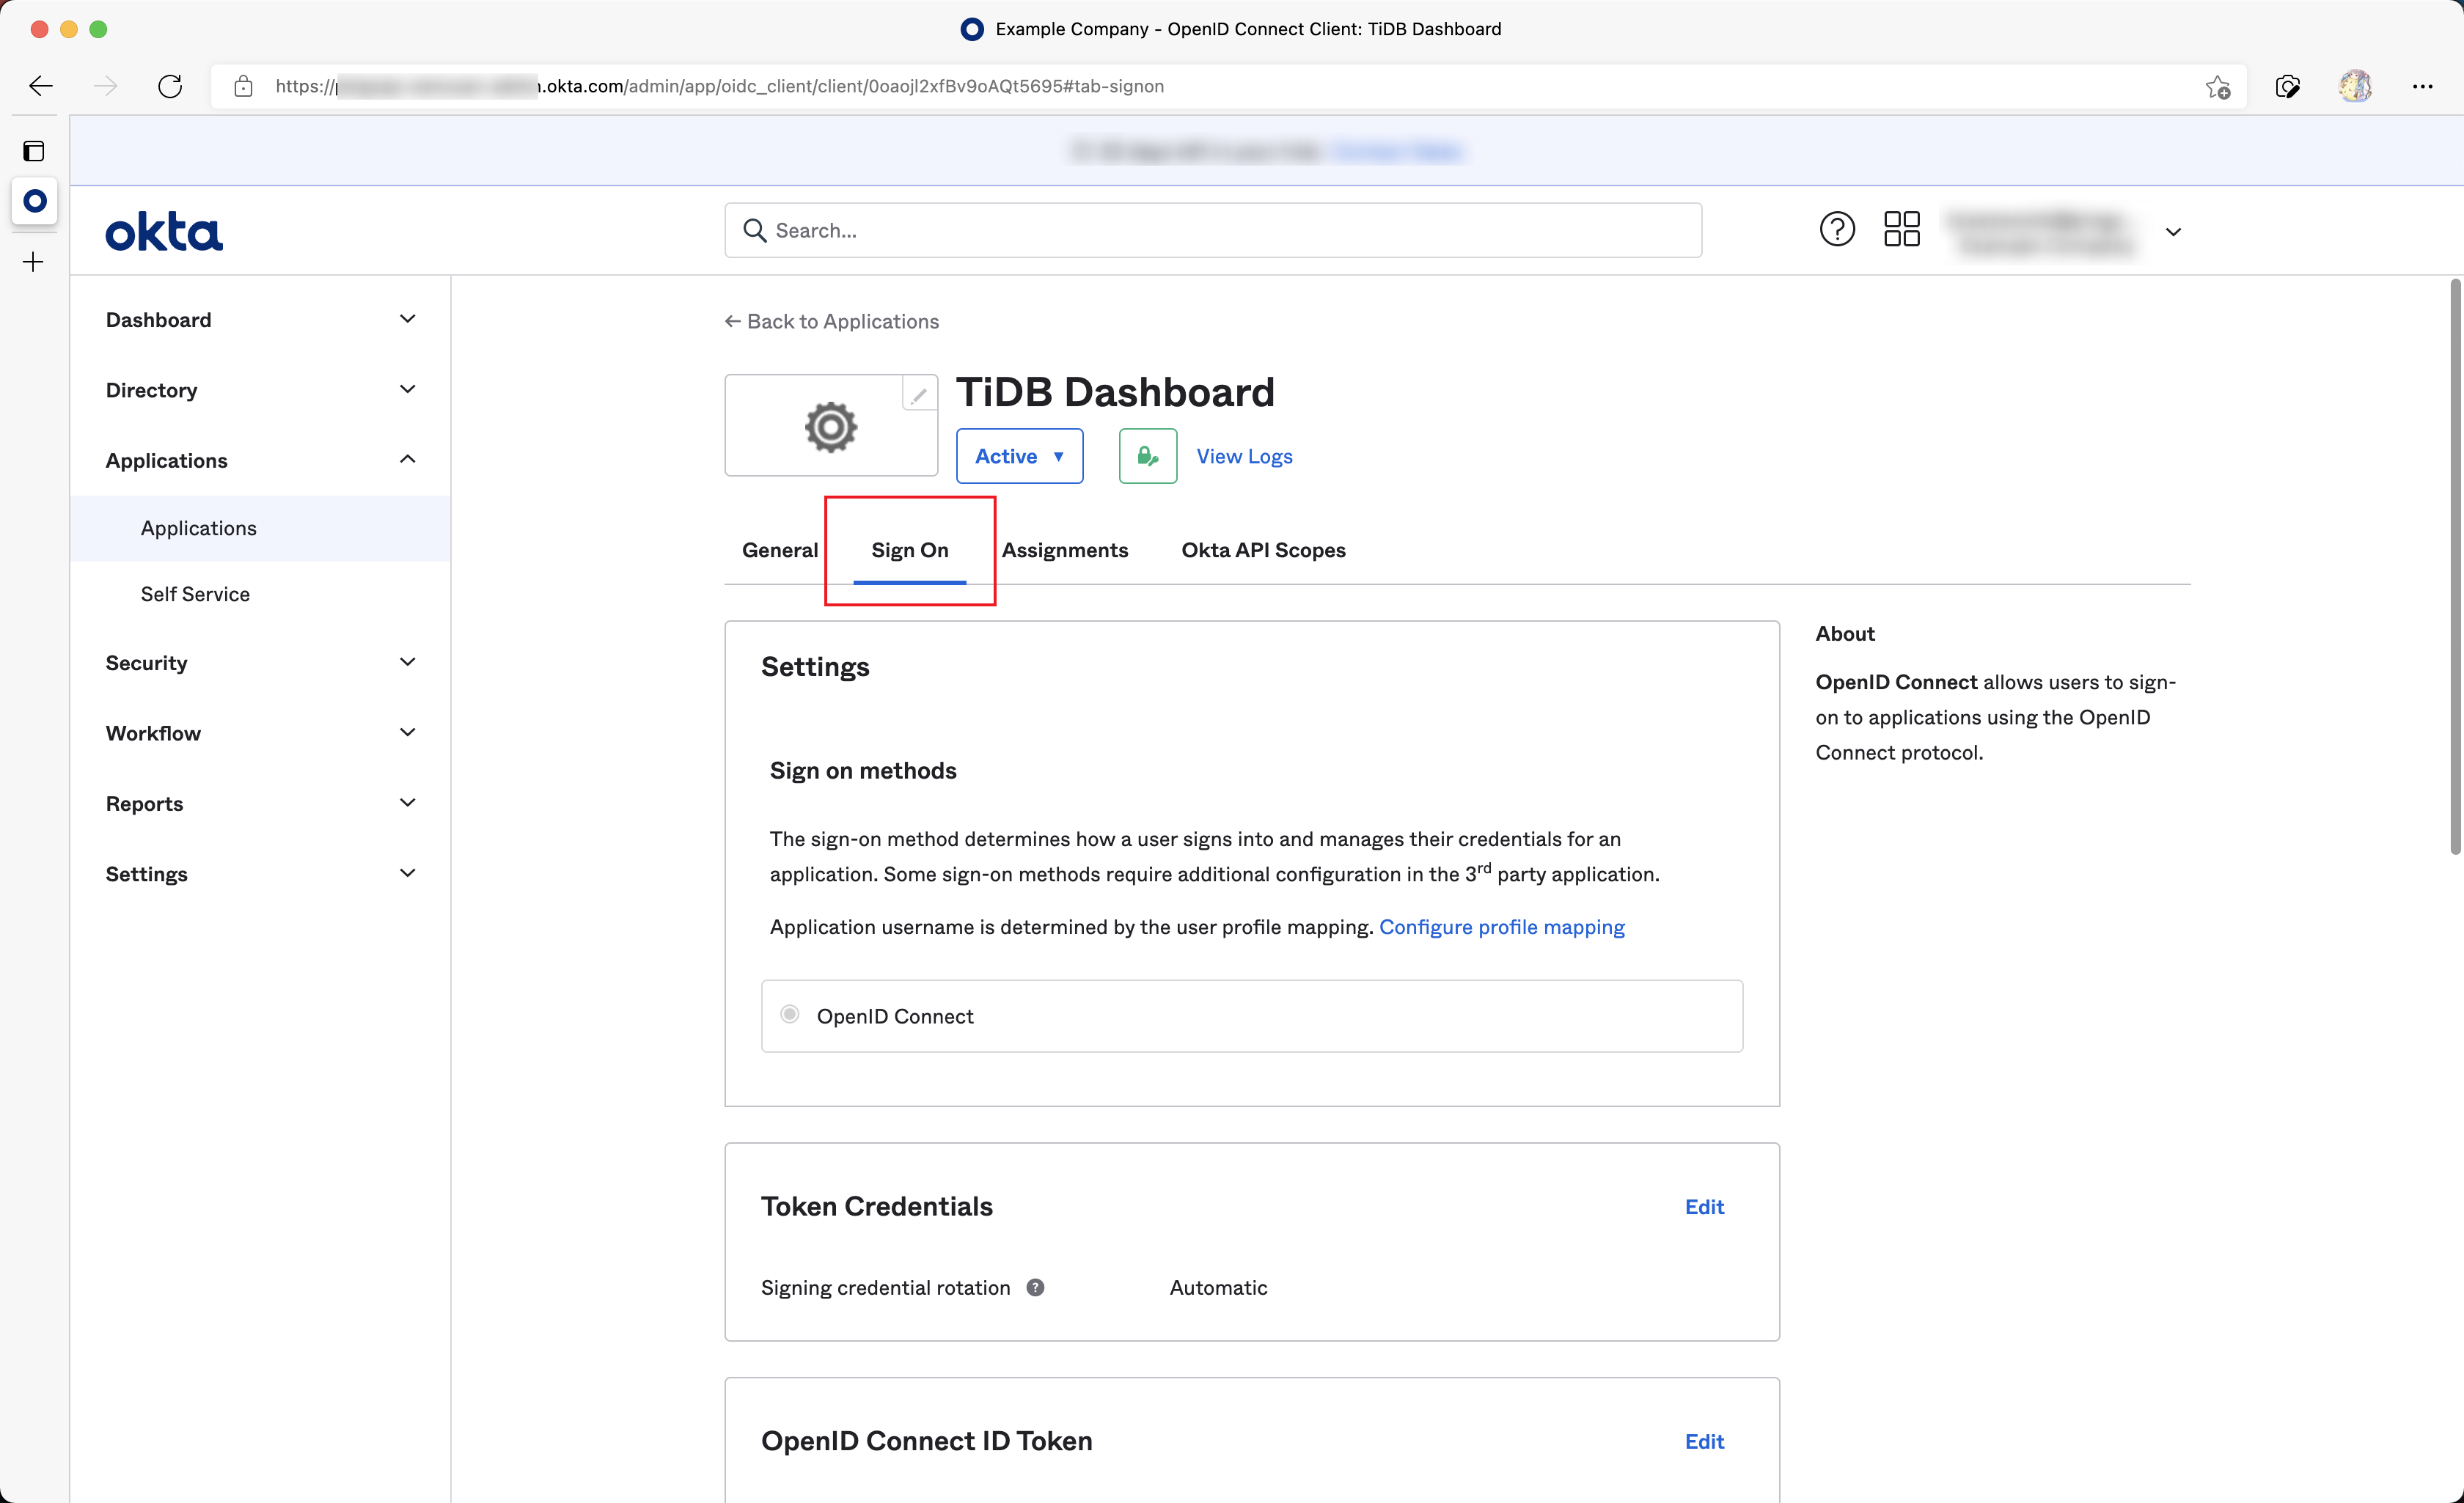
In the Application Integration just created in Okta, click Sign On.
Copy values of the Issuer and Audience fields from the OpenID Connect ID Token section.
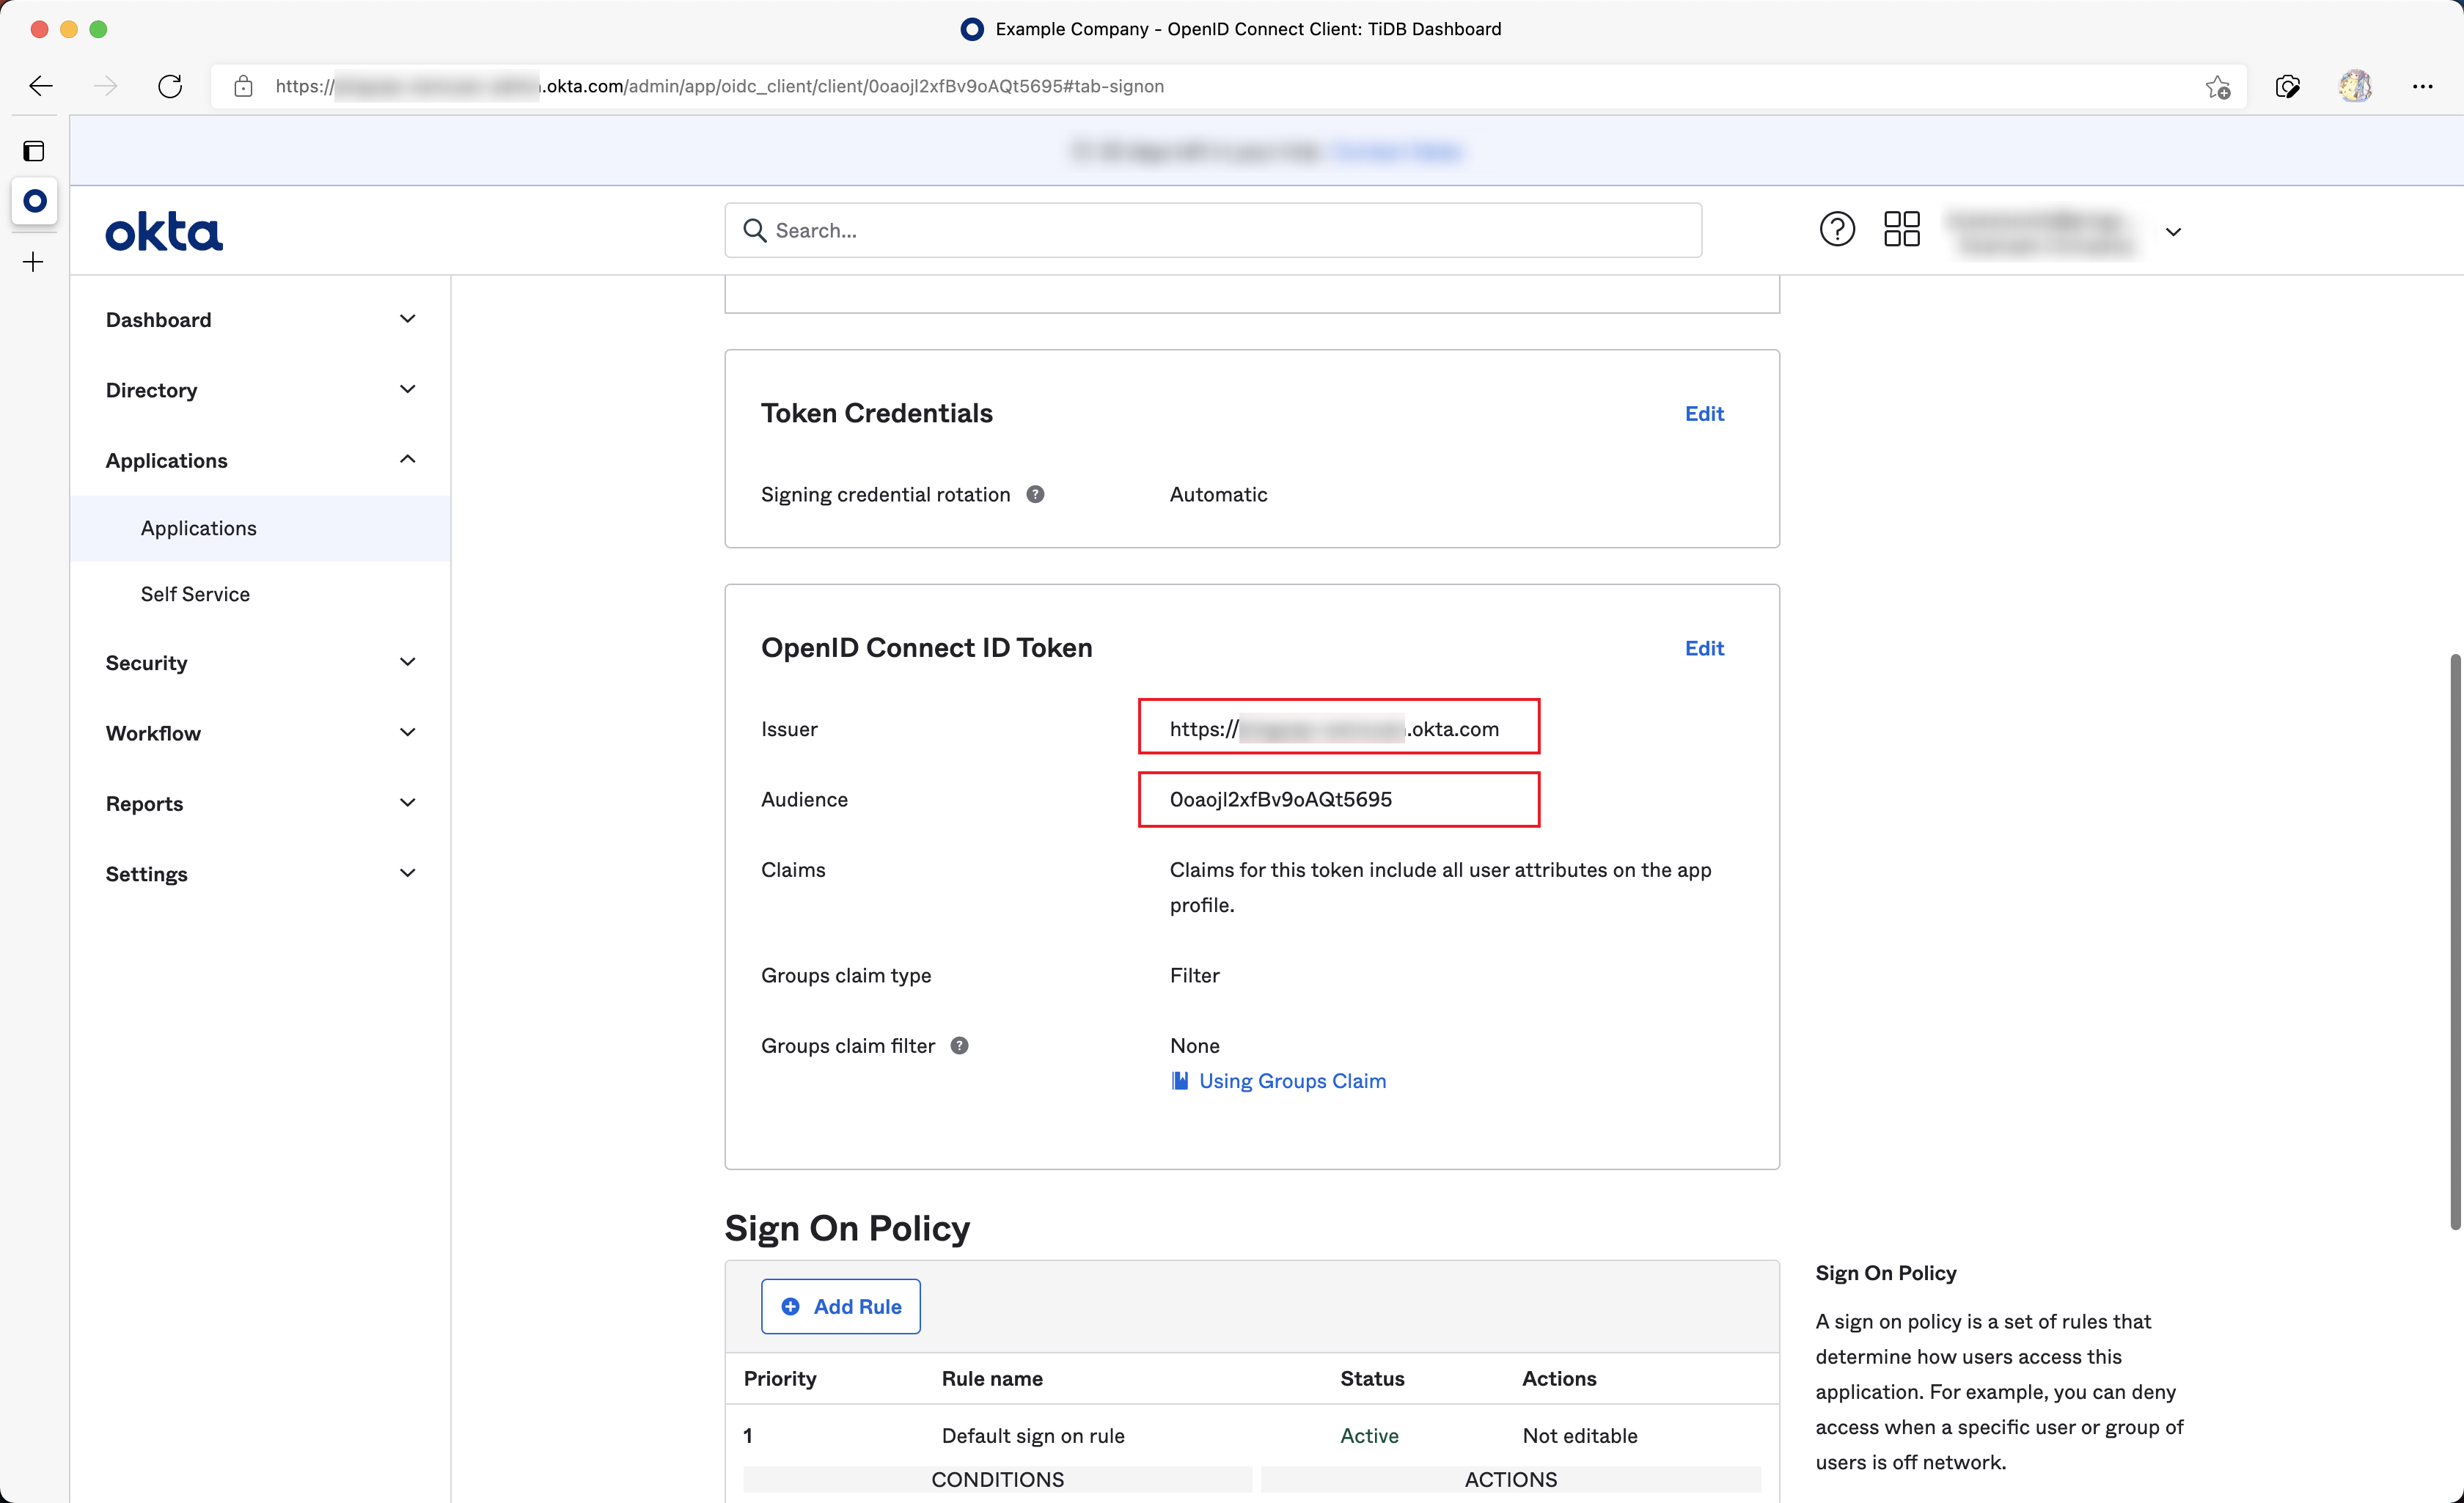
Open the TiDB Dashboard configuration page, fill OIDC Client ID with Issuer obtained from the last step and fill OIDC Discovery URL with Audience. Then finish the authorization and save the configuration. For example:

Now TiDB Dashboard has been configured to use Okta SSO for sign-in.
Example 2: Use Auth0 for TiDB Dashboard SSO sign-in
Similar to Okta, Auth0 also provides OIDC SSO identity service. The following steps describe how to configure Auth0 and TiDB Dashboard so that Auth0 can be used as the TiDB Dashboard SSO provider.
Step 1: Configure Auth0
Access the Auth0 administration site.
Navigate on the left sidebar Applications > Applications.
Click Create App Integration.
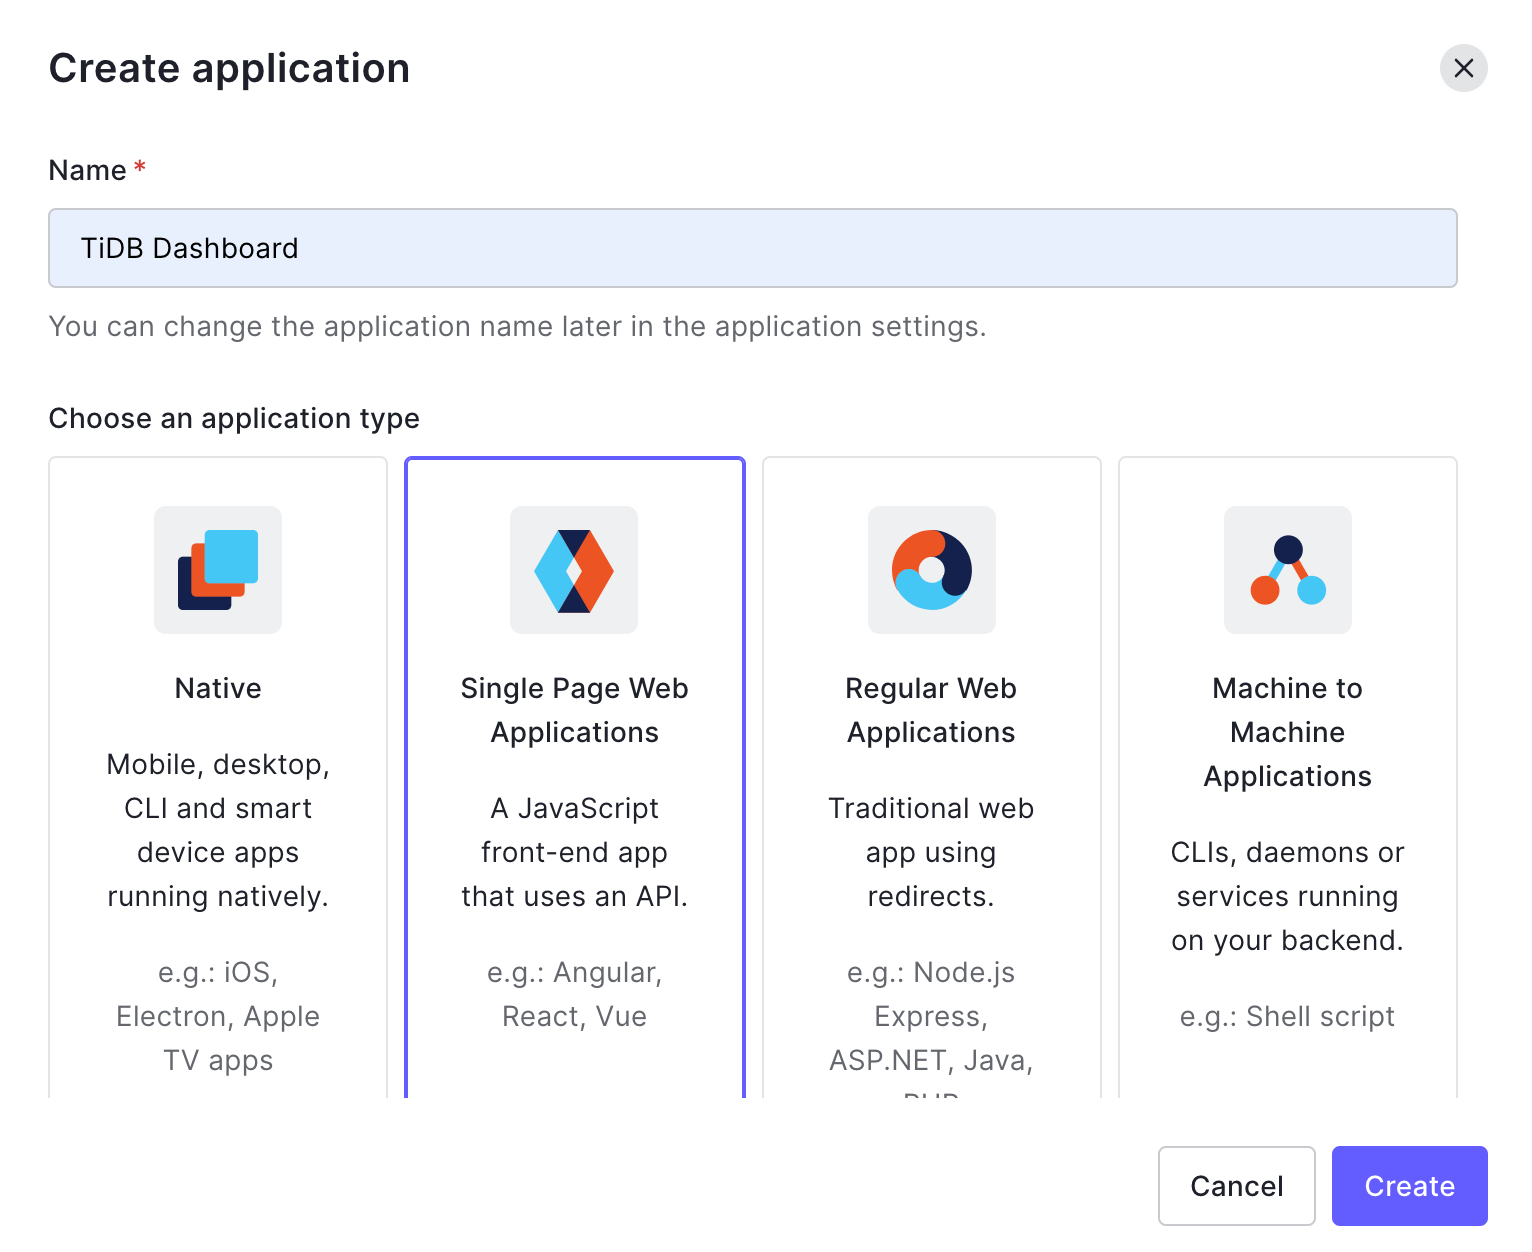
In the popped-up dialog, fill Name, for example, "TiDB Dashboard". Choose Single Page Web Applications in Choose an application type. Click Create.
Click Settings.

Fill Allowed Callback URLs as follows:
http://DASHBOARD_IP:PORT/dashboard/?sso_callback=1Replace
DASHBOARD_IP:PORTwith the actual domain (or IP address) and port that you use to access the TiDB Dashboard in your browser.Fill Allowed Logout URLs as follows:
http://DASHBOARD_IP:PORT/dashboard/Similarly, replace
DASHBOARD_IP:PORTwith the actual domain (or IP address) and port.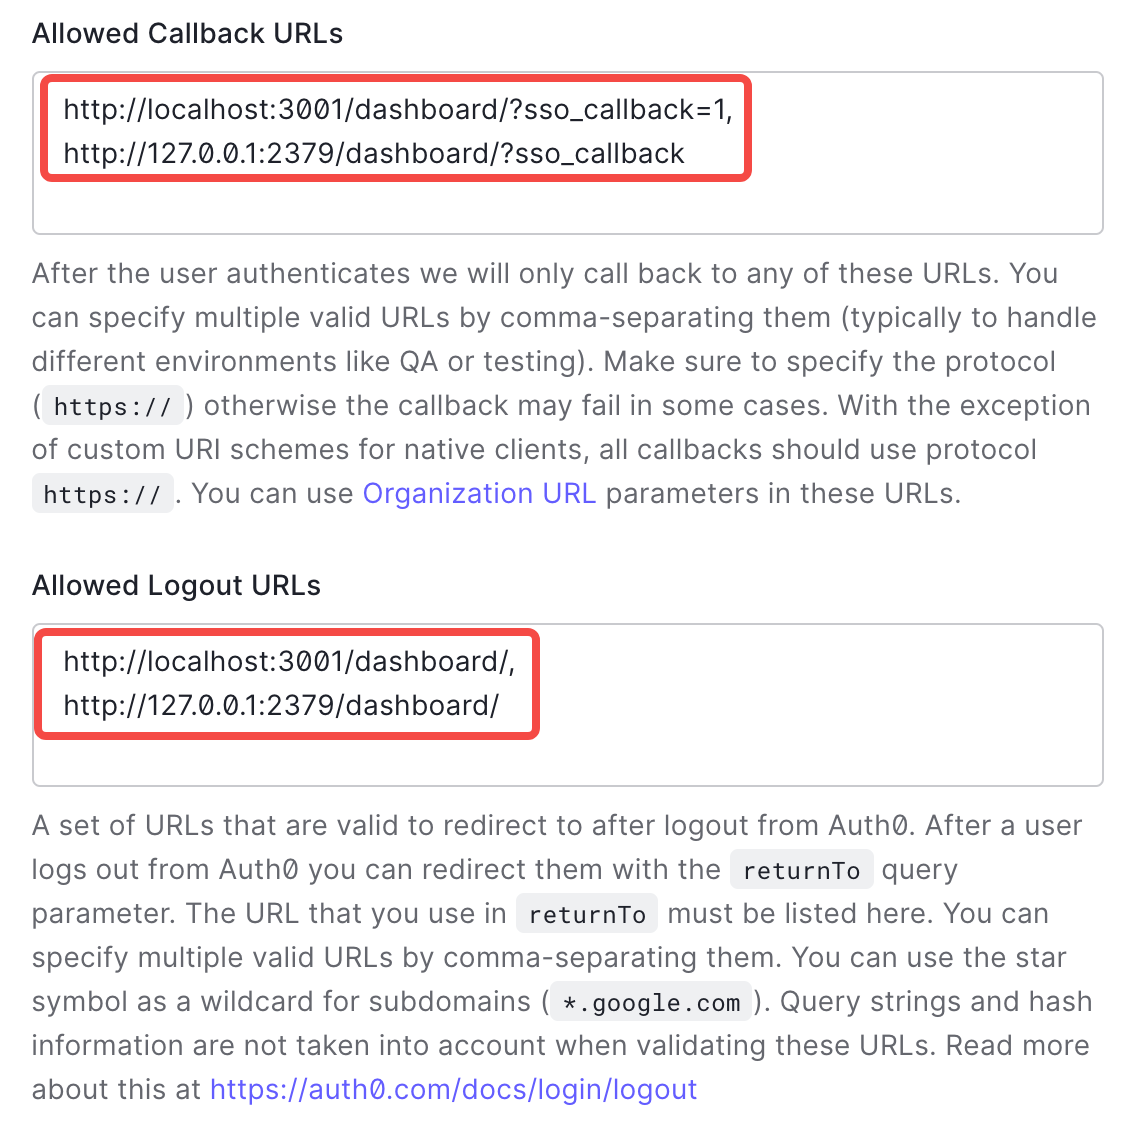
Keep the default values for other settings and click Save Changes.
Step 2: Obtain OIDC information and fill in TiDB Dashboard
Fill OIDC Client ID of TiDB Dashboard with Client ID in Basic Information under the Settings tab of Auth0.
Fill OIDC Discovery URL with the Domain field value prefixed with
https://and suffixed with/, for example,https://example.us.auth0.com/. Complete authorization and save the configuration.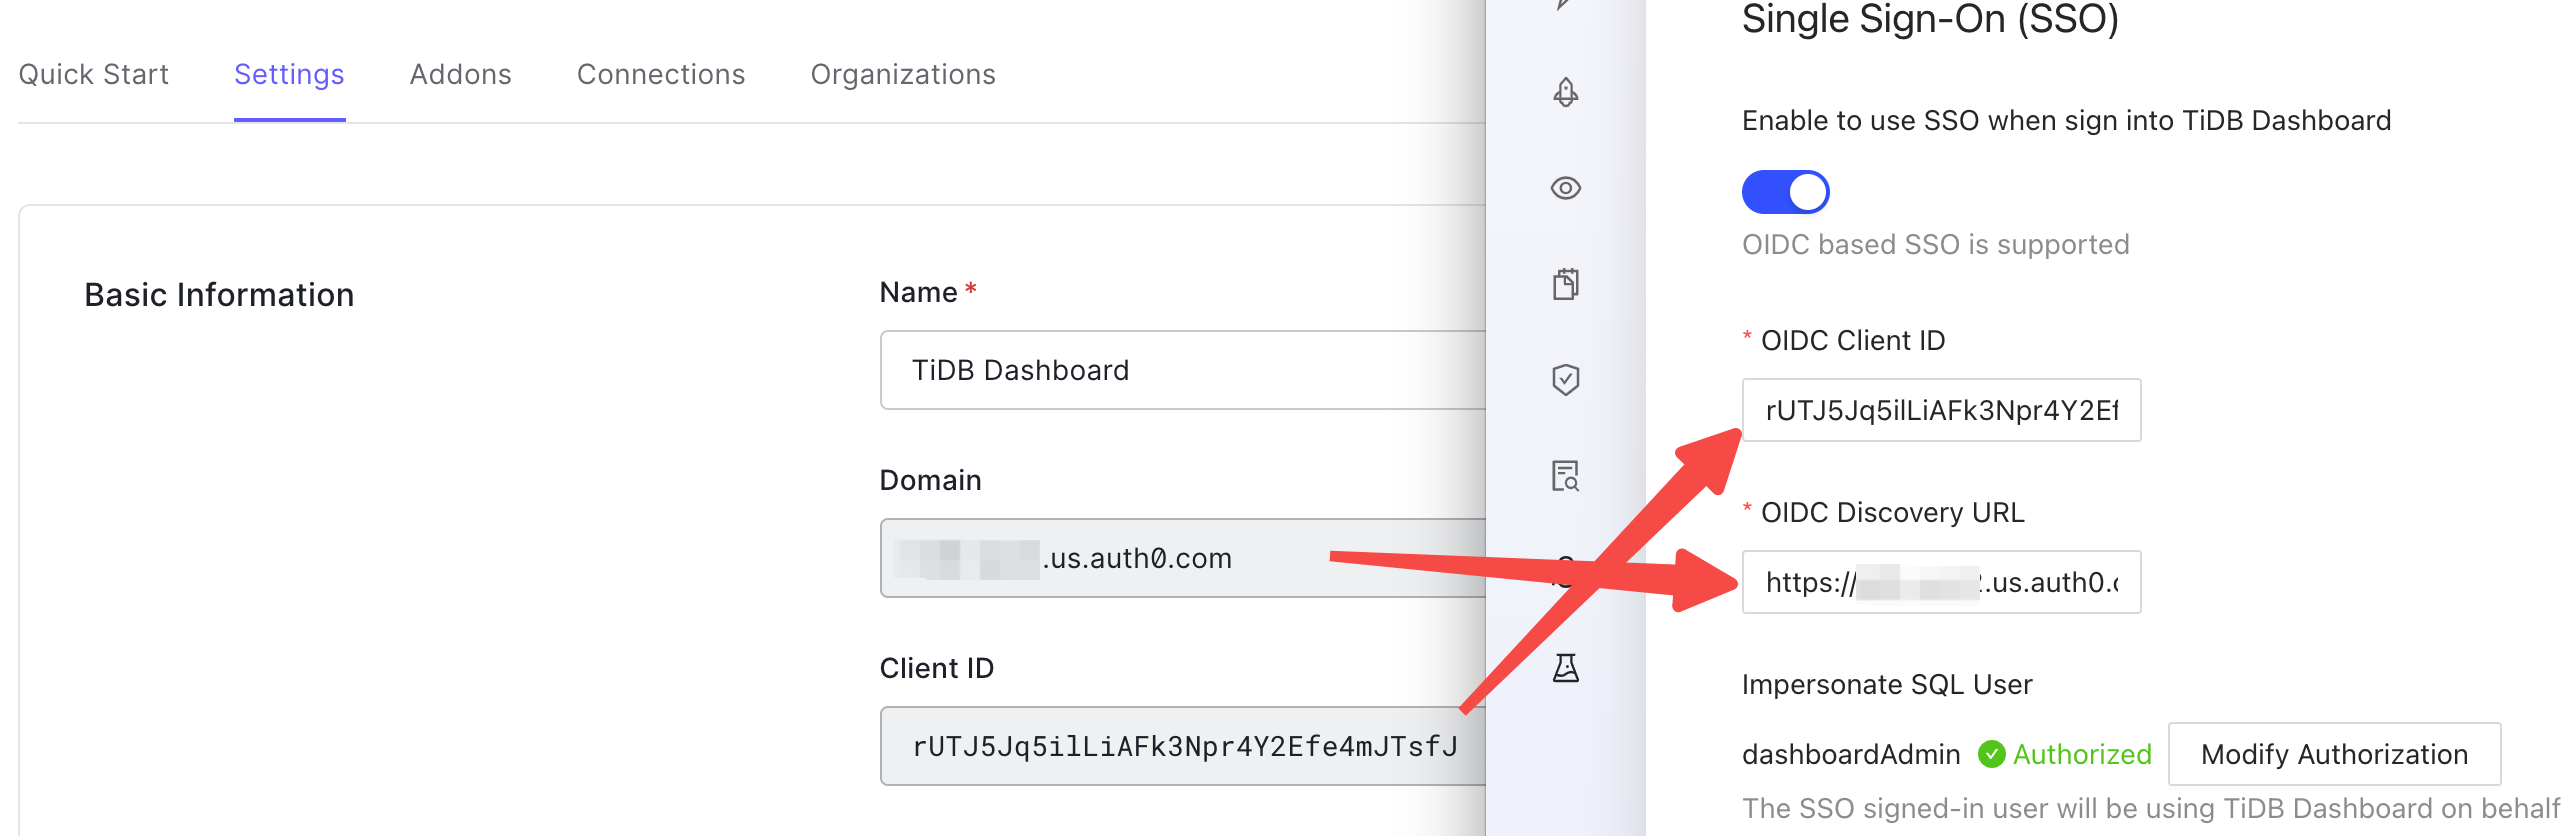
Now TiDB Dashboard has been configured to use Auth0 SSO for sign-in.